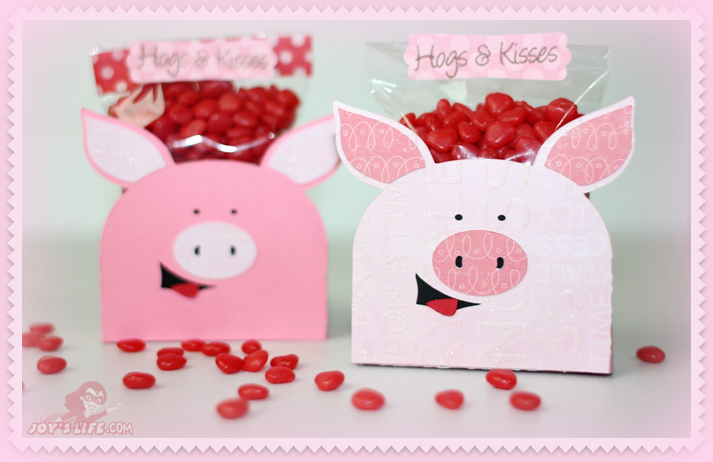
These 3D pigs are so cute! I used the Hogs & Kissses cut it set from Lettering Delights to make them. They were fast and easy to make too. YAY to that! Here’s how I made them:
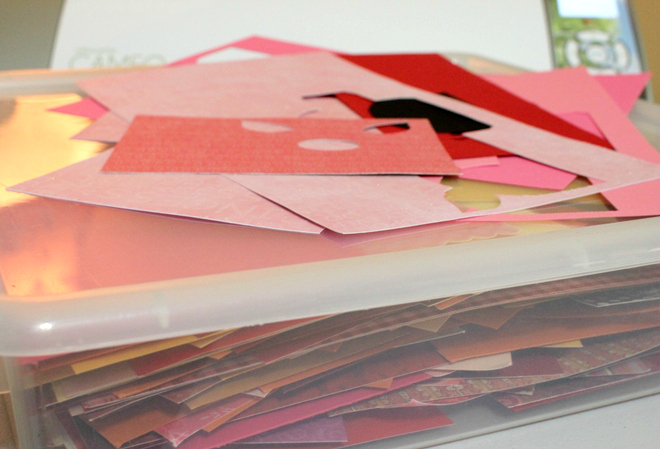
I was able to use my scraps to make these little piggies. This little piggy saves her scraps in 12×12 plastic containers. I sort them by general color. This is my pink, red, orange and yellow container. I cut the pieces into usable squares before I add them to the box. I don’t keep anything smaller than 3″ x 3″ unless it’s really unusual. One way to not have a lot of scraps is to use digital paper. Here’s some that matches these pigs! You can see it here.
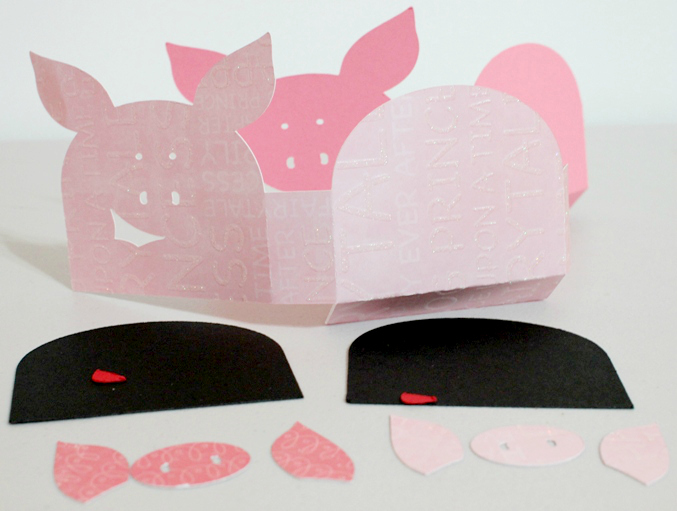
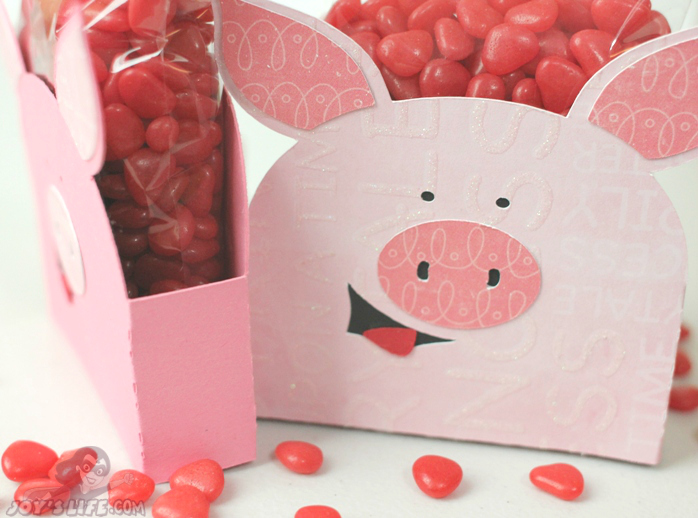
These pieces make 2 piggies. One piggy comes in the file but I doubled mine. I also made it shorter and wider. I’m using my Silhouette Cameo with the Silhouette software today but you can import Lettering Delights files into SCAL or MTC too.
Need help importing .svgs into the Silhouette software?
How to import .svgs and how to make imported .svgs cut in the Silhouette software. Check out my FAQ’s page for more tutorials on the Silhouette software and Cameo. I hope that helps!
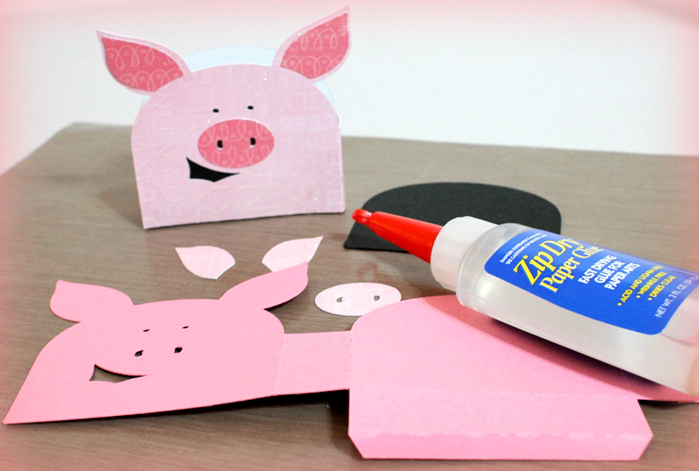
All you do is fold the perforated parts and glue them. Add the black piece to the back of the pig. Lastly, attach the ears, snout and tongue. Easy! I’m using Zip Dry Paper Glue to put everything together.
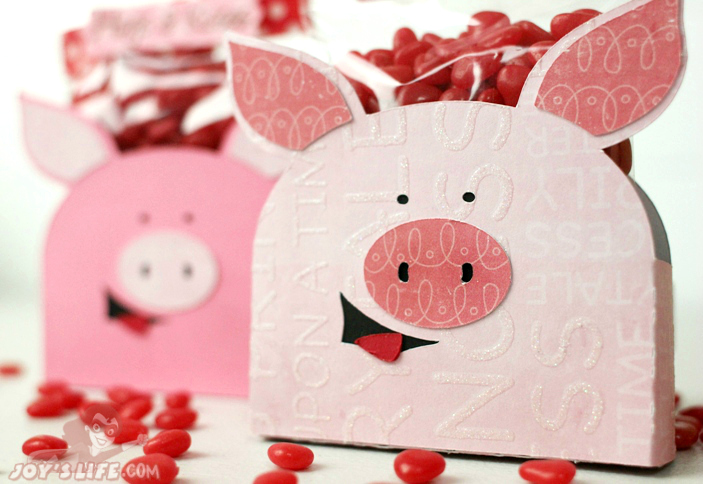
I just LOVE these cutie pies! I added the “Hogs and Kisses” sentiment for these from the Joy’s Life Barnyard Puns stamp set.
That’ll do pig…that will do. 😉
Have a happy day!


Joy, your little piggies are just too cute! I’m still getting used to my Cameo – are the Lettering Delights files SVG’s? When I purchase one, is it easy to turn it into a cut file for the Silhouette? Do you have a video on that – – or COULD you make one??? 🙂 Have a great weekend!
Teresa
TeresaK,
I’m so glad you left that comment! I was half asleep when I wrote this post and I completely left out those links. I’m going to go add them now but in the meantime, here’s a link to how to import .svgs and how to make imported .svgs cut in the Silhouette software. Check out my FAQ’s page for more tutorials on the Silhouette software and Cameo. I hope that helps!
~Joy~
Hi there!
These are Sooo Cute I want to make for my daughter that loves piggs!
How did you emboss? The whole thing?
And is that All the SSDE software does is imports SVG’s??
Thanks so much,
KimberlyRae
Hi KimberlyRae!
This time I used an already embossed paper from my scrap stash but if I were going to emboss the paper, I would probably fit in as much as I could from one end and then turn it around and sent the other end through. The main difference between the regular Sil software and the designer edition is just what you said, the ability to import .svg files. You can also use MTC and SCAL with the Silhouette machines as an alternative to the Silhouette software. They both import .svg as well as other file types. Here’s a comparison of the Silhouette software vs the Designer Edition. I hope that helps!
~Joy~
Thank you much, Joy!
And yes, I will just use my MTC then, if that’s all the difference is 😉
I hear you can’t save svg files that you make either…I don’t like that.
Super cute project I can’t wait to try one…I bought the files right now 🙂
Hugss,
KimberlyRae 🙂
Beautiful little piggies! The scraps you chose look really cute, too–seems like I always grab solid paper to make my die cuts–gotta think outside the box–thanks for the inspiration!
And is your last line from the movie, “Babe?”
The hogs are the cutest Hogs i have seen and look they have treats! That is my kind of hog! Great project!
Deb C
Bugjuiced
Debbie,
The hogs are hogging the candy. LOL! 😉
~Joy~