Need a fast Team Rocket Grunt costume? With just a few basics and one simple DIY step, you’ll be ready for Halloween, cosplay, or last-minute parties.
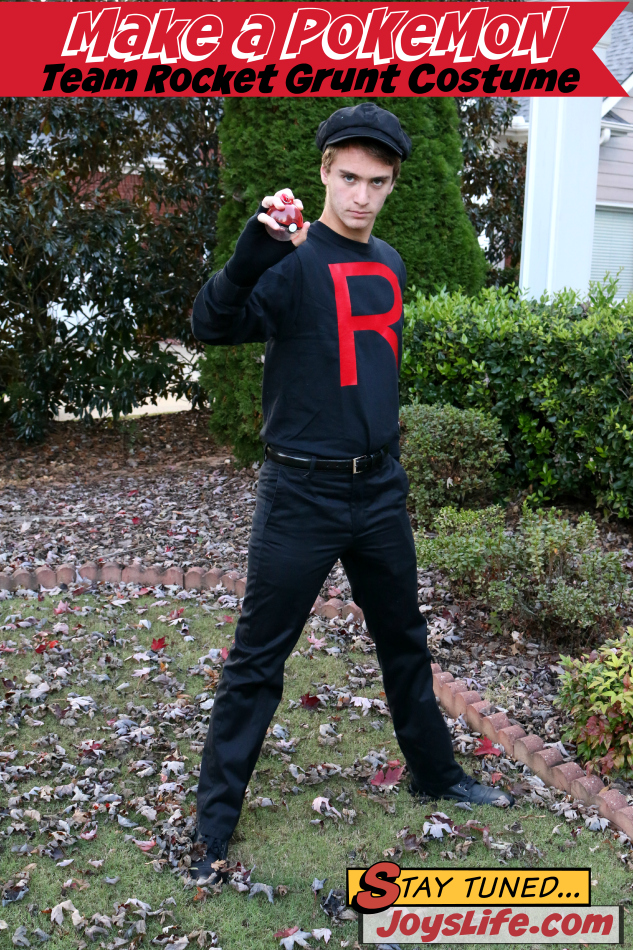
Need a fast and fun Team Rocket Grunt costume? With just a few basics and one simple DIY step, you can pull together this Pokemon cosplay in no time. This easy project uses iron on vinyl, a shirt and a couple of accessories to create the classic Team Rocket look. Perfect for Halloween, dress-up day, or anime conventions.
Why Make a DIY Team Rocket Costume?
I’m so glad that I still get to cobble together Halloween costumes. This year my oldest son was invited to a costume party and wanted to go as a Team Rocket Grunt (from Pokemon). Yes, I totally had to look that up because I thought Team Rocket wore white. There’s a lot I don’t know about Pokemon. LOL!
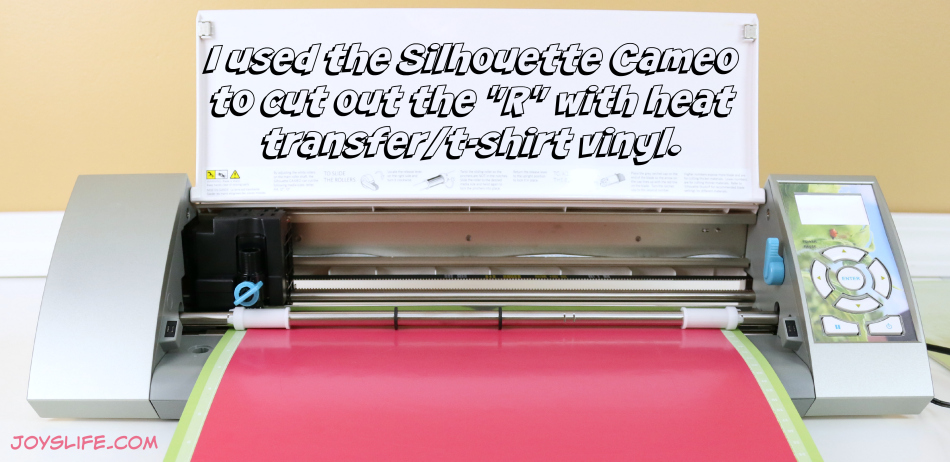
Luckily, my son sent me all of the links I needed to buy his costume on Amazon. Unfortunately, the shirt he wanted (which looked just like this) took a long time to ship and thanks to a lack of advanced planning on the part of someone who isn’t me …just sayin’… we didn’t have the time to wait. So, I used iron on vinyl to add an “R” to the shirt and we were done.
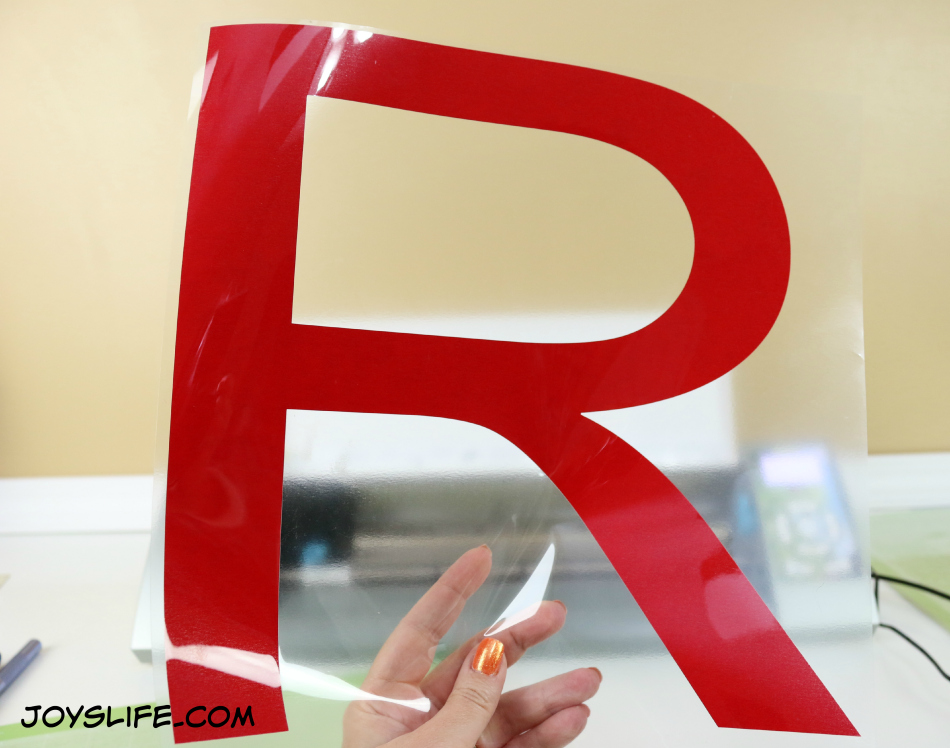
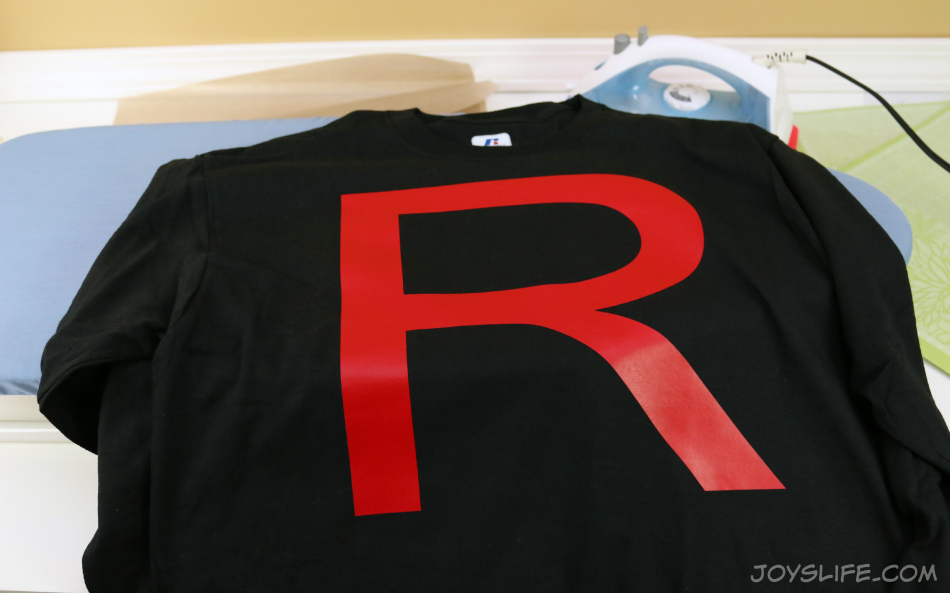
Reverse the letter! Make sure the “R” is backwards in your design software so when you flip it over to iron, it faces the right way. Terribly important!
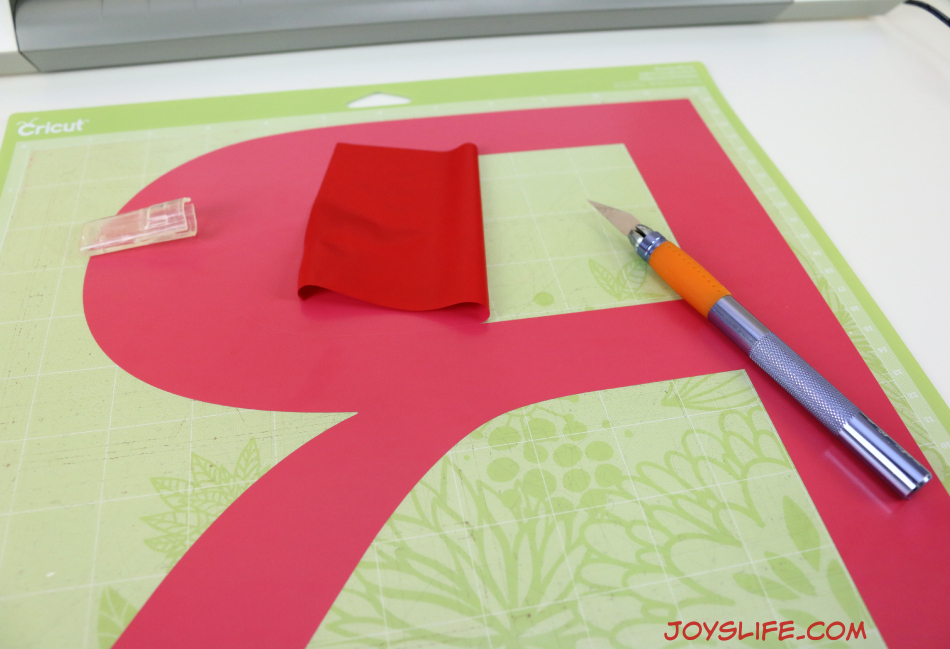
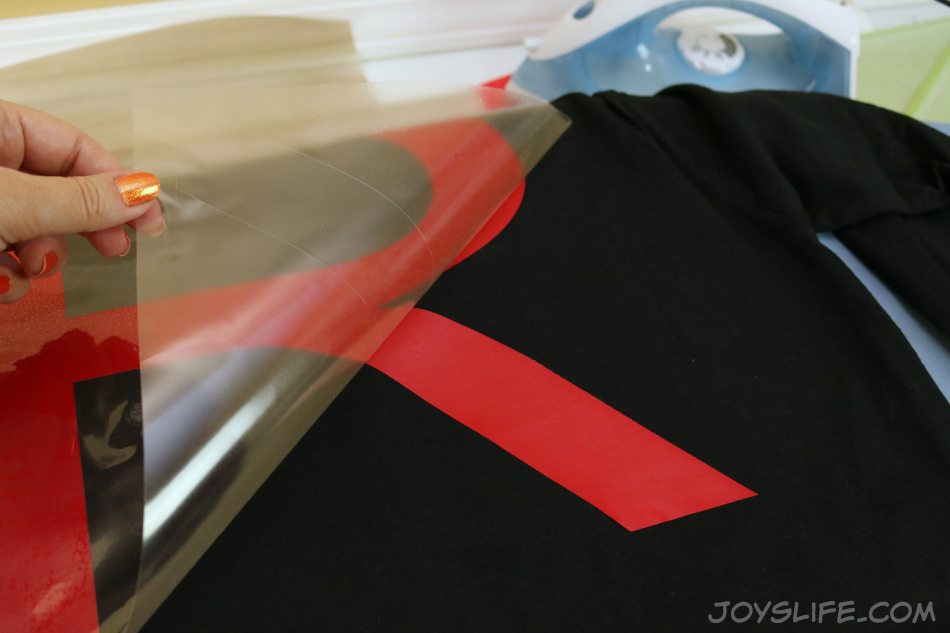
Once you’ve got it cut, place it where you want it on the shirt.
I use a Teflon sheet to cover my vinyl when ironing (you can use a thin towel or t-shirt). My iron is on the cotton setting.
Depending on the brand of heat transfer vinyl you’re using you may have a clear adhesive sheet over the top of the vinyl or you might have one solid color sheet. Read any instructions that come with your vinyl or are on the manufacturers site. Some need the top layer to be peeled off when they are hot, some when they are cold. It depends on the vinyl.
I’m using a tiny ironing board that I bought from WalMart. It’s perfect for small projects and small spaces like my craft desk. I also rest my iron on a silicone iron rest to keep from searing a spot on my desk.
Putting the Team Rocket Costume Together
Yep! The “R” is facing the right direction. Super! Once it’s ironed down, just add the hat, gloves, and pants. That’s it — your shirt is ready for wearing.
Sometimes it’s the quick fixes that end up being the most fun. This little project reminded me that even a simple Team Rocket costume can be memorable. With just a few supplies and a little creativity, you can turn a last-minute scramble into something that feels planned and put together. Plus, it gave me an excuse to pull out my Silhouette Cameo again, which is always a win in my book.
Want to dive deeper into the world of Team Rocket? Check out Team Rocket on Bulbapedia for their full backstory and more.
Happy Halloween… or costume party… or dress-up day… or comic convention… to you!
What size did you do the R? Also my husband is a welder and wants me to make decals for his welding helmet would I just use regular vinyl or some kind of decal paper? I just got my Cameo so Im new to all of this but so far I LOVE your page the best its been really helpful. Thank you for any information, my big question is sizing font for making wooden block sets ect.
Hi Gina,
I think I made the “R” at about 11.5″ high but I adjusted the width to make sure the “R” looked just right. My suggestion to you for determining the perfect size for your projects is to first measure but second cut out your design on paper and then see how that looks on the item that you’ll be decorating with vinyl. Typically what people call decal paper is vinyl. You can use any kind of material that works for you, including Contact paper. However, I find that vinyl works best for my projects. Remember, heat transfer or t-shirt vinyl is for adding vinyl to material/clothing/pillows/etc and regular vinyl is for walls, interior windows, many craft projects. Outdoor vinyl is for the outside of windows, used for car detailing, mailboxes, boats, things that get wet. Don’t put outdoor vinyl on your walls inside. It will tear the wallboard upon removal. Ack! I like to buy my vinyl from Expressions Vinyl.
When adjusting lettering in the Silhouette software you can click on the word or letter and drag the box corners to the width and height you need. If you need a very specific size, go to the “Scale Window” at the top right of action bar in the software. Select your letter or word. Uncheck the “Lock Aspect” box on the right side of the screen. Now you can enter the exact size for your word or letter. Make sure your letter/word is selected in order for the sizing to take effect.
I hope that helps! 🙂
Hi Joy,
Team Rocket does wear white, on TV…don’t ask me how I know. I think it’s great that your oldest is still into Halloween. I think you did a fantastic job.