I got so many requests asking how to make the beautiful paper floral bouquet that I received from Provo Craft’s Design Team that I was persuaded to take one of the beautiful flowers apart so I can share its construction with you.

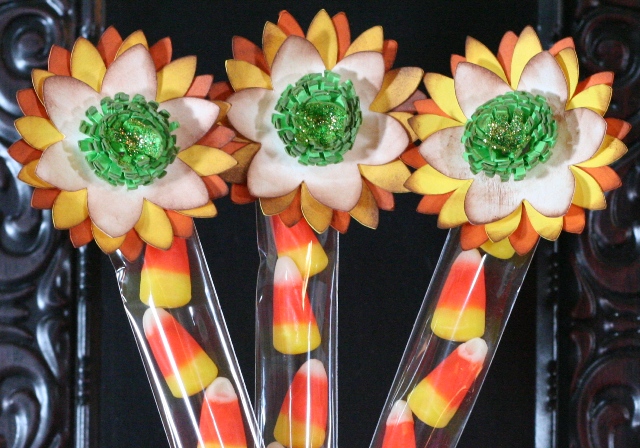
Here’s a single flower up close. It is made out of paper. Glue dots and double sided tape are used as the adhesives. I was able to find the wire called “floral cloth wire” at Michael’s in the floral department. In my store they cost $1.99 for 12 stems. The wire used in my bouquet is 18 gauge.

Here is the back of the pretty center of the flower. Whatever embellishment you choose for the center it goes through the 2 top pieces. A thick glue dot attaches it to the middle of the flower.

I removed this petal from the others and unfolded it. So, STEP ONE in creating the flower is to start with the flat petal. Each of the three remaining pieces that you see attached to the floral gray piece of paper has begun as a flat piece like the one to the left. There is a big piece of double sided tape under the four petals. You can see it at the center of the flower where the stem is located.

STEP TWO fold the piece in half. Carefully placed glue dots will help secure the folded piece.

STEP THREE fold the petal again.

Each of the fluffy petals is created like the one made in the previous steps. Then you glue them down as seen.

I even measured all the pieces for you! You can create flowers like this from a variety of Cricut cartridges. Certainly, the Mother’s Day Bouquet Cricut cartridge would be an easy choice for floral variety. If you don’t have that one just look through your current cartridges. I’m sure you can find a floral shape that will work for this project. You can also use Sizzix dies if you have those.

Here’s how the bouquet started. 🙂 You can see more photos of it on THIS POST.
I hope you have fun making your floral bouquet!


These are soo pretty! Thank you for taking the time to measure and share this tutorial! I’d love to make a bouquet for my Mom.
Thanks for the step by step photos.
Thanks for this great tutorial. I can’t wait to try and make a bouquet for my mom. Have a wonderful Mother’s Day!
Oh how you’ve read my mind! I spent all day googling tutorials and watching youtube vids on making a paper bouquet and when I was about ready to give up, you post the perfect tutorial (with measurements!). Thank Super Joy! Have an awesome Mother’s Day!
Thanks for taking the time to show us how it was made. Happy Mothers day………………………
These are lovely and thanks for taking the time to show us how they were put together. As always you are a mega star *****
Thank you so much Joy!!! I am going to try to make these for my mom! They are beautiful!
Joy you really are super…Thank you!!! Happy Mother’s Day!!!
Thanks!!!!
These are wonderful…thanks for the detailed instructions! Happy Mother’s Day!
Thanks for the tutorial of the flowers! I can’t wait to try to make some! Happy Mother’s Day!
Thank you so much for this. I made a Paper Flower Bouquet last week (x2 bouquets) off some You Tube videos that I watched and they took me F-O-R-E-V-E-R! I made one of these last night for a teacher appreciation gift and they were so easy. You saved me Joy! I was able to bust out the 12 flowers no problem and I even have to make another one later this week. Now I am not dreading it. Now…off to take advantage of your stamp sale! 🙂