Welcome to the Holiday Cards Blog Hop! I hope you enjoy looking at the different creations from everyone. Be sure not to miss the blog hop line up/list at the end of this post. You won’t want to miss the GIVE AWAY either!
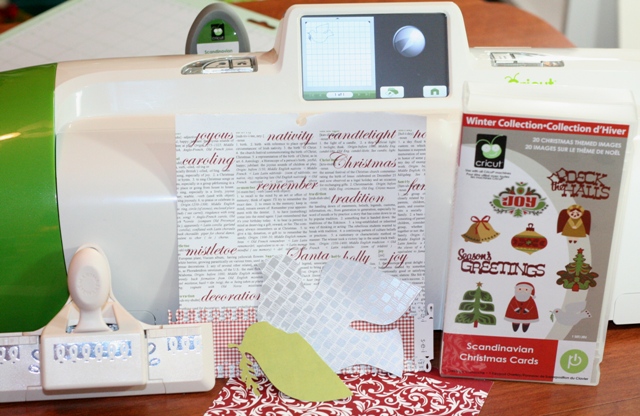
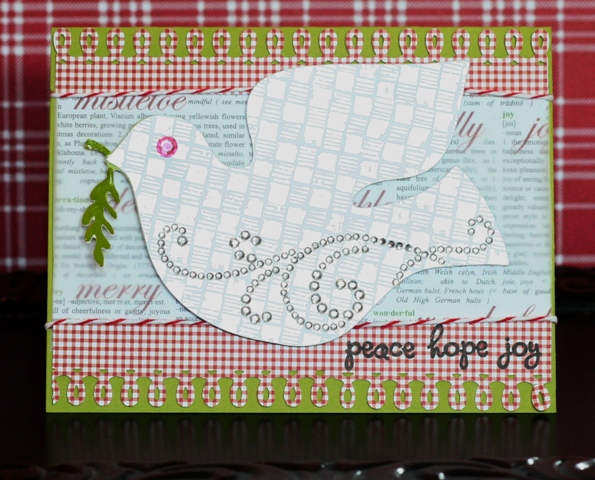
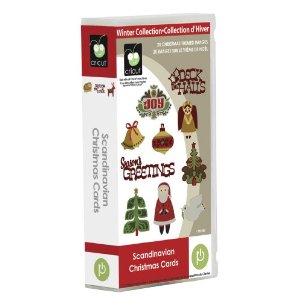
Today I decided to use my Cricut Expression 2 along with the Scandinavian Christmas Cricut cartridge.That is a really pretty cartridge. I’m glad I finally used it! I cut the dove at 3.5″. Wondering what happened to the green cutout? Well, I only needed the greenery part to show so I used a piece of leftover paper that wasn’t big enough for the whole dove.
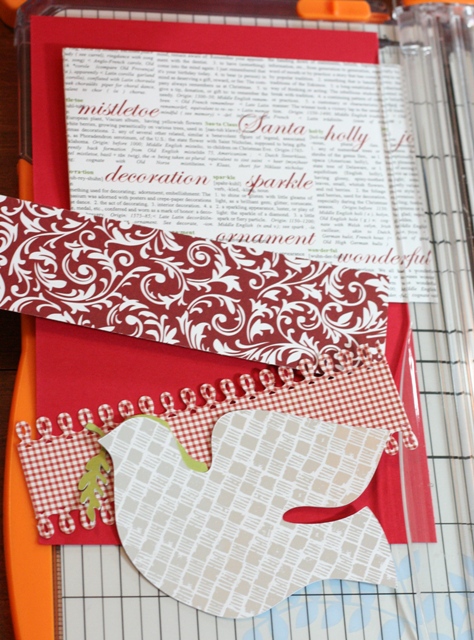
I tried to keep this card fairly simple. I took a 8 1/2″ x 11″ piece of paper and cut it in half to create two 4 1/4 x 5 1/2 cards. I’m only using one card today though. I used a Martha Stewart Loop punch on both ends of the red and white plaid paper and then I cut that piece right down the middle.

After I put everything together the way I wanted it I realized that the wording behind the dove really competed with the overall look of the card. I didn’t want to radically change the card but I knew something needed to be done. What I think turned out to be a nice fix was to cover the worded paper with vellum, that way you can still see the wording but it’s more subdued. About gluing vellum…so many companies claim to sell adhesives that don’t show through vellum but I don’t think any of them really do a good job. To be fair, I have not tried them all! 😉 Maybe there is one out there that could work. What most people do is use whatever glue they like and then cover the glued area with some kind of design element. Here, I covered the glued vellum with the looped punched paper.

I brought out the bling, string and anything…yes, I will stop rhyming now. Don’t be afraid to take your pretty bling and cut it! Isn’t that shocking? Well, that’s what I did. I cut it and flipped and moved swirls to the areas where I needed them. Yes, those swirls look beautiful in the package just as they are but are you going to hang the package for display or make what’s in the package fit your project needs? I know, I know you’re going to hang the package. You crack me up.
I used a Viva Decor Pearl Pen in Kiwito add some dimension and shine to the greenery that the dove is carrying. I tied bakers twine around the card.
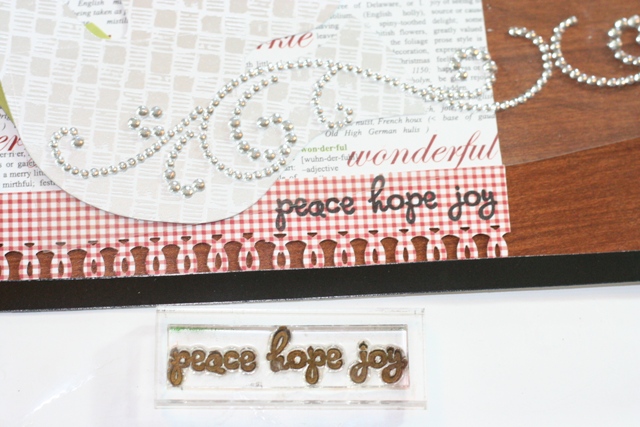
I leave the bling on the clear backing and manuver it around my image until I determine how I’m going to lay it out.
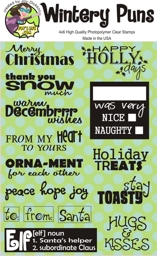
The stamp I used is from the Joy’s Life Wintery Puns stamp set.
Hop Over and See What These Ladies Have Created
Joy: https://joyslife.com – You Are Here
Amanda: http://www.whiteruffles.blogspot.com
Anne: http://anniebeescraftroom.blogspot.com
Annette: http://www.aspoonfullofsugarcrafts.blogspot.com
Christine: http://www.stampynwifesspace.blogspot.com
Jennie: http://earthyscrap.blogspot.com
Maria: http://joyfulstamper.blogspot.com
Martha: http://pattisscrapingtime.blogspot.com
Melisa: http://melisascraftycreations.blogspot.com
Stacey: http://staceyscreativecorner.blogspot.com
Susie: http://www.thedieshaveit.com
Tracy: http://www.thepickledowl.blogspot.com
GIVE AWAY TIME!!
Leave a comment to be eligible for a chance to win the Scandinavian Cricut Cartridge or a set of Joy’s Life Wintery Puns stamps!
I’ll use Random.org to choose a winner on Saturday, December 10, 2012. Good Luck!!
Congratulations to the Winners:
The Winner of the Scandinavian Cricut cartridge is:
Susan says:
DECEMBER 3, 2011 AT 10:36 PM
I like the rhymes Joy! Your post crackes ME up! I do like your card, very pretty! I have not used Pearl Pens but after seeing how it really popped out the green I’m going to give them a try. I’m off to hop…thanks for sharing your project and hosting the hop! Susan cricutandgrasshopper.blogspot.com
The Winner of the Joy’s Life Wintery Puns stamps is:
reneehere13 says:
DECEMBER 4, 2011 AT 5:09 PM
Love your Joy’s Life site! I’m basically new to all of this. Today’s the first time I’ve explored any site, blogs, and links in this much detail. I am so glad to feel your passion for creativity and am inspired!! Thanks so much for sharing. I’ve made a copy of your great cartridge checklist and am thrilled to begin the organizing of my cricut cartridges and card making supplies. Thanks for the inspiration!
I hope you enjoyed this post and have a nice time hopping to the other blogs and checking out their crafty creations!


Gorgeous card Joy… Absolutely Love it.. Starting to hop now.. Tracy xx
Oh Joy, love this card, love the boarder it really added to the card. Thanks for the chance.
angel hugs
Debby
Your card is so beautiful! Love the bling!! Scandinavian Christmas is on my wish list so thank you for the chance to win!
Tracy
jtg0398 at sbcglobal dot net
I love this card! The papers are adorable and love the Dove and bling! TFS CallyAnn
Beautiful card and love the bling. I’m a bling kinda girl. Thanks for taking the time to post such a detailed description of your beautiful yet simple card.
Karen C
emptynestboutique at yahoo dot com
WOW!!!!! That is a beautiful card.
Marilyn
mimicaro9650 at yahoo dot com
Wow, you did a wonderful job on this, so creative!
I’m a new member and i am so glad to have found you! I saw the announcement of your bloghop on ScrapStreet! Your card is just amazing… i love the bling on the dove! Thank you for sharing and for the chance to win!!! I’m off to check out the rest of the blogs 🙂
I love it!!!! So creative and who doesn’t love bling ?
Really lovely! Your definition of “simple” is far superior to mine. 😉 Thanks for the chance to win.
What a super Sweet Hop!! I really enjoyed seeing all the wonderful creations. This has really helped me get out of the runt I am in. Thank You so much ladies for all the inspiration.
This card is absolutely gorgeous! thanks for a chance to win!
And, have a GREAT day!
kmassmanATgmailDOTcom
Gorgeous Joy! love the simplicity of this card…and the blingy bling of course!!
thanks for the vellum tip too!
Blessings
Joy, this is such a pretty card! I love that dove and the bling is an awesome touch! Great card my friend! *Hugs*
Great card!I love the color combo!
Great card…… Love the printed paper……great idea to mute the writing down with velum……
Crystal R.
Lovely Christmas card! Love how you used the vellum to soften the printing on the background. Also like how you cut the bling to make it fit your project. Thanks for the chance to win.
tcsobotka at charter dot net
Gorgeous card Joy!! Love how you blinged the bird..You done beautiful detail to your card
Stunning!!
Loved being on your Blog Hop
Amanda
I love the card!! I enjoy your blog!
Kathleen
what a beautiful card. I cant wiate to see the other talented ladies. thans for the chance to win.
Angie
This is so pretty! Great card!
Wow your card is simply gorgeous!! 🙂 What great paper and cart!
Beautiful card, the dove is gorgeous, love the bling. Thank you for sharing.
janiceaeschliman.blogspot.com
Beautiful card! I love the paper and the bling. Don’t have that cart, may be my next cart purchase.
Ashley
[email protected]
http://theglamoroussideofscrapping.blogspot.com
What a great card….I am loving my Christmas Carts and this one would be icing on the cake!!! Thanks for the chance to win..
Joy, such a pretty card. I adore that dove and all the blingyblingy!
Jamie
http://oohlalapaperie.blogspot.com
Aren’t we lucky to have talented people willing to share their creations with us!
I really love the simplicity of the dove 🙂 Such a pretty card!
Pretty! I’m super excited to go through the blog hop. And December 10 is my birthday! Scandinavian Christmas would be a great birthday present!!
katie (dot) nobles (at) gmail (dot) com
So adorable! I am new to this craft and totally addicted but still so much that I feel I “need” so what a thrill it would be to win something! Thank you so much for sharing your ideas and such wonderful instructions! ~Leslie
This card is just so BEAUTIFUL Joy! I love the added bling! Thanks for a chance to win.
[email protected]
Great card! Love all the various elements and layers you used to create this card.
I am new to your blog and I am so excited to have stumbled upon it!! I love this card. I love the different paper choices and the bling. So creative!! Thanks for being so creative!!
my-o-scrappin.blogspot.com
[email protected]
Very pretty card, you did a wonderful job on it. Thanks for sharing it with us all. Thanks for the chance to win that cartridge too, that is one I would love to have.
What a pretty card! I love the bling!
nanettemt at yahoo dot com
I’ve visited all the blogs on the hop. Everyone did an amazing job!
nanettemt at yahoo dot com
Beautiful card, love the bling flourish! Wonderful job!
cute!! It’s always a help to see what you come up with.
Your card is absolutely Gerogeous!!!! I love everything thing you did with it and really appreciate the tutorial! I may not be doing the blog hop, just stopped in to see what you were up to!!! You always have amazing projects.
I would love if you ‘d come visit me!! I posted a biggy today
http://scrapbookingforbeginners-naomi.blogspot.com/
Joy,I love your card!I love how you used your vellum on the card.Great bling! Joy
Gorgeous card Joy!! I love the pretty papers, beautiful dove and awesome border punch. Great sentiment and just a wonderful Christmas card:)
Sherrie K
http://sherriescraps.blogspot.com
This is a really lovely card, Joy! I love the dove and the beautiful papers you used. I’m off to visit all my teamies!
Hugs,
Anne
Joy, this is simply beautiful. A great card for making multiples of. Going to hop on to all the blogs! Thank you!
Teresa K
bling, string and anything… You should be a rapper Joy! You could rap about scrapbooking, How awesome would that be. What a pretty card, I love the bird.
Love the card!! You are so creative. I’ve invested in a cricut now after seeing what you do with yours. Hope i can do as good as you with it. keep the projects coming.
Joy, I really like the card, but I have to tell you. I miss never hearing your voice or seeing your videos. Maybe, I’m just not looking in the right place. I enjoy it more when I can hear you or watch you do something. Just miss you that’s all=)
Super cute card!!! Pretty color scheme too.
Shar
Love your card. It is really special. I like how you used your pearl pen to brighten and highlight the greenery. I also like how you are not afraid to cut up your swirls of pearls.
I love reading your blog. You are so creative!
Joy that card is gorgeous!! I love the papers you used!! Thanks for putting the hop together, the ladies did AMAZING and I had so much fun with the stamps!! TFS!! Take Care!!
Jennie @ http://earthyscrap.blogspot.com/