Looking for a furniture makeover idea? This china cabinet makeover shows how a dark outdated piece can become a bright focal point using KILZ paint and primer in one and a simple step by step process.
This post was sponsored by KILZ Paint as part of an Ambassador program for Influence Central and all opinions expressed in my post are my own.
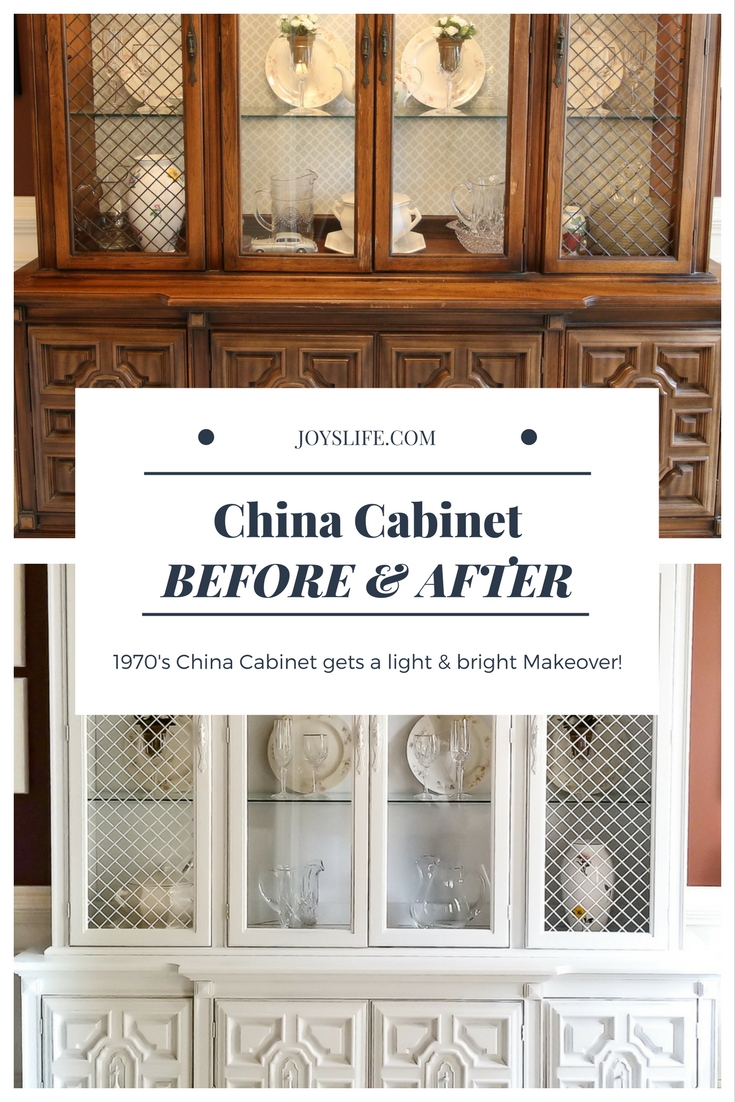
China Cabinet Makeover Success
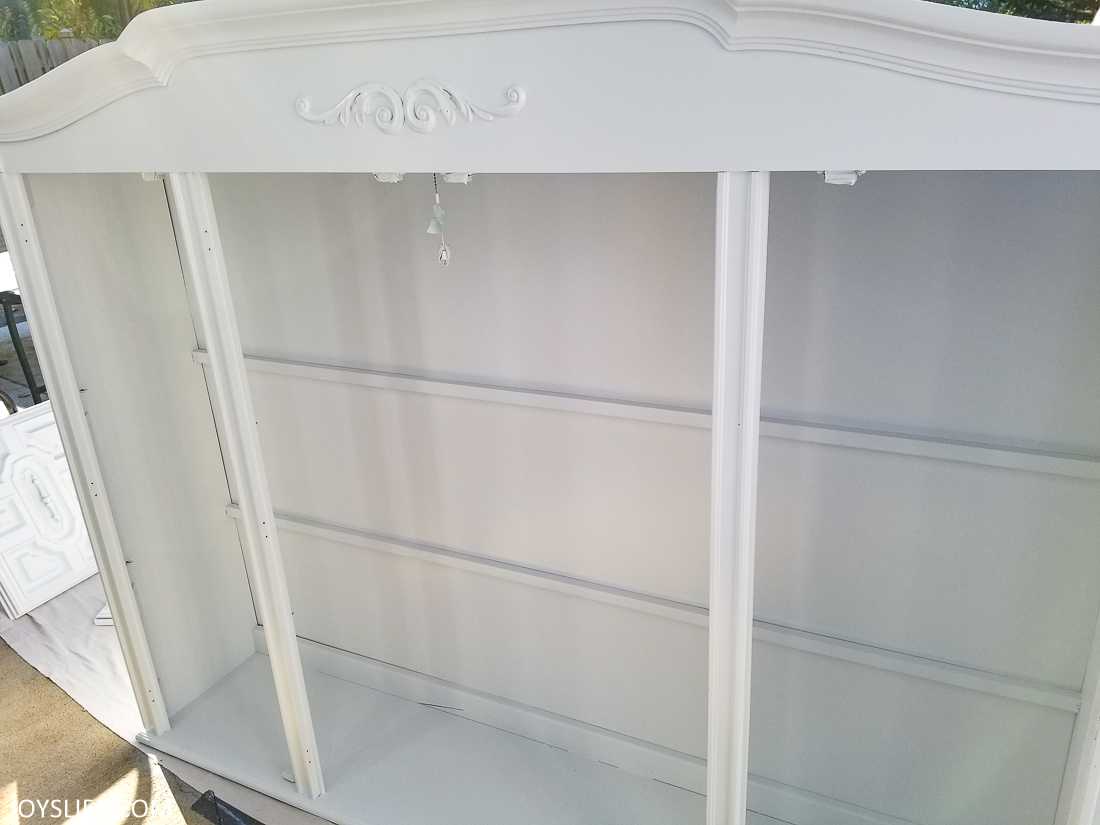
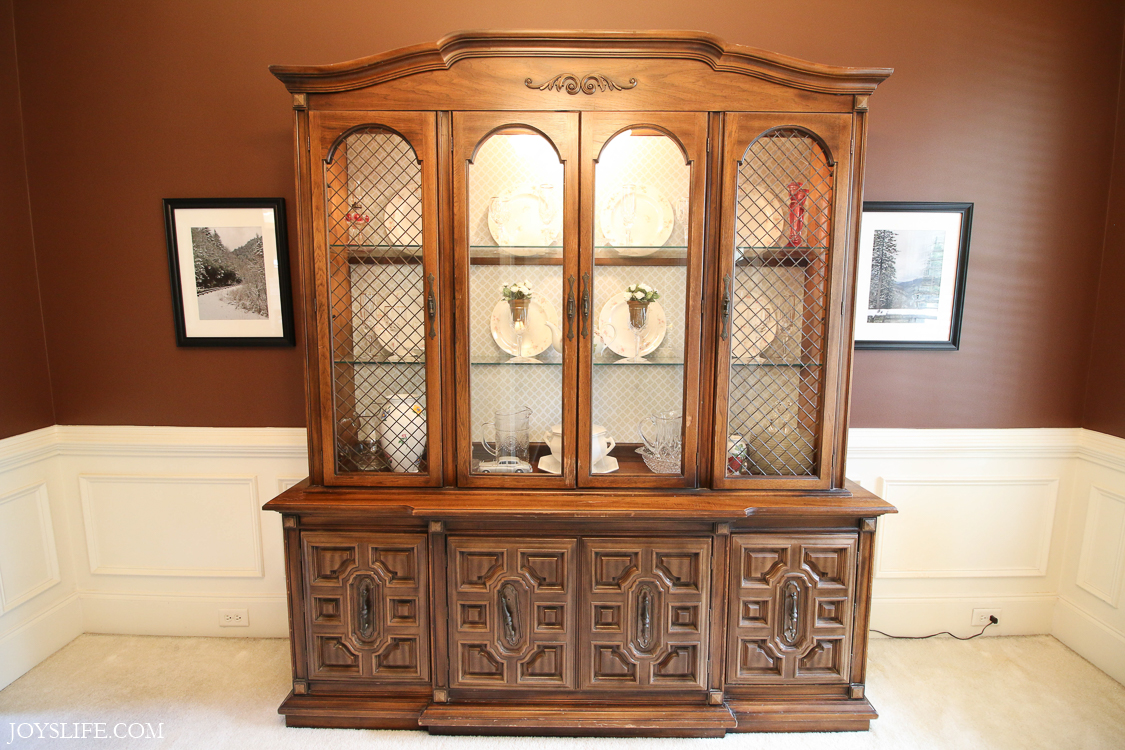
If you saw my last post, then you know that I’ve been working on turning this dark 1970’s china cabinet into a brighter, fresher piece for our dining room. I am utterly stunned by the transformation! I mean, besides adding a screw, removing broken glass and peeling off the shelf liner backing that I’d added, KILZ paint and primer in one is what really transformed this piece. Isn’t it incredible what paint can do?
Even better?
The actual painting took less time than cleaning it out.
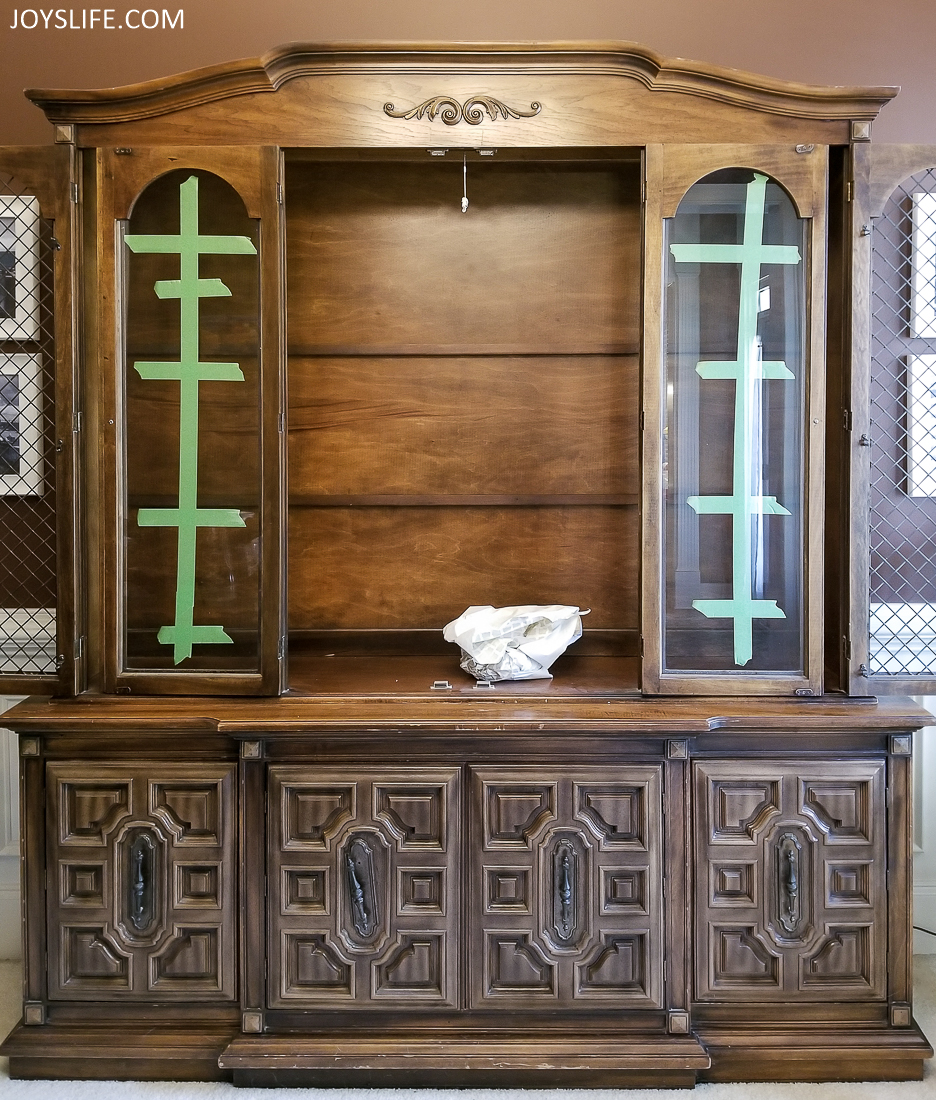
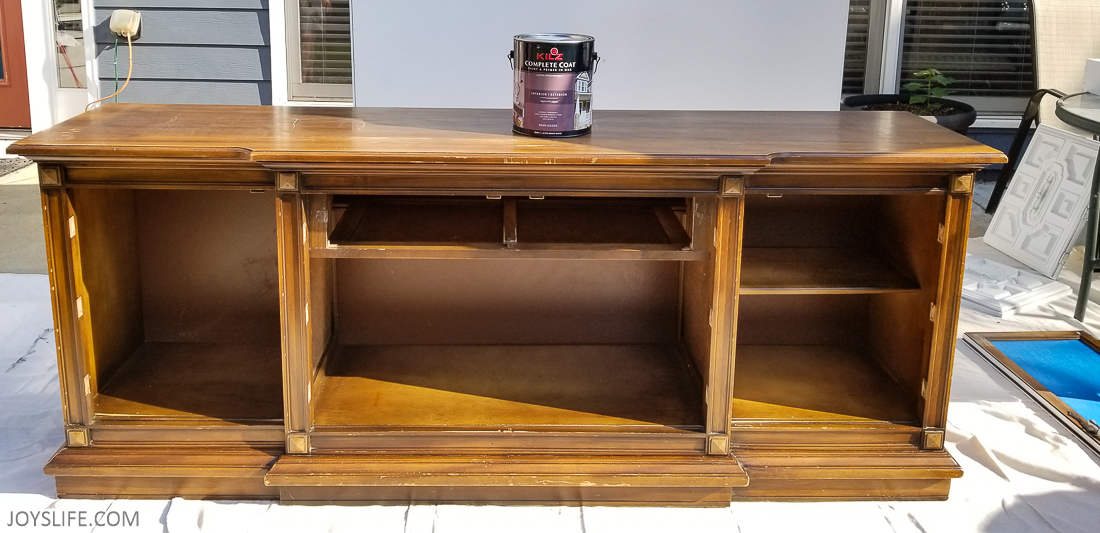
Can we just lose this photo? This china cabinet is a sad looking nightmare, but there was no reason for it to look like this. It only took a few hours to paint the whole thing. It took longer to clean it out and clean it up than it did to paint it.
Before You Start Don’t Overthink It
Don’t psych yourself out when it comes to big projects. Big projects feel overwhelming when you look at them as one giant task.
Break it down into stages like this:
- unload
- clean
- fix
- move outside
- paint
- move inside
- decorate
It’s a lot less stressful than thinking about it all in one big chunk.
What Made the Biggest Difference
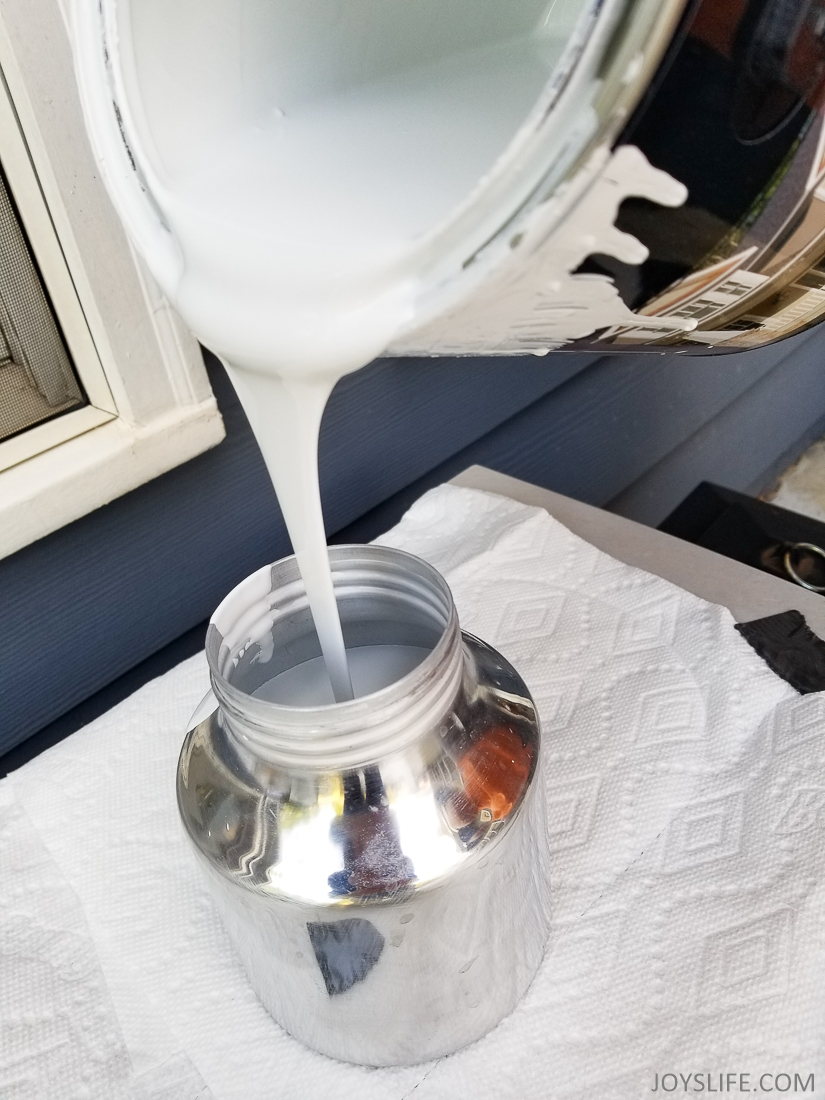
The biggest transformation came from using KILZ paint and primer in one.
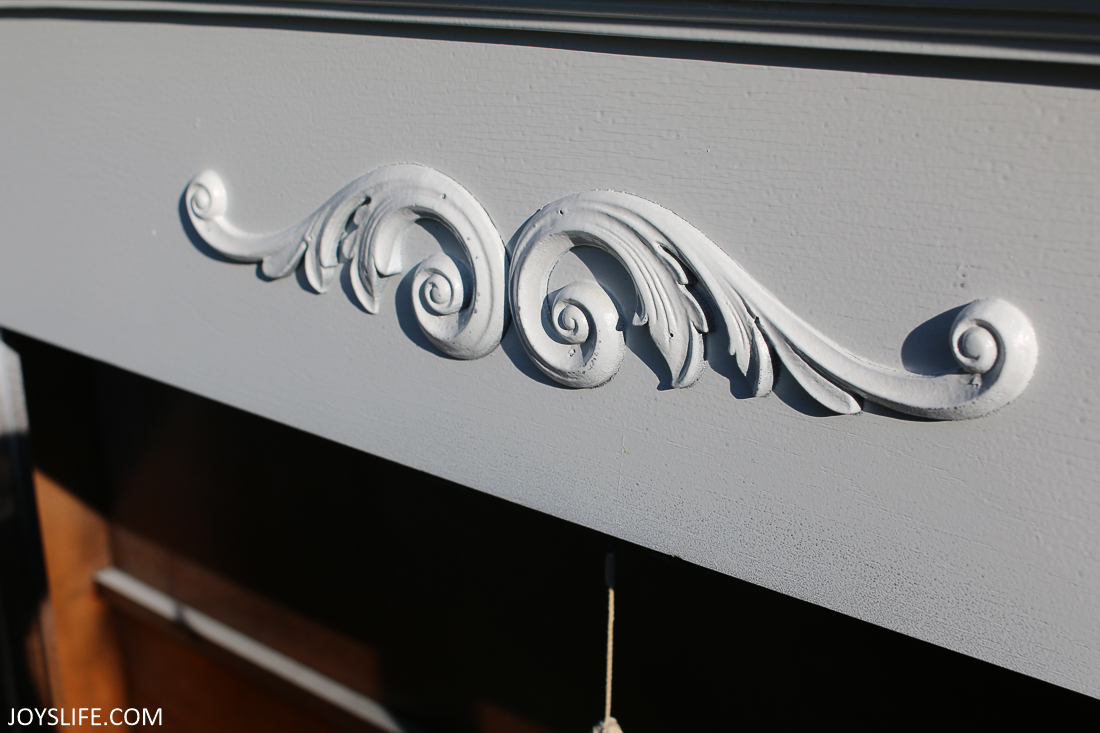
We used Regency White RJ130, and it completely changed the look and feel of the cabinet.
Why it worked so well:
- Excellent coverage
- Works on wood and hardware
- Smooth, even finish
- One paint for everything
We thought about painting the handles a different color, but I like that it’s all the same. You know what’s super cool? We used the same paint to do everything, not one paint for handles and knobs and another for wood, one paint.
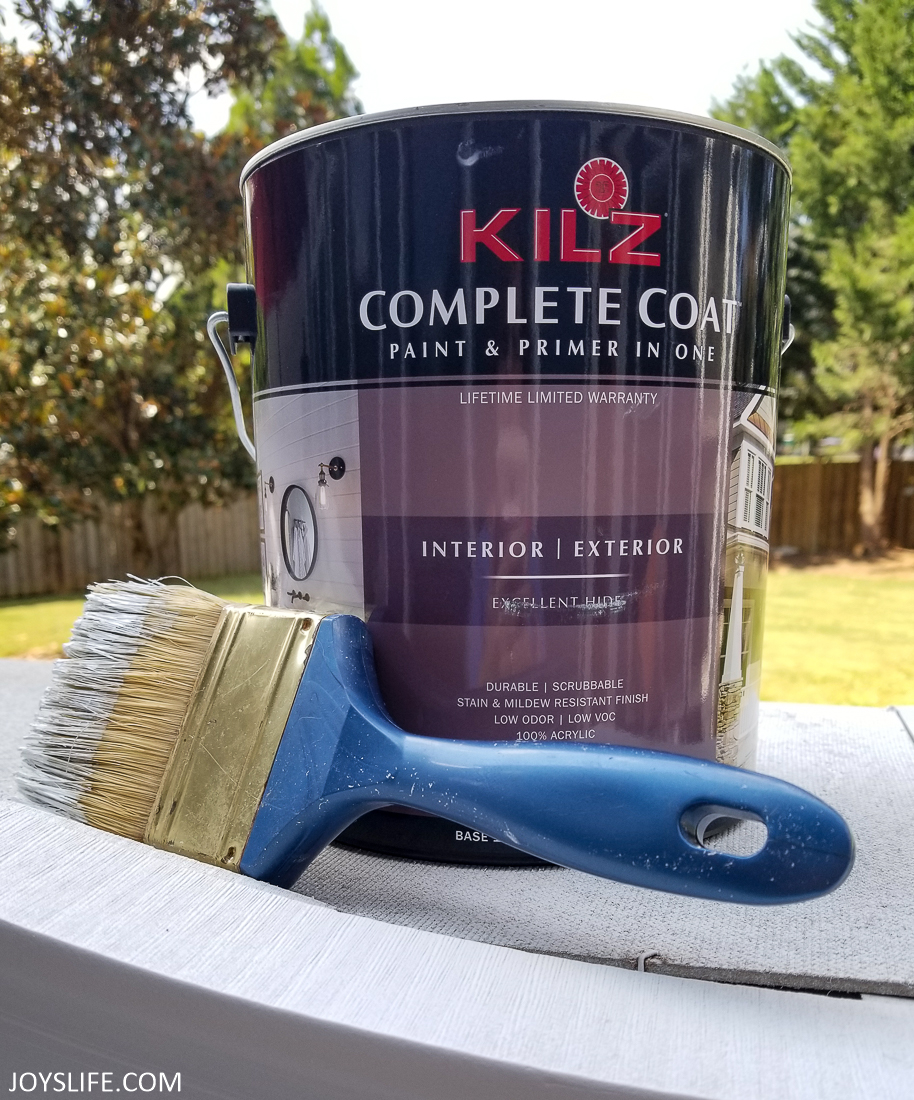
You should explore colors for KILZ paint and primer in one, we used Regency White #RJ130, and we love it so much that we’re going to paint all the trim in our house that color. Really. It’s fabulous, both the color and the paint.
Painting Method That Worked Best
We started with brushes and rollers but switched to a paint sprayer. The paint works well with any of the options, but spraying was easier with this piece of furniture.
Spraying made it:
- faster
- smoother
- easier to reach detailed areas
That said, this paint works well no matter how you apply it. We’re thrilled with the outcome!
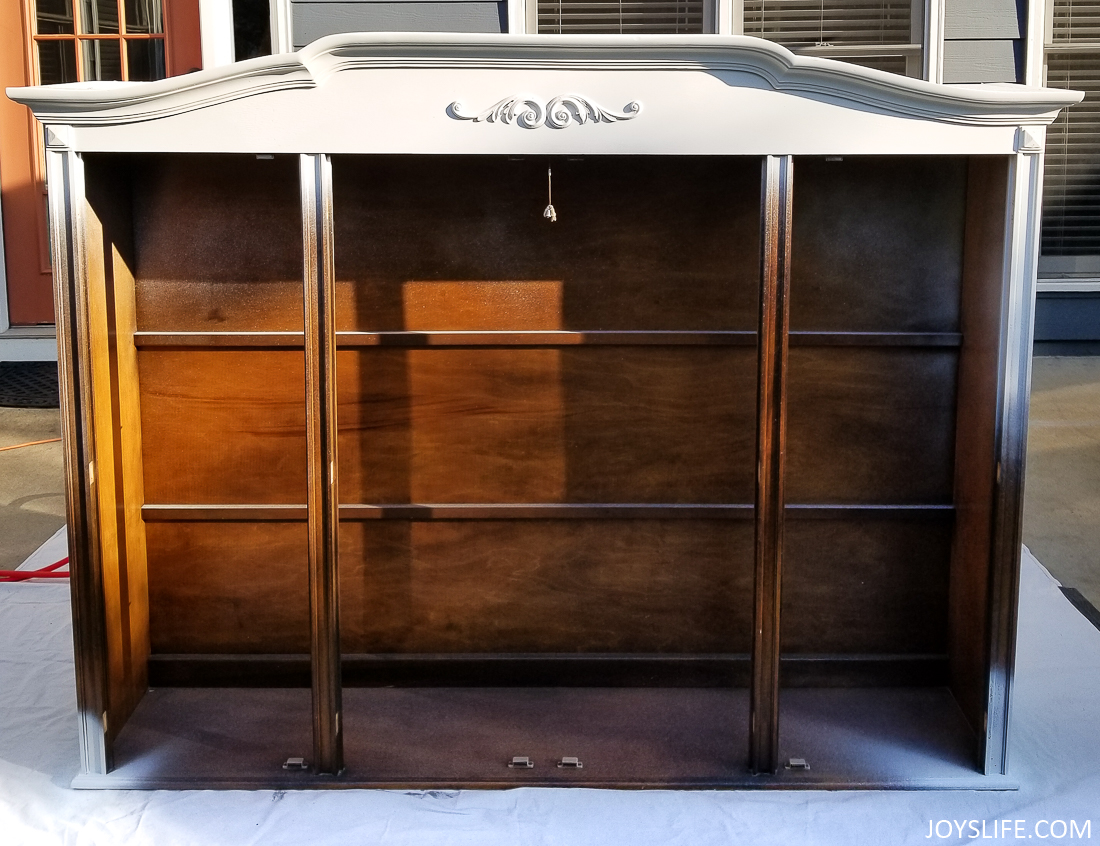
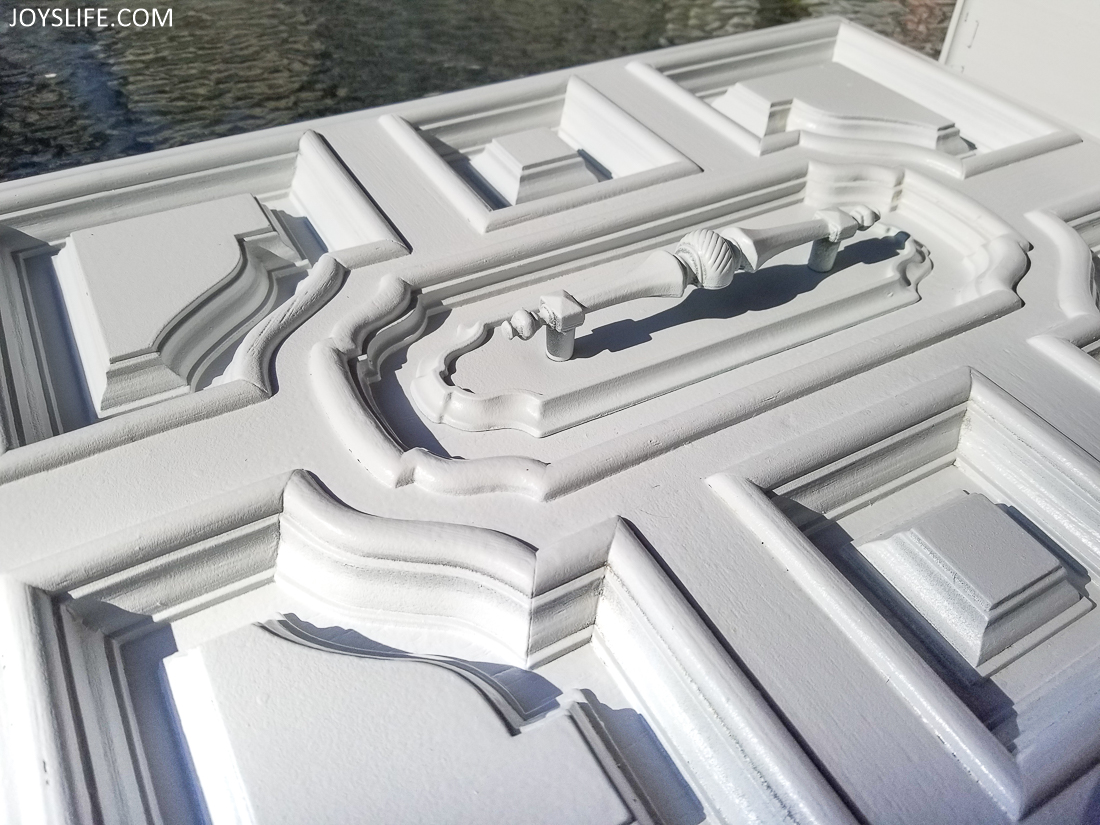
Here’s the top in the beginning of its awesome transformation. At this point, we were already amazed. Painting it so immediately rewarding. I love that a simple change in color is so renewing, not only to the piece your painting, but in the way you actually feel about the piece!
Step by Step China Cabinet Makeover
- Remove doors and drawers
- Clean thoroughly
- Make small repairs
- Prep your workspace
- Paint using sprayer or brush
- Let dry fully
- Reassemble and style
Simple process. Big payoff.
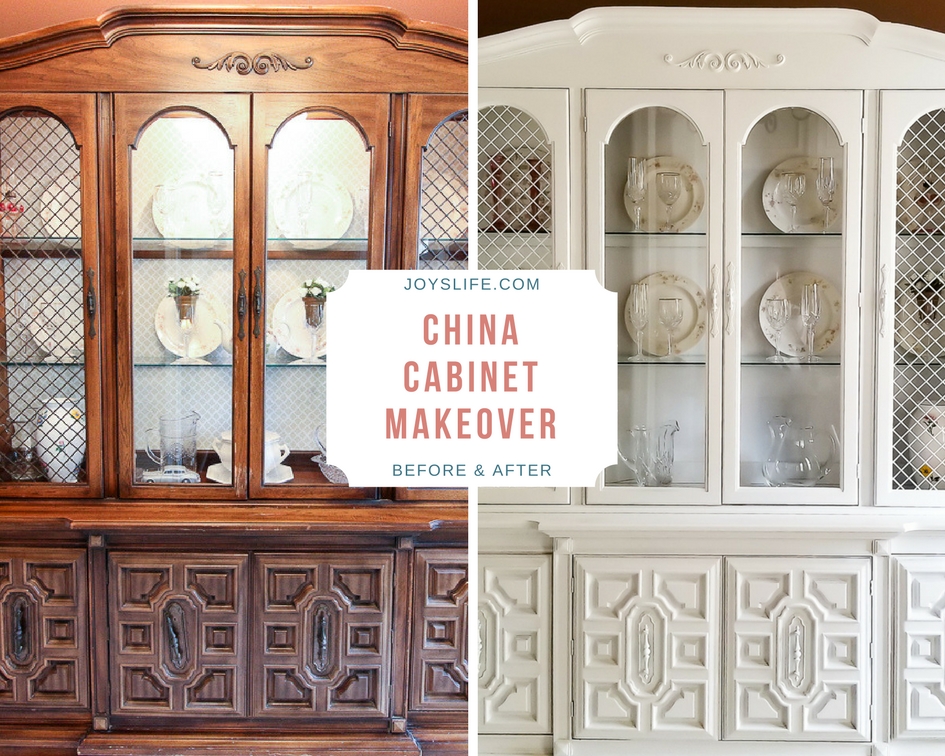
Before and After Transformation
Before: dark, heavy, outdated
After: light, clean, completely refreshed
This is one of those projects where the difference is almost hard to believe.
The Emotional Side of This Project
I thought it would be difficult to make changes to this china cabinet because of all the emotions I had tied up in it. I mean, this piece has been part of my life since I was born.
It’s really tough to decide to radically change something that’s been the same for so long. I’m so glad I did it though. It was time and it looks so much better!
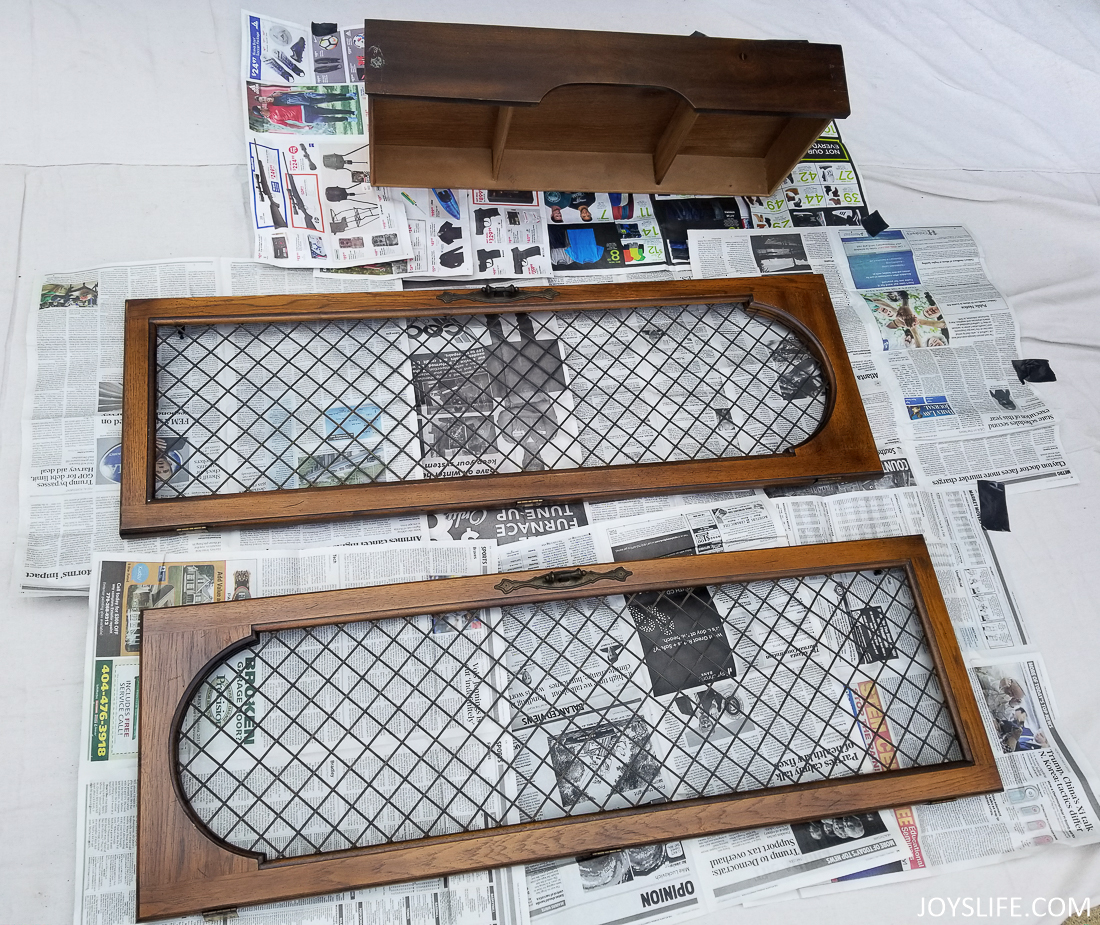
Check out these wire doors and interior drawer before and after being painted!
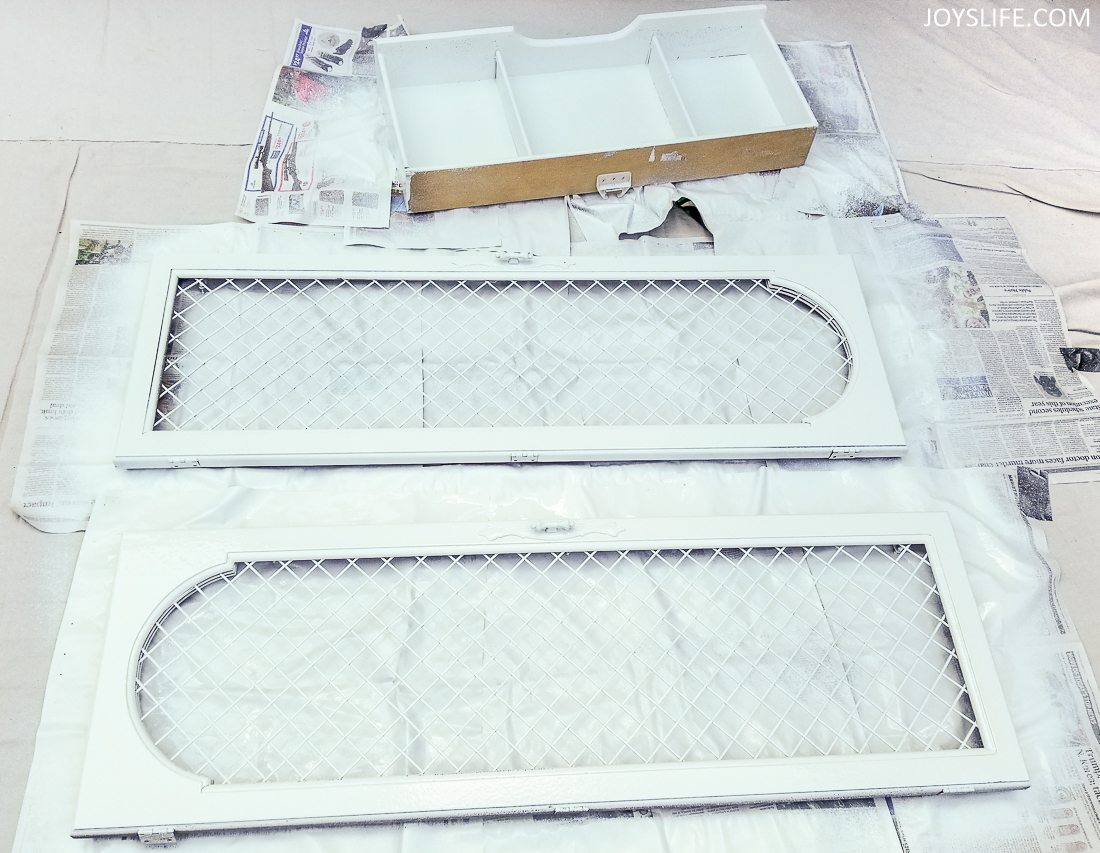
We removed the doors and drawer so the china cabinet base could get painted.
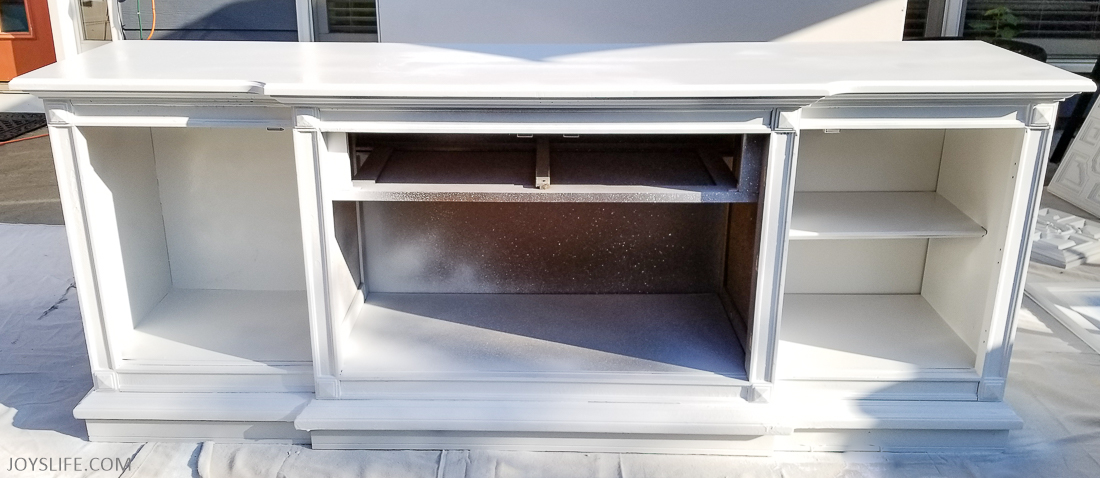
Here’s the base in the middle of getting painted. The paint gives great coverage, but it still takes time for the person painting to crouch down and climb around to get to all the places.
Can you believe that this paint covered the handles too? We were thrilled!
Here is the sad before, again.
You Can Do It!
If you’ve been putting off a project like this, here’s your sign.
It doesn’t take weeks.
It doesn’t take perfection.
It just takes starting.
And once you do… you might end up wanting to paint everything in your house too.
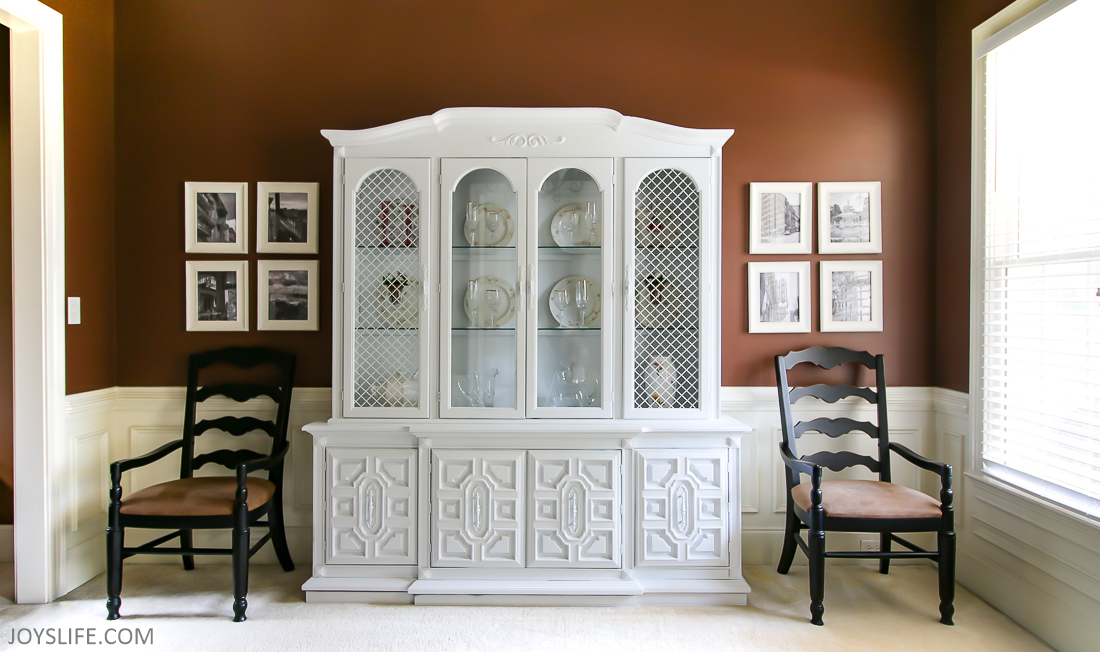
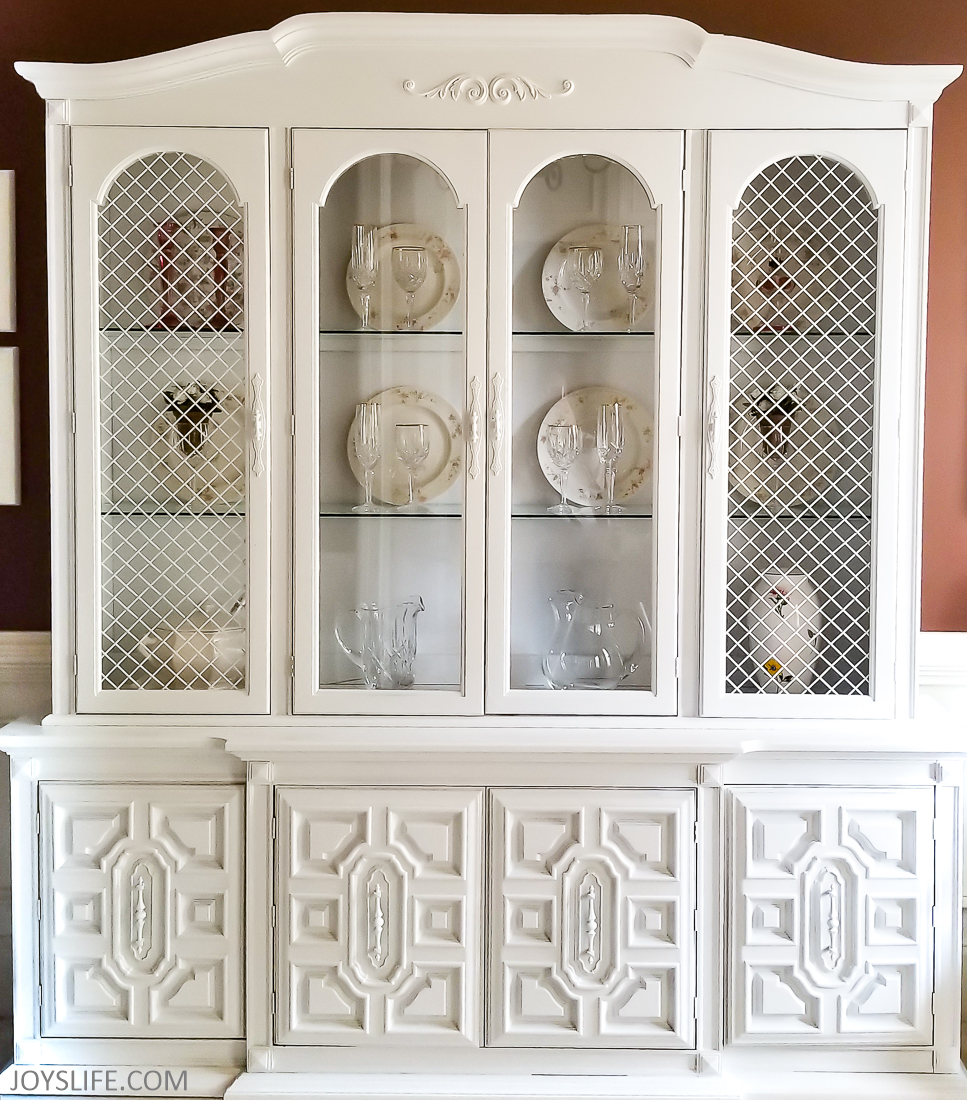
Here’s the awesome after!
I love how the china cabinet turned out. It used to suck all of the light out of the room, now it’s the light of the room!
(Later we also repainted the room a lighter color and redid the floors!)
More DIY and Upcycle Ideas You’ll Love
If you enjoy projects like this, here are a few more ideas to try next:
- Hallway refresh with a pine hutch makeover that shows how a darker piece can brighten up an entire space
- Renewing Precious Furniture with a thoughtful update that keeps the meaning while giving it a fresh new look
- DIY chair makeover that transforms worn seating into something clean and updated
- Turn used candle jars into pretty bathroom storage for an easy and practical upcycle
- Shabby chic mason jar lamp that adds charm and personality using simple materials
These are all great examples of simple DIY and upcycle projects that can completely change how your space looks and feels!


You didn’t say did you sand the china cabinet first ? It looks good!
Hi Jennifer, We made sure that the china cabinet was dust free, but we didn’t sand it except in places where the wood was splintered and needed a sanding. 😉 I hope that helps!
Hi! The cabinet looks amazing! I was wondering if you sealed it with anything afterwards? Also, what would you recommend for a paint sprayer?
Thanks!