Using Make the Cut Conical Warp to Create Vinyl Strawberry Tumbler

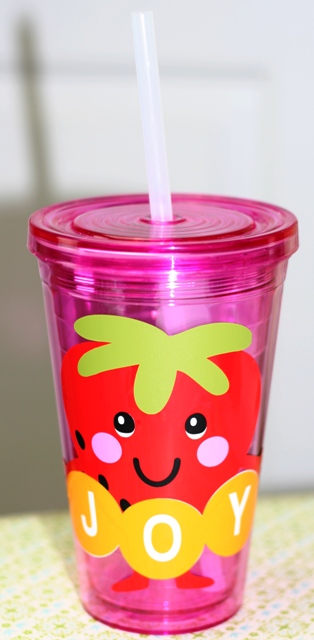
Today I thought I’d get back to my crafty roots and use my 1st love: vinyl. I’m also branching out a bit and trying a super cool function in the Make the Cut software called the Conical Warp. You use it to help you create words and images that will more easily wrap around a cone shaped item, like a tumbler and other things with sloped sides.
Need vinyl? I like to buy mine from Expressions Vinyl.
Here are all the posts I’ve made using vinyl.

I’m using the Stuck on You .svg file from Lettering Delights. You get all those things you see on the left of the screen above. I love that PB&J sandwich.

To get to the conical warp option in Make the Cut choose your image or text then go to EDIT, SHAPE MAGIC, CONICAL WARP. See how it curved the text/image I had highlighted? Now the JOY lettering will wrap around the tumbler perfectly. Sometimes if you’re making an image that is this big or has a lot of lettering you run into problems because your vinyl is cut to go onto something straight but your object curves. If you’re not using software that offers a conical warp setting then you usually have to make your text or image smaller or add pieces one at a time. It’s doable but this is better, I think. 😉
At first I was going to use a blue tumbler and make something for DH but then I remembered I had this adorable strawberry (long time followers know of my strawberry b’day’s) so I decided to be a shellfish selfish, use a pink tumbler and make this for ME! 😉 Sorry DH. I do love you BERRY much. Think of that when you look at MY tumbler. LOL!
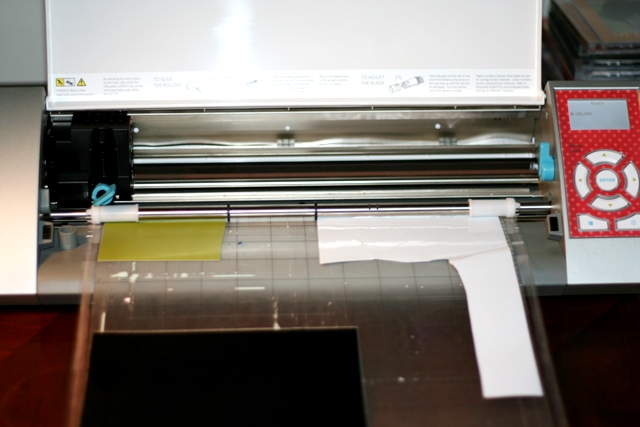
I’m cutting vinyl and using Make the Cut with my Silhouette Cameo today. You can also use MTC with the KNK Zing, my newest machine. Check out these Zing posts.
You don’t have to use a mat to cut vinyl with the Cameo unless you have crazy shaped or tiny pieces, which I did. Gosh, I really need to give my Cameo control panel a makeover. Dear Joy, Christmas is over. LOL! Here’s how to customize your Cameo control panel.
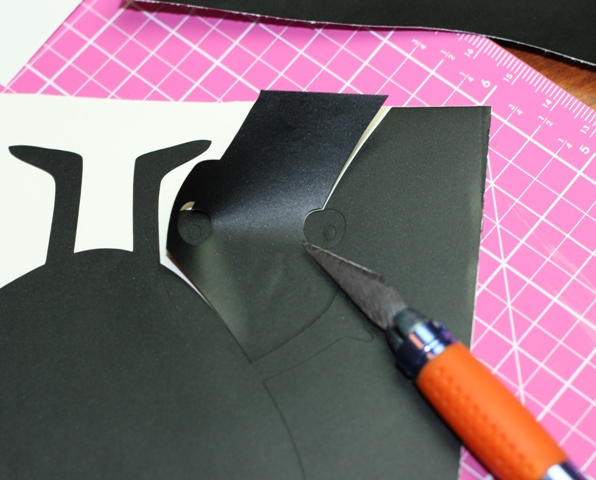
Sometimes as you are “weeding” (removing the vinyl you don’t want to use from the vinyl you do want to use) you find little areas that need some extra help. The Silhouette didn’t evenly cut these images so I had to help it along buy adding some slices to the vinyl. This small cut allowed me to get to the eyeballs which otherwise wanted to pull off with the vinyl I wasn’t using.
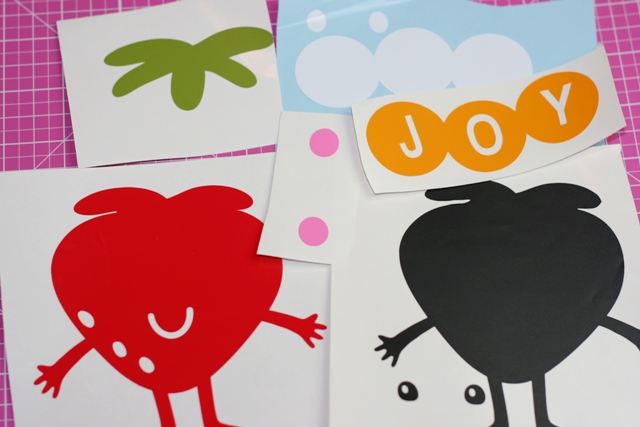
Now all the pieces are weeded. It’s time to layer and assemble the whole berry. I like to construct my whole layered image and then apply it to things. You can layer it onto the tumbler one bit at a time if you like.
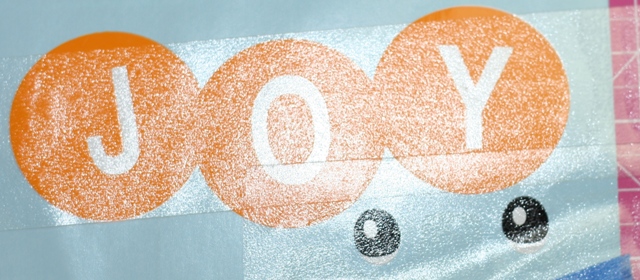
I’m using transfer tape to help me remove these items from the backing. Next, I will layer them onto the different pieces.
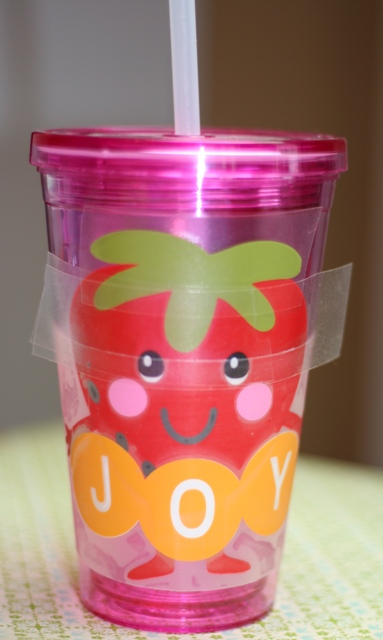
I told you I was a big believer in transfer tape. Here I’ve transferred the berry to the tumbler. After making sure it’s stuck down well, I will remove the tape.
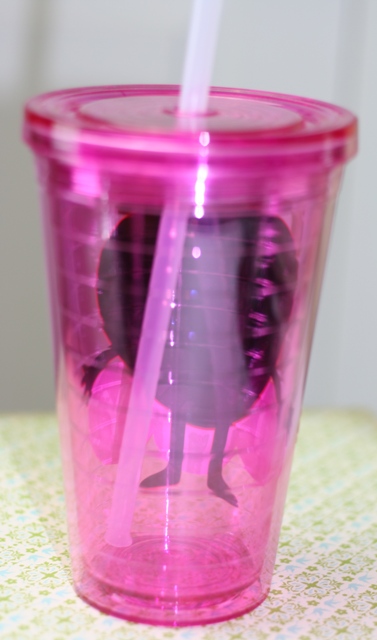

Using the conical warp really makes that look perfect on the tumbler.
Need a Silhouette Cameo? Amazon has great deals. Need vinyl? I like to buy mine from Expressions Vinyl.
Have a Cricut and want to learn about vinyl? No problemo. Check out my Cricut Vinylology DVD!

Wow! Great project! I saw a tumbler a lot like this that a lady had COVERED with acrylic jewels. I bought one at the dollar store to decorate for a teacher gift. But, I like your idea better! It would be much faster!! Also, I had used vinyl in my Cricut a time or two before, but I’m sooo glad I found your site and now have access to all your vinyl projects!! Thanks so much!
Hi Krafty Kim!
Wow a jewel covered tumbler would be cool! I just know I don’t have the kind of patience it takes to do that. LOL! I’m so glad you like my little berry creation. You can definitely make some awesome things using vinyl and your Cricut. 🙂 Have fun getting crafty!
~Joy~
You always make the neatest stuff joy!
this is super cute Joy!!!!
I too believe transfer tape is a MUST!!!! when working with Vinyl…..
but sometimes I run out, and I need to get a project done, what is one to do but head to my hubbies tools and I found some mesh drywall tape…it works GREAT!!! and it is reusable if you are doing a few projects and you can get it at the dollar store!!!!! love it!!
thanks for another great project….
This is the BERRY cutest tumbler I have ever seen!! And don’t worry Joy… it’s ok to be “shellfish” every now and then! 🙂
Hugs,
Lori
This is soooo soooo CUTE Joy! I LOVE seeing everyones ideas with vinyl and the tumblers…. Your happy strawberry put a big ole’ smile on my face! 🙂 TFS!
Theresa
How super cute is that! I have had some vinyl for about 3 months now. Haven’t gotten up the nerve to actually use it so thank you soooo much for the inspiration!! ((hugs))
I am joining the addicted with working with vinyl. I was afraid too at first but it really is so easy. Although I did have to buy the vinyloloogy DVD to get my courage up first. Really enjoyed and have made a lot of candy jars for Easter and my Anniversay today (for my hubby to take to work with him, not that he needs the candy ;D
I just looked for this software and they state they are no longer compatible with the Cricut machines. BOO
Hi Betty!
That is sad but true. Several years ago, Cricut forced them to make changes to their software so they would no longer be compatible. It was a huge disappointment to many when that happened. Sad!