Shrinky Dinks Charms Cut with Cricut
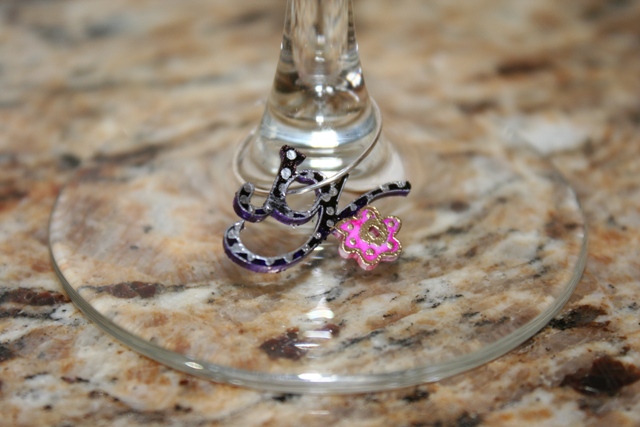
So cute!! Shinky Dink Wine Charm.
The #1 Question I got when I announced I was going to be doing a Shrinky Dinks project was, “What are Shrinky Dinks?” Many people remember them from their childhood. They used to even sell a Shrinky Dinks Oven, like the Easy Bake Oven. (I had the Easy Bake, but not the Shrinky Dinks one.) Shrinky Dinks are a thin shrink film that you color on, cut out and then shrink using either a heat gun or an oven. Basically, you create something bigger and you shrink it to something smaller. As the film shrinks, it also gets thicker, like the Joy charm above. That started out as a thin sheet!
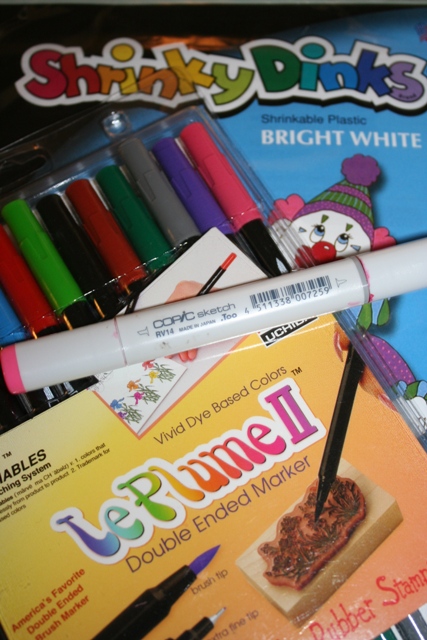
Here are some of the things I used.
You can buy Shrinky Dinks at Amazon, Michael’s and other stores. You can also buy another product that does the same thing, called “Shrink Film“. I found that the Le Plume II markers made much darker and prettier colors on the film than the Copics. The Copics worked fine, of course!! They’re awesome! I was just really surprised at what a good job the other markers did.
Rubber Stamp It!
You know what else I learned? If you quickly stamp a “Shrinky” item while it’s still hot from the oven or the heat gun (be careful) it will make an impression! See…that’s what I did here:
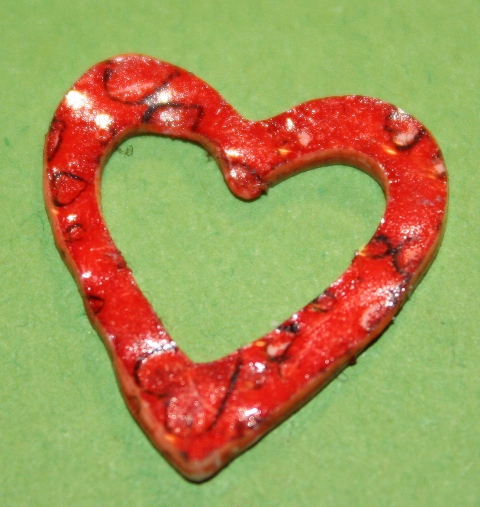
Yep, that rubber stamp still had some ink on it…but it worked!
It actually has impressions in the heart, from the stamp, but I don’t think that’s showing up very well in the photo. Well, you’ll have to take my word for it; it worked!
Shrinky Dinks with Cricut – How to:
You know what I did? I cut out all the designs for my Shrinky Dink charms using my Cricut! I sure did! To do that, you’re going to want to make sure you use a sticky mat or the film will be moving all around and will be a wreck.
CRICUT SETTINGS for Shink Film/Shinky Dinks:
Deep Cut Blade: Blade Depth 6, Speed 2-3, Pressure 4, Multi-cut 2.
It works best to cut things that are over 1″. The most intricate cuts I made were “girl” and “joy”. Intricate things are difficult to remove from the film. I’m not telling you not to do it, but you might not have great results…then again…you might! If you want certain success, stick to basic shapes. Feeling adventurous? Go intricate. You’ll need to monkey around with the speed and the multi cut for best results with those delicate cuts…and don’t go super small! 😉
** If you’re going to make charms…you MUST punch a hole in the charm BEFORE you heat the shrink film!!!
For the charms I made I used Designer’s Calendar, Gypsy Wanderings and Sweethearts Cricut cartridges.
Shrinky Dinks Before and After:
Here is the before. Before color, before shrinking.
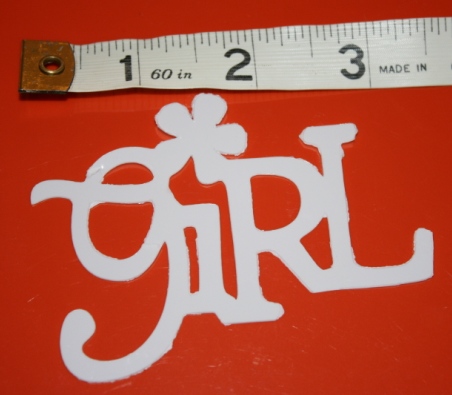
Here is the charm with the color on it:
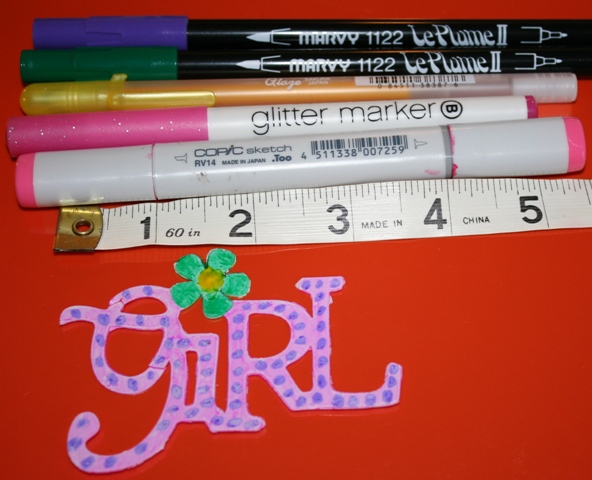
I tried all those markers and pens on this, before shrinking. Oh, notice that “girl” has cracks in the “g”? Yep. I told you. Those intricate cuts are tricky. Those tears happened when I was removing it from the film.
Here is the After.
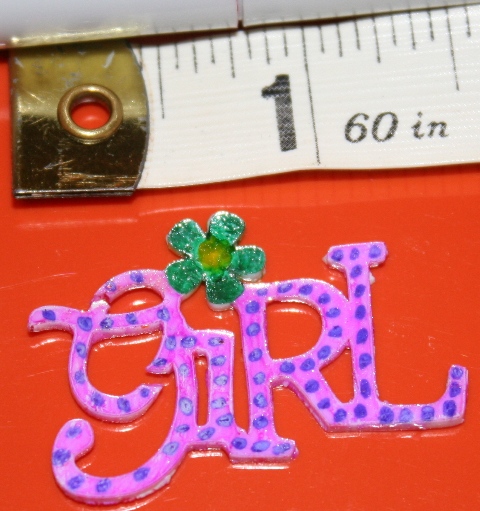
See how it thickened up as it shrank? Sooo cool! I spent 1/2 the day shrinking things. Yeah, those cracks and tears don’t get any better with heat.
So, then I shrank some more stuff!
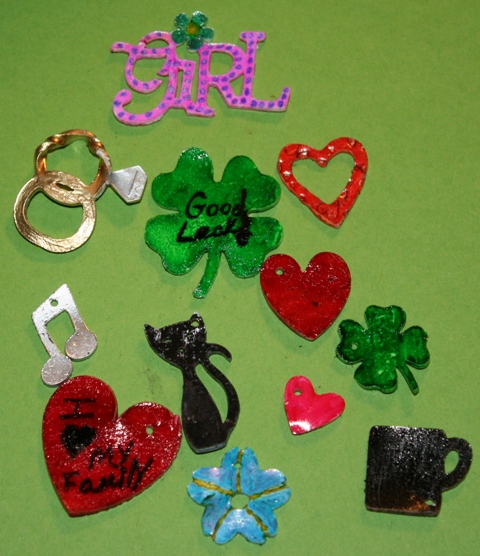
Hey, I never claimed to be an artist. That’s why I have a Cricut, LOL!
I LOVE those rings!!! I wish that one hadn’t curled up like that. I used Sanford Calligraphic Metallic Pens to make the silver and gold on the rings, the silver on the musical notes and the silver and gold on the “Joy” charm.
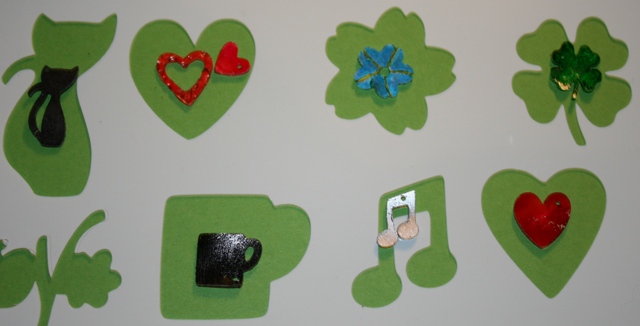
The two hearts were a heart inside a heart. That =’s the 2.
The white layer is the Shrinky Dinks film. That’s the size I cut these things. Then the charms that are colored and finished are the shrunken ones that I cut from the film earlier. Amazing, huh?
So, what am I going to do with all this stuff? And better yet, what could YOU do with yours? You could use them as embellishments on cards, gifts, scrapbook pages, bookmarks, etc. I’m using some of these to hook onto the stylus of my Gypsy, because my stylus is a pain to get out sometimes. You can also make wine glass charms, like I did in the first photo. I used little jewelry hoops I found at Michael’s to form my charm ring. I did have to bend the metal a little.
Whatever you make…I know it will be awesome!
Go shrink something!

That is cool. I just found some shrink film that came with our printer in a specialty pack. Do you have to use the deep blade housing? Would the regular one work with multi-cut?
Hey Jan S.,
I haven’t tried the regular blade with the Shrinky Dinks/Shrink paper yet. Let me give it a try and I’ll post my results here! 😉
~Joy~
That is SO cool! haha
The items would make a nice embellishment for cards, or scrapbook pages, however I am not sure the glue would hold them on, but think of the possibilities of adding your own charms like this to cards, I am wondering if you could use some of the spellbinders dies for different shapes or the bigshot would cut the film. Your could probably, even make a necklace to attach to a valentine or birthday card with some cording. Oh Joy, you got my brain going again. I am going to email this link to my daughter………It would be an interesting gift to make butterfly necklaces to hand out to the guests that come to her bridal shower. Most of them have children that if they didn’t want to wear the necklace them self, they could give it to their daughters.
I am already thinking about making my granddaughters a horse necklace and the other things that they might like to wear themselves. My plan is to punch a hole in the shape add an O ring and get some cording.
Oh I so want to try this. They are so cute and they can add a lot to any of your projects. Looks like you had a lot of fun doing these.
Joy, you are such a JOY to read which I’m sure has been said before but it is true. I have been laughing so hard as I cruised your past blog entries and bookmarked MANY of your past how-to’s. And guess what, despite your wanting to chuck those punches at Martha, now I gotta have the Loopy and the Drippy Goo Around the Page sets. All thanks to you. I’ll just make sure that I use the ‘correct’ paper size. DoriG
Thank you, Dori!! 😀 I laughed out loud when you told me about your new Martha must haves!! What have I done?! LOL 😉
~Joy~
These are so cute!! I think crystal lacquer would hold these onto a card. I have done some shrinky dinks with stamping but have not tried them in my cricut yet.
You brought memories back for me with my two daughters. I haven’t thought of shrinky dinks for years and now they’re back and even better. Gotta try it….what a clever idea to do them for a necklace for a wedding-my son just got engaged this past month and I’m sure we’ll get more ideas in the months tp come!
Marlene, that is a good idea to make necklaces!! That would be really sweet!
~Joy~
Never thought to use Shrinky dinks with my cricut. I remember making earrings and charms when I a lot younger. I haven’t thought of using it again but the wine glass charms is an excellent gift item.
Love this idea! My DD and I have done the SD before, but with the cricut we can really have alot of fun! Thank you for the inspiration!
Oh my goodness..something else to get addicted to..LOL. I love what you have done with the SD..I may have to give this a try..so cool!
What a great idea! I used to love Shrinky Dinks…I think there are still some smurf ones floating around my parent’s house to this day LOL. I may have to try this with my Disney cartridge to make Snow White and the Dwarfs for my daughter. She loves them and I could make them into a necklace or even stitch them onto a little purse she carries as charms. Here is just one more must-do to add to my ever growing crafting list (still haven’t done my felt cutting project yet LOL). Thanks for your inspiration!
Maryjo,
That’s a great idea about your daughter’s purse. How sweet!
~Joy~
i am going to try this with my grandaughter. she loves doing the shrinky dinks. now we can have a more professional look to our creative flare. Thanks
They’re called ‘Shrinkles’ in the UK but other than that it’s exactly the same stuff… I’m going to try (!) and cut the swirly heart from the Wedding solutions cart to put onto an acceptance card for a wedding we’ve been invited to. It IS quite intricate so I’ll let you know how it goes! *crosses fingers*
Cazzablanca,
Just think how happy the bride will be when she sees the pretty addition you’ve made to the acceptance card. That’s so nice! Please do let me know how it goes. Remember, if you have trouble with it cutting that intricate heart try slowing down the speed, also try adjusting the pressure. 😉 Good luck! 😀
~Joy~
I just saw a demo on this….if you use an acrylic stamp block right after you heat it the edges will flatten! They used them to make little signs with jewels and beads on them. Used wire to make the hangers. Very cute.
First time on your site and just spent almost 2 hours looking! AWESOME!!
Thanks ThatGirl!! Welcome!! I’m glad you’re here! 😀
~Joy~
I am going to cut Shrinky dinks out with my cricut and give them to the girls to color at my daughter’s 7th birthday party. After I’ve baked them, the girls will put them on string for a cool necklace!!! Now, I just need a deep cut blade….
How neat!!!!!! thats answers my question about where to fine the shrinking stuff.
what a great idea….the girls always want new necklaces.
I am a 4-H leader in my spare time. haha what is spare time? Anyway this is a great craft to make at one of our meetings. Any suggestions on what boys can make besides something for their moms.
LOVE IT!