If you need help with your Silhouette Cameo, check out my tutorials. Curious about which Silhouette Cameo you should buy? Check out this comparison post!
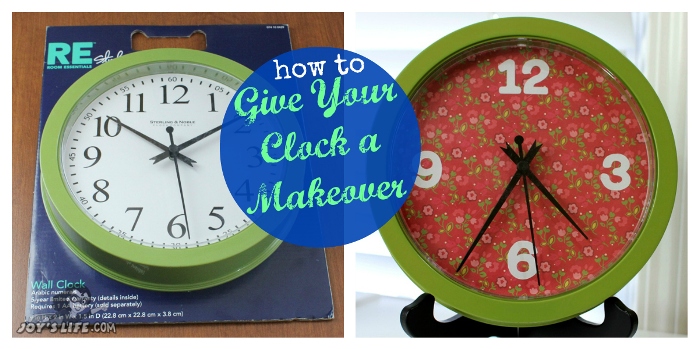
I’ve been planning on giving this clock a makeover for more than 2 years. It’s TIME to get started, huh? See how I did that there with the whole time thing? That’s just good TIMING. Bah ha ha…um…let me get some more coffee and see if I can find a good joke anyTIME soon.
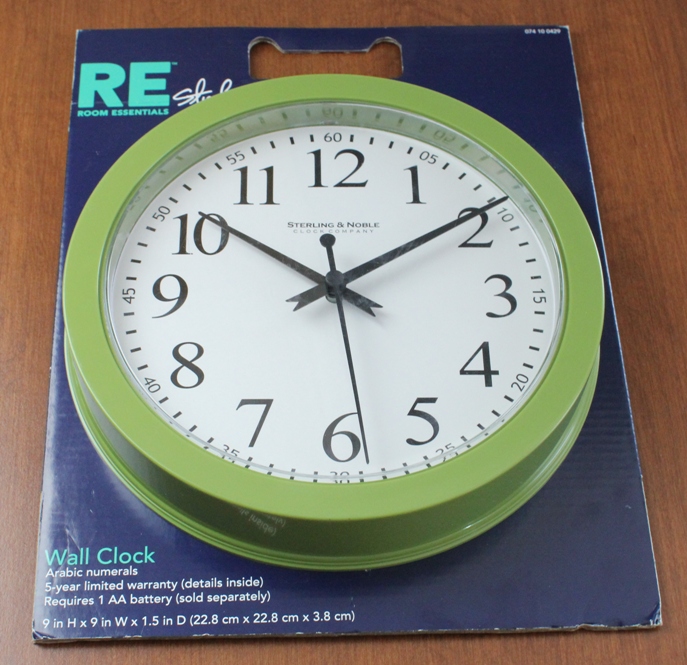
I bought this Room Essentials wall clock at Target. You can find similar clocks at Wal-Mart. Pay attention to the way the hands on your clock are attached. You have to put them back on exactly the same way. See if they have a shiny or dull side and if they face up or down. My clock hands have to go on shiny side up for the hour and matte side up for the minute hand.
I thought about this later and realized you might be able to do this by only removing the top tab to take the face of the clock off leaving the battery pack attached. This is how I did it:
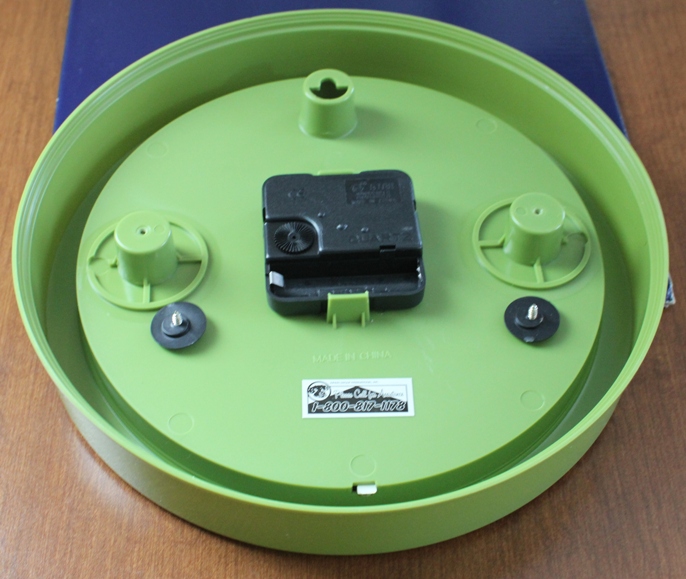
See those screws? They were holding the clock to the box, so I removed them. I don’t think they serve any other purpose but when I was done I screwed them back on just to be sure and because I didn’t feel like thinking more about the purpose of those screws. LOL! Remove the battery pack. I actually used a bone folder to aid me in that struggle. I was so scared that I was going to break the tabs! The clock hands are attached to the battery pack/clock mechanism. Don’t worry about it. Just pull the pack out as straight and gently as you can (it’s not easy) and let the hands fall into the face. You’ll get them out soon.
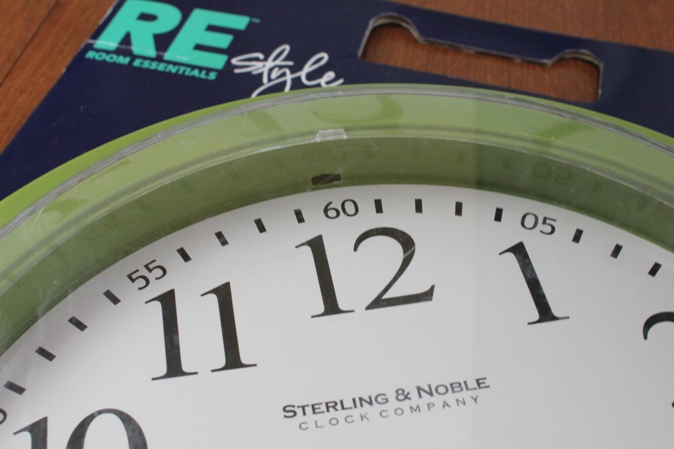
Pop the top tab out (from the back) first. There’s a longer tab on the bottom but you remove it as you pull away the clear cover after you’ve removed the top tab. Be careful not to break off the tabs. Once you’ve removed the cover you can retrieve the clock hands. Put them aside and we’ll reattach them later.
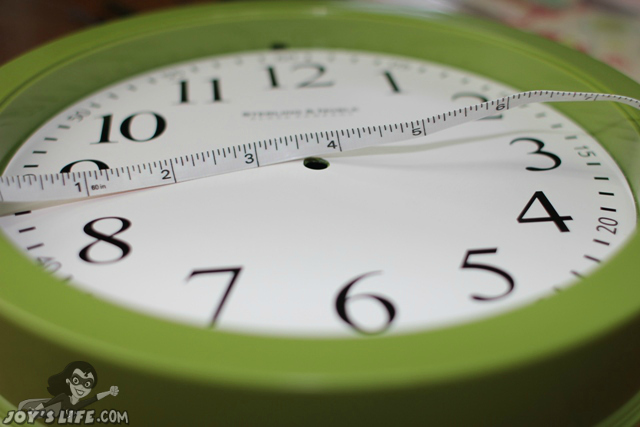
Find the diameter of the clock face. That just means to measure a straight line that goes across the middle of the circle. I measured from the end edge of the 9 to the end edge of the 3. The face of this clock was 7 – 1/4″.
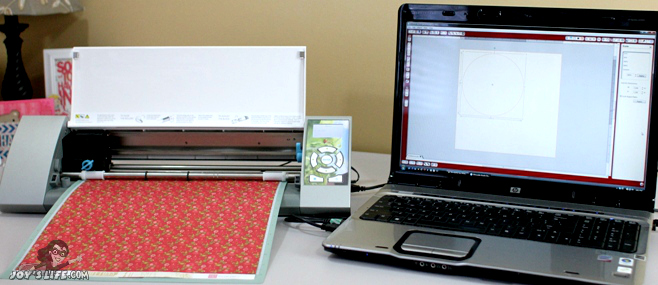
I’m using the Silhouette Cameo to cut out my new clock face. If you’re laying paper on top of the existing numbered face make sure your paper is thick enough to keep the old face from showing through. Use SCRAP PAPER until you’re sure your new face fits the clock. I bought this paper just for my clock and used 3 sheets of it until I got everything just right. That was stupid. I know better but I did it anyway. Crazy!
FREE CLOCK FACE DOWNLOAD for Silhouette Studio
To make your experience better, I’m sharing the clock face template that I made! Here’s a link so you can download it. This file is just the round face with the center circle that fits this clock. Even if you don’t have this exact clock you can easily resize it to your needs. If you make a clock face by hand be sure to add a hole to the center for the clock hands to fit through.

I added white vinyl numbers to my clock face. I used a ruler to help me line up my numbers. Here are some other projects where I’ve used vinyl.
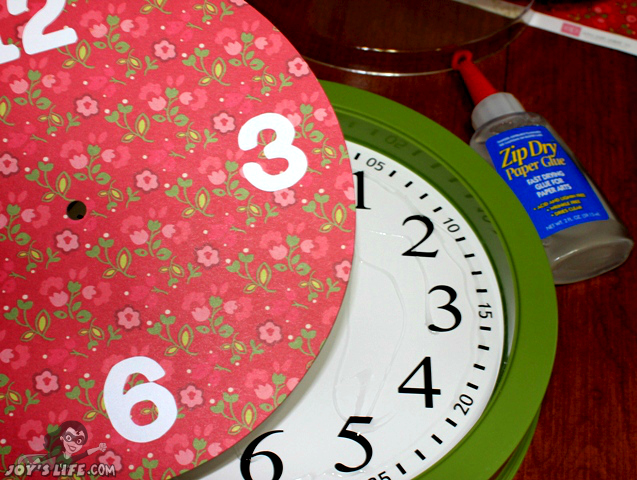
I left the original numbered face in the clock because it was glued in place. Having it there made it much easier for me to make sure I put the 12 right at 12, 3 at 3 and so on. The last thing you want to do is finish the clock and realize it’s not pointing to the right time because you glued it in all wonky. LOL! Zip Dry Paper Glue was a great choice for this but you could also use a spray adhesive. For this project, choose glue based on the thickness/transparency of your paper.

Ok! Time to put the hands back on. Be sure to do this part correctly. It’s very important. Attach the hands the same way that they were originally. For this clock, the hands attach this way: SECOND hand goes on top, MINUTE hand in the middle (matte side up), HOUR hand on the bottom (shiny side up). Place all the hands at 12.
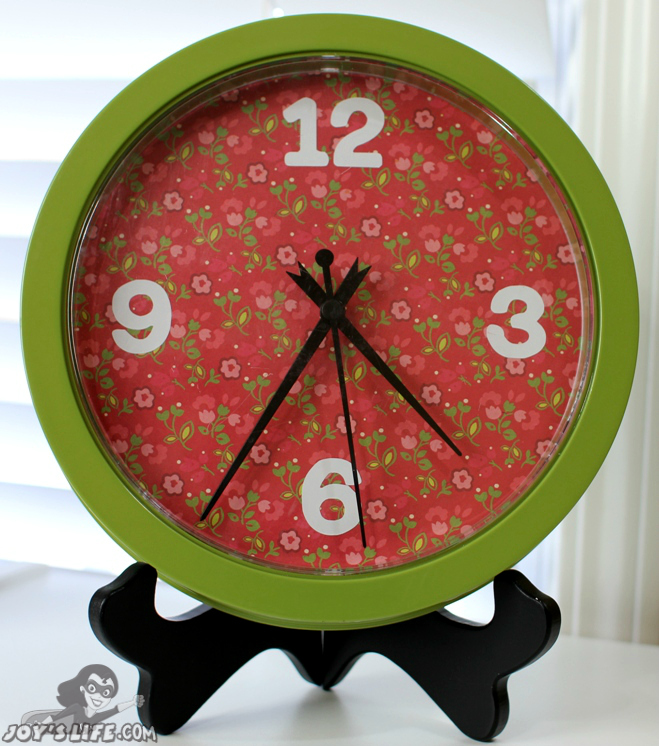
Place the battery pack/clock mechanism back on and make sure your clock hands are pushed into it well. Replace the clear cover. Set your clock and enjoy!
I hope you have a great TIME today!


Super cute clock Joy – and thank you for sharing the template! 🙂
This was so TIMELY for me! I had a very ugly red, blue and yellow clock in my (pink, black and white) craft closet that I was planning to make over and this gave me the incentive to do it! I now have a pretty white, black and pink clock…I even painted the hands (we’ll see if it still works)! Thanks, Joy!
Martha,
That’s wonderful! Genius painting the clock hands too! Crossing my fingers for you too that the clock took paint and kept on ticking. WOO HOO – to your tackling of that clock! YAY!
~Joy~
Love your blog and this project – so creative and fun! Just wanted to let you know I featured it in my roundup of clock re-dos and makeovers here. Feel free to check it out if you want and hope you like it! : )
-Mel the Crafty Scientist
Thank you, Mel! I’m so glad you liked the project!
~Joy~
Room Essentials has just replaced their original $3.99 wall clocks that you used to be able to gently pry off the plastic face with a new $4.99 type thet looks the same but you can no longer remove the face in the manor stated above, I purchased one of these recently but have not yet figured out how to remove the plastic clock face. On their original one you used to be able to gently slip a thin blade between to frame of the clock and the plastic crystal face but with the new clocks you can no longer do that, Has anyone else discovered this and if so, Have you figured out how th get the clear plastic cover off. Please email me if you have.
Thanks,
[email protected]