This shop has been compensated by Collective Bias, Inc. and its advertiser. All opinions are mine alone.
#BigGameSnacks #CollectiveBias
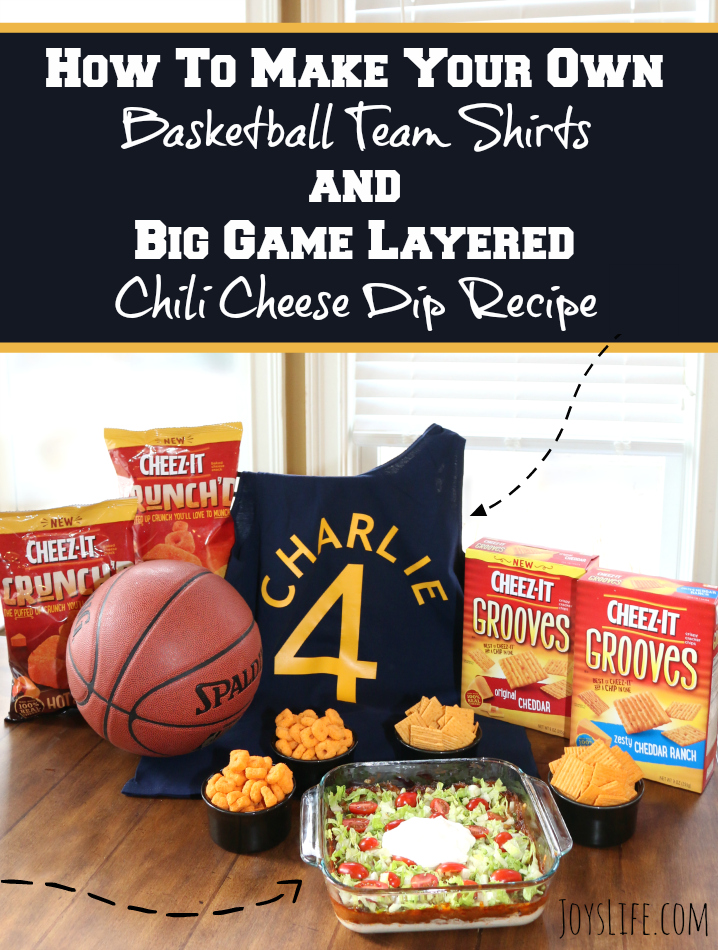
Years ago, I took my kids on a road trip up the East coast all the way from Atlanta though New England, Maine across New York and up to Canada. We had a great time. It was a trip that none of us will ever forget. It’s surprising what you pick up on your travels. For example, I was in Boston during basketball season playoffs that year and it was exciting! I followed the games throughout the rest of our travels and before I knew it, I was a basketball fan. Will you be tuning in to the Big Game playoffs this season? I will for sure! Here’s a delicious recipe that’s perfect for sharing while you cheer on your favorite team.
See how simple it is? Really. You just layer these ingredients in an 8×8 baking dish. That simplicity is a … say it with me … slam dunk!
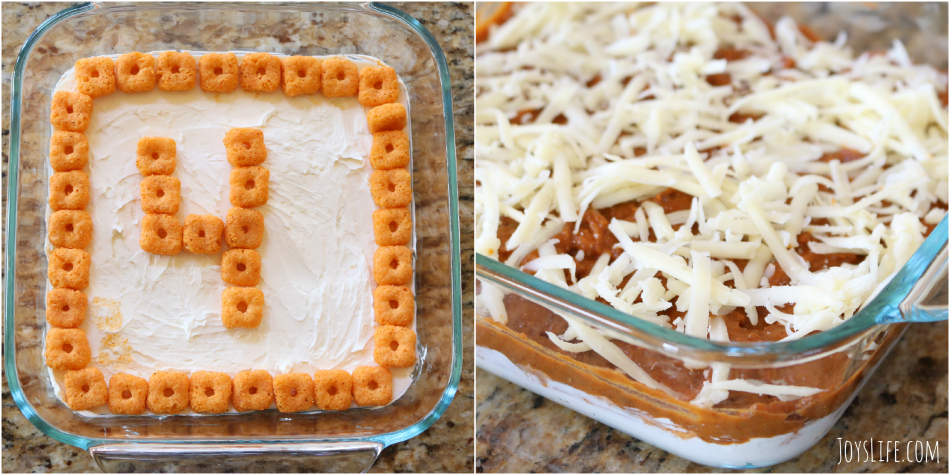
I’m adding a layer of Cheez-It Crunch’d to the dip. You don’t have to make a number with yours but it matched the shirt I made so….I had to. LOL! I hated to cover up that layer but the chili had to go on next. If you haven’t tried the Cheez-It Grooves and Crunch’d you should try them. They’re really good! Cheez-It is dedicated to using only 100% real cheese, which is baked into every delicious cracker.
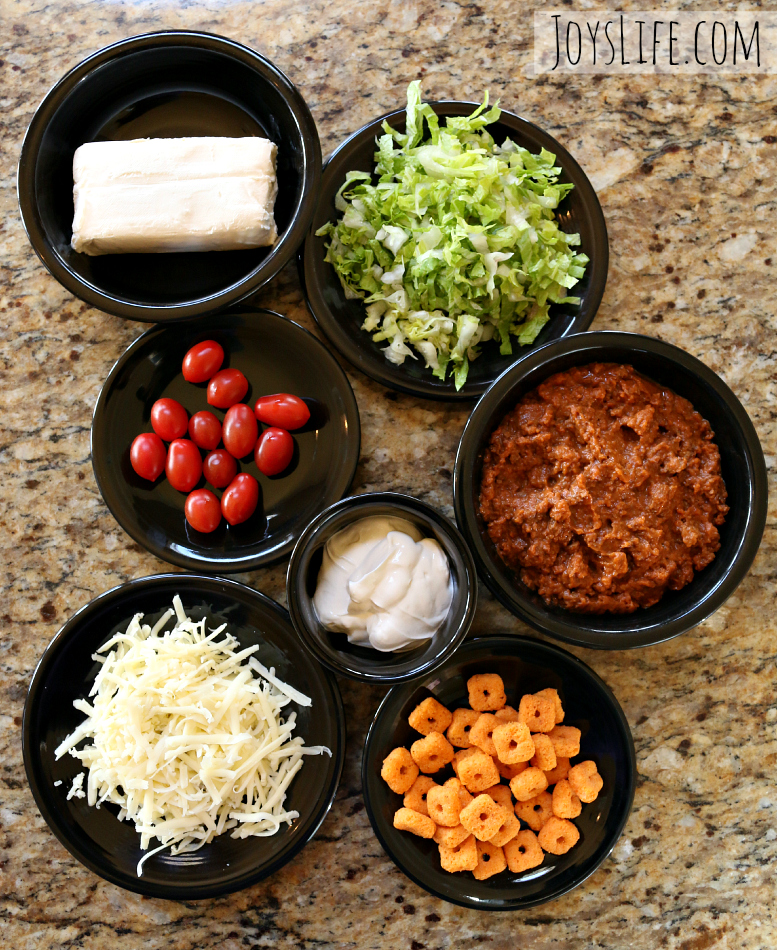
Big Game Layered Chili Cheese Dip
Ingredients
- 8 oz. cream cheese
- 1 cup shredded cheddar cheese
- 1/2 cup cherry tomatoes sliced
- 12 oz can of chili
- 1 cup shredded lettuce
- 2 cups Cheez-It Crunch’d
- 3 tablespoons sour cream
- Cheez-It Grooves
Instructions
- Spread cream cheese into 8×8 baking dish.
- Layer Cheez-It Crunch’d pieces over the entire surface.
- Cover Cheez-It Crunch’d pieces with chili.
- Top with shredded cheddar cheese.
- Bake for 30 minutes at 350.
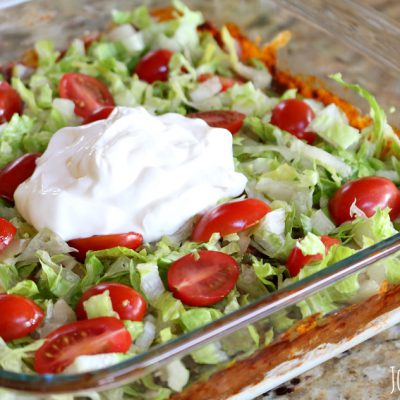
- Top with Sour Cream
- Serve with Cheez-It Grooves.
- Enjoy!
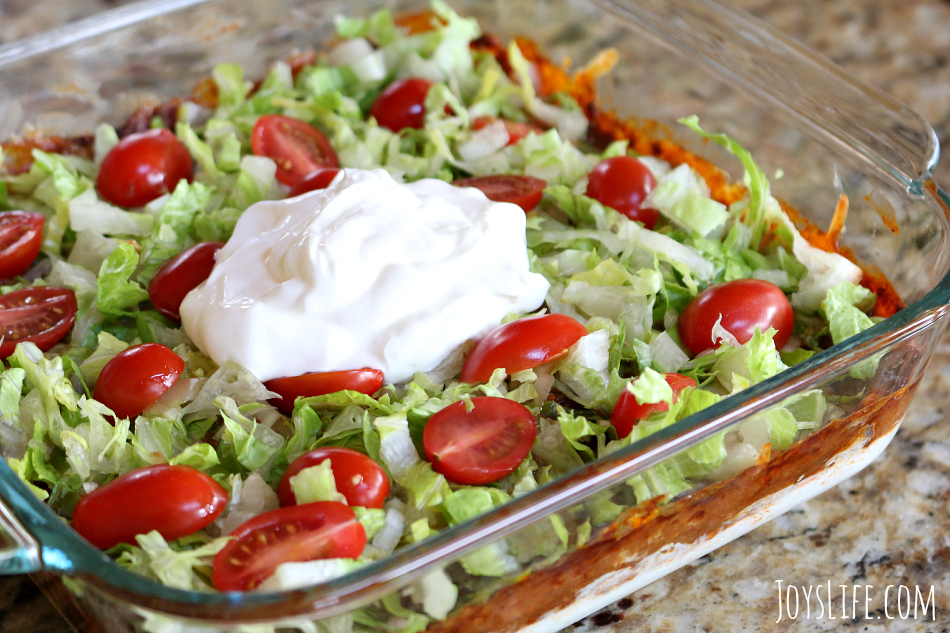
It turned out so pretty and it tastes great!
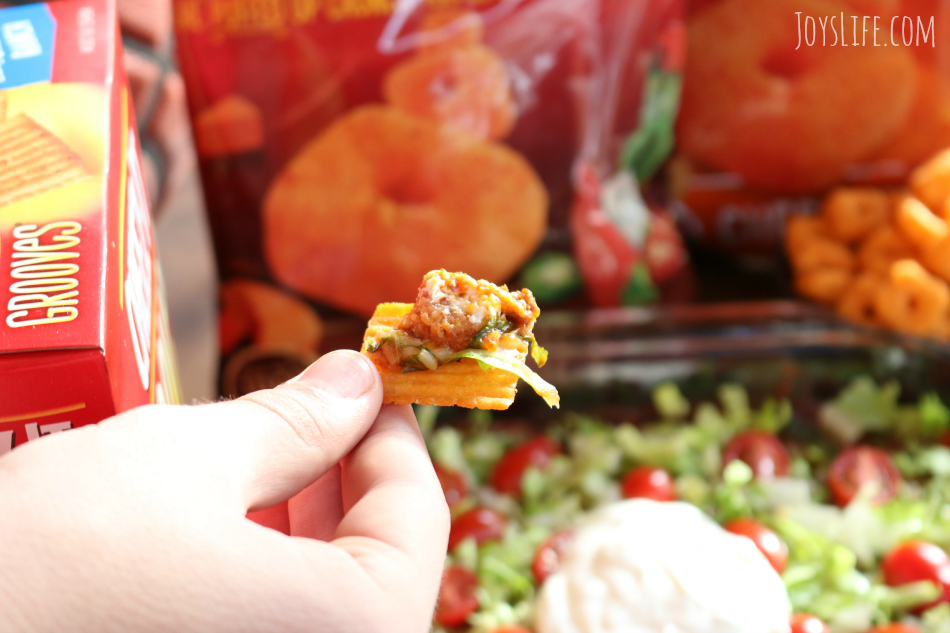
Our whole family enjoyed this dip! We’re eating it with the Cheez-It Grooves. Chomp. Chomp. Chomp. Yum!
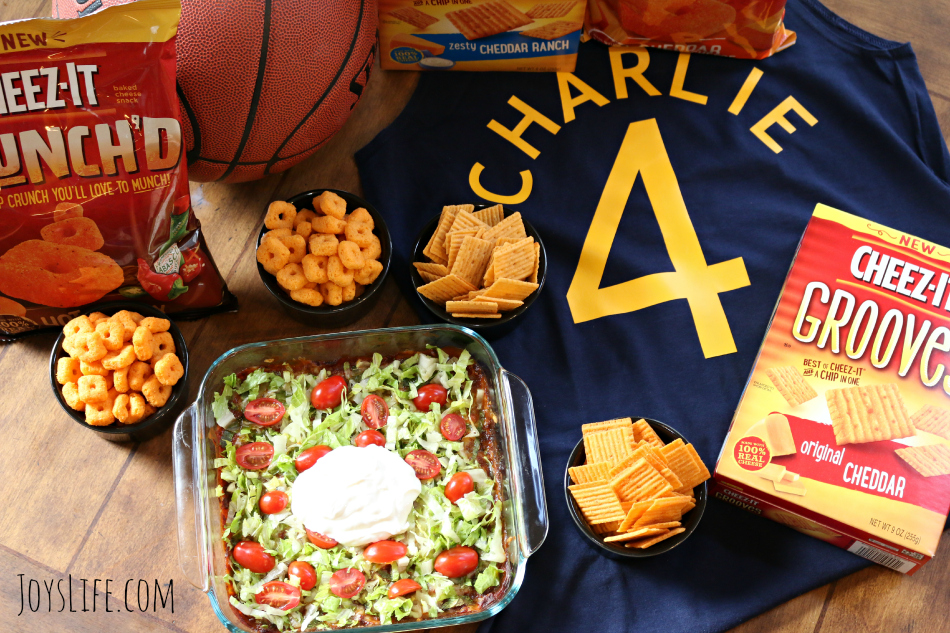
Let’s Make a Basketball Shirt for Your Team!
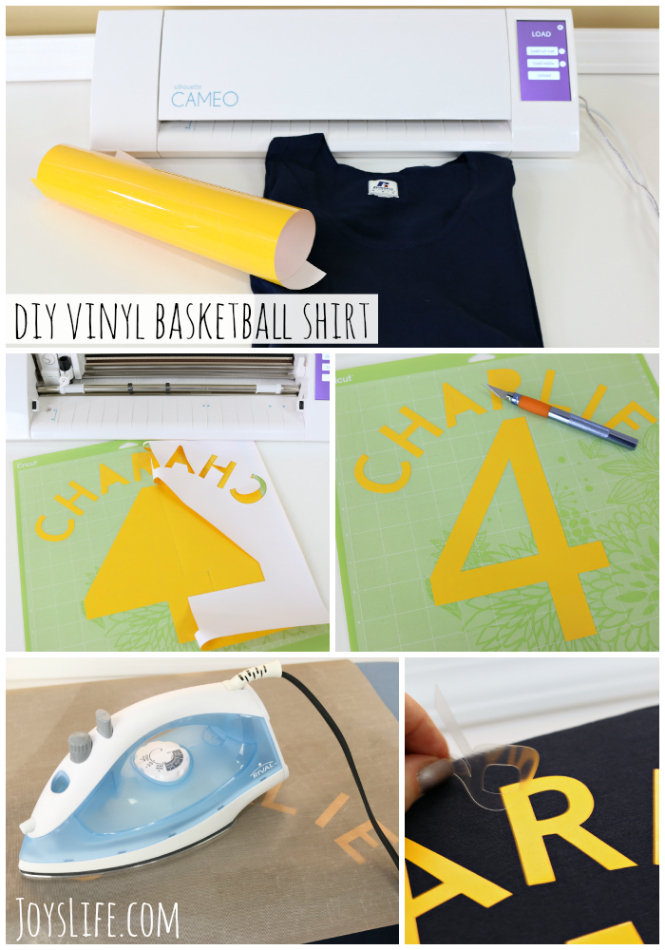
Making personalized shirts is easy with iron on vinyl. I’m using a yellow/orange iron-on or heat transfer vinyl. I designed the lettering and number in the Silhouette software and used the Cameo to cut out the vinyl. Some vinyl’s need to have the lettering flipped before cutting it out. This vinyl can be used without flipping the letters. You simply cut it out and weed the vinyl (remove the pieces you don’t need from the pieces you do need). Next, lay the vinyl on the shirt. I use a teflon sheet to cover the vinyl and then iron it down using the cotton setting. Iron for approximately 20 seconds or until the vinyl sticks to the shirt. This vinyl has plastic that must be peeled off after it has cooled. Remove the plastic and your shirt is finished!
Here are some other vinyl projects I have created.
Need help with the Silhouette Cameo? See these tutorials!
Have you tried the Cheez-It Grooves or Cheez-It Crunch’d? You can find them at Walmart! I picked them up there and was able to find everything I needed for my recipe. YAY!
I think it’s so much fun to make your own basketball team shirts. You can add your family’s names to the shirts and create your own “home team”! What will your shirts say?


I never thought to make our own basketball shirts! What a fun personalized idea!! #client
Thank you, Samantha! 🙂
I love how you used the Crunch’d to make a team number on top of your dip.
Thank you, Maria! It’s easy to make words with those. I bet they’d look super cute on top of a yummy dip!
MMMMM, that dip looks SO good. I can’t wait to try it!
I hope you enjoy it, Kelly! 🙂
What brand vinyl are you using in this tutorial if you don’t mind me asking? I’ve only had my cameo machine for 3 months, obviously I am very green, but I have had some different issues with both the silhouette heat transfer vinyl, and the adhesive back vinyl staying attached to different things/surfaces. I was wondering what is your favorite vinyl brand when price doesn’t matter, and if it exists, your favorite vinyl brand for people on a budget.
Thanks so much for any and all help!!
Hi Courtney,
My favorite brand is Siser Easyweed for heat transfer. I don’t like to use anything but Oracal 631 (regular vinyl). I also like Oracal 651 (heat transfer). Oracal is also what the Cricut brand of vinyl is. From my experience, the Silhouette brand vinyl is terrible. (So, it’s not just you!) 😉 Other reasons that your vinyl might not want to stick could be that it is old or has not been stored properly. I order from Expressions Vinyl and have always been pleased with their products. Sorry to keep this short but I’m headed out of town. I hope this helps! 🙂