Cricut Layered Freezer Paper T-Shirt Stencil Mini Monsters
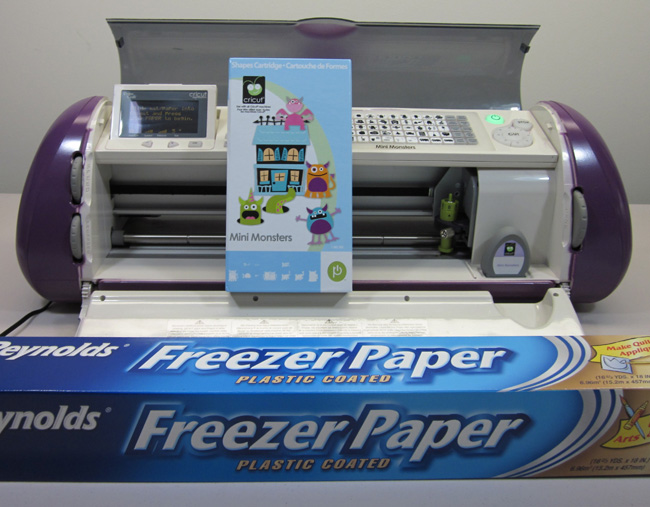
Yep. That’s the Cricut I painted purple.
FUN! I made a stencil using freezer paper, fabric paint and my Cricut so I could create a little mummy tee shirt for my nephew. I used the Mini Monsters Cricut cartridge for this project.
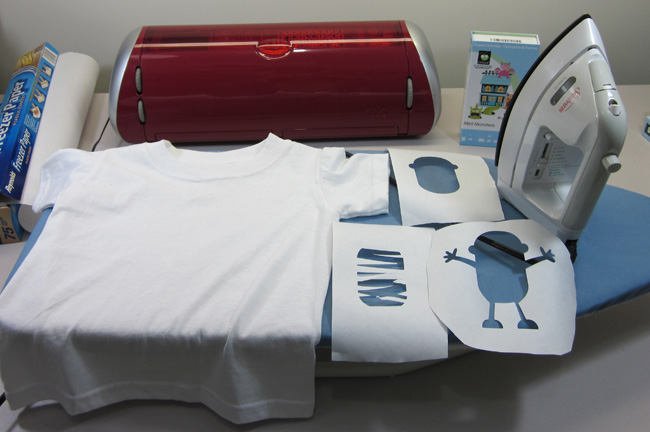
I used my Red Expression too.
The MOST IMPORTANT thing I can tell you about this project is to make SURE you are using FREEZER PAPER. It is NOT the same thing as wax paper. Freezer paper is only waxy on one side. You put that side against your shirt or fabric. As that wax melts it sticks the stencil to your fabric. Very cool! If you used wax paper, it would stick to your shirt, but it would also stick to your iron. That’s bad news for your iron.
Do you heart that little tabletop ironing board? I do. It’s perfect for small projects. I got it at Walmart for about $7. This one at Amazon is nice because it will even hold your iron. I kinda want to upgrade.
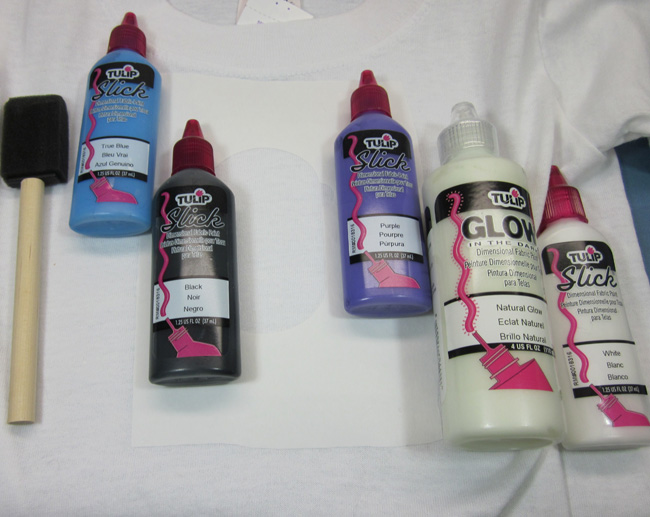
I used these Tulip fabric paints. That glow in the dark one works GREAT! You can buy a bunch of those foam brushes in a package pretty inexpensively. Thumbs up to that!

I put freezer paper inside the shirt so the paint didn't bleed through. Be sure NOT to leave it inside the shirt when ironing!
I put the waxy side down on my Cricut mat. It helped me remember to put the waxy side down when I ironed. I cut the different layers of the mummy out using the regular blade set at 4, speed 2 and pressure 3. For my first time trying this, choosing to do a layered design was harder than it had to be. It worked out fine, but if you want to do something fast I’d suggest doing a single layer or lettering. I let each layer dry for four hours before adding the next layer. So…it took a while. I just wanted to be sure I didn’t smear anything.
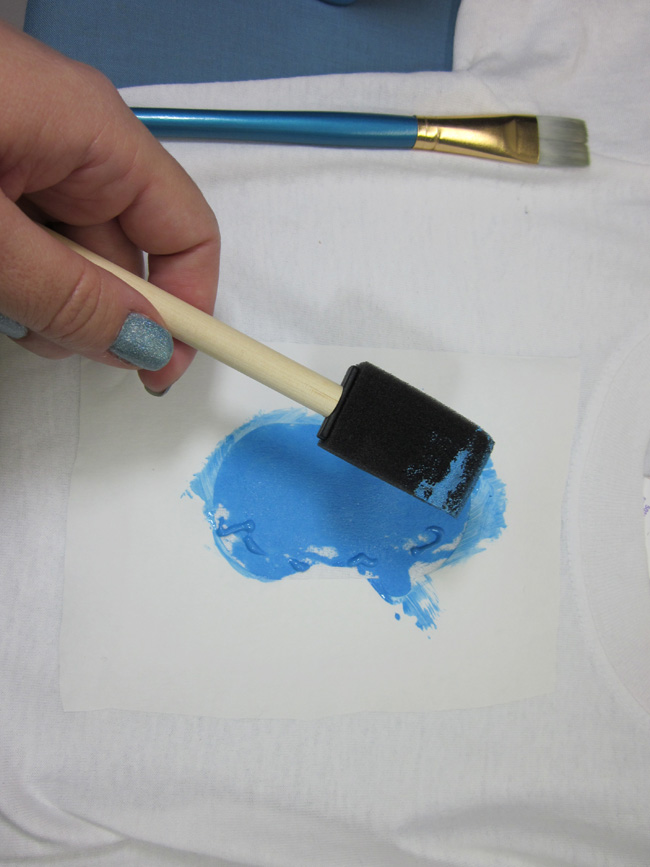
Look! My nails match the mummy. This is layer one. I let it dry 4 hours.
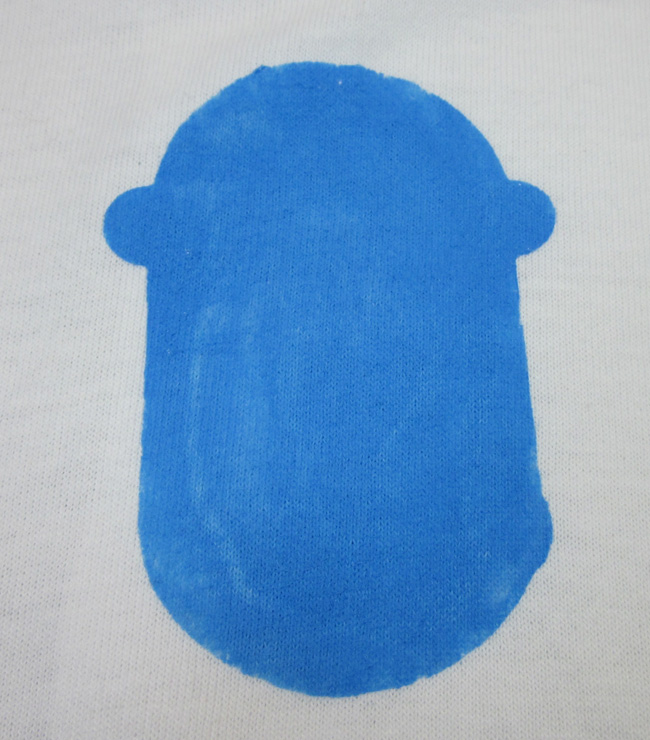
It’s not perfect…me neither.
Time for the next layer! I ironed this right over the already painted blue mummy body. Since I had waited until the body had dried completely, I didn’t have any trouble when I ironed it down.
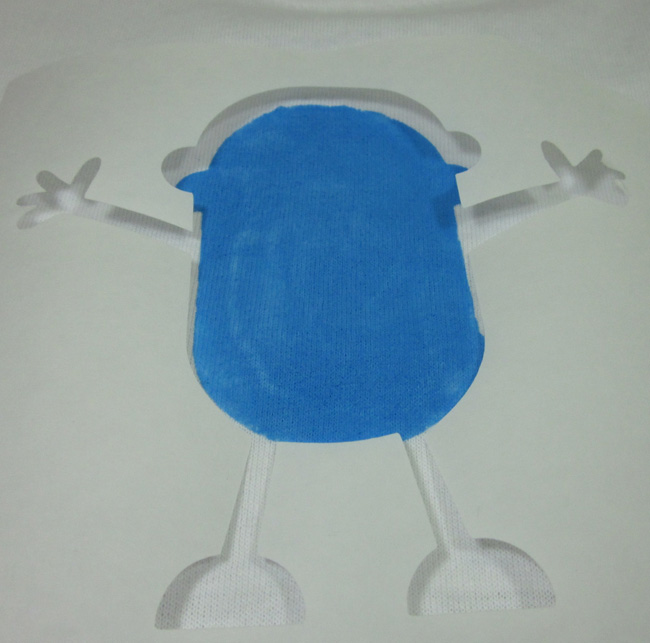
I used the purple Tulip fabric paint for the arms and legs.
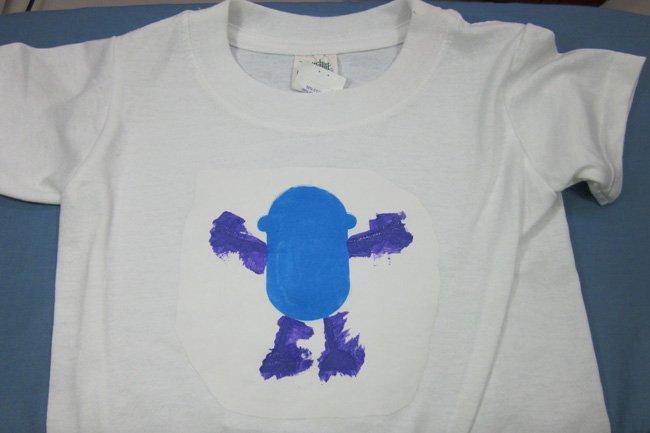
You can be messy. You’re going to pull the wax paper and your messiness right off. No problem.
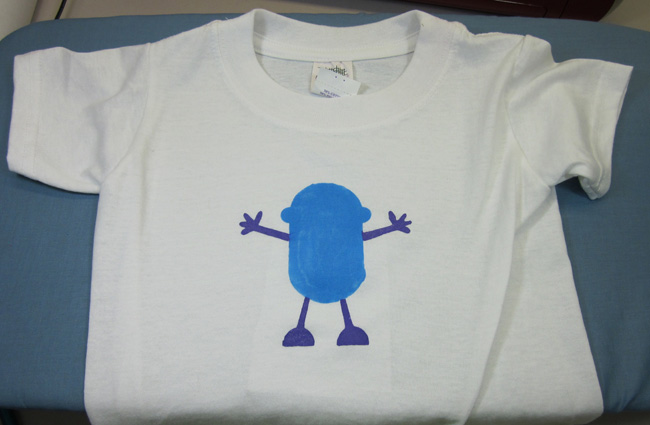
TA DA!! No mess! So then…I let that dry FOREVER (or 4 hours that just seemed like forever). Then I did the COOLEST thing. I mixed some glow in the dark paint with white paint for the mummy bandages. SO COOL!
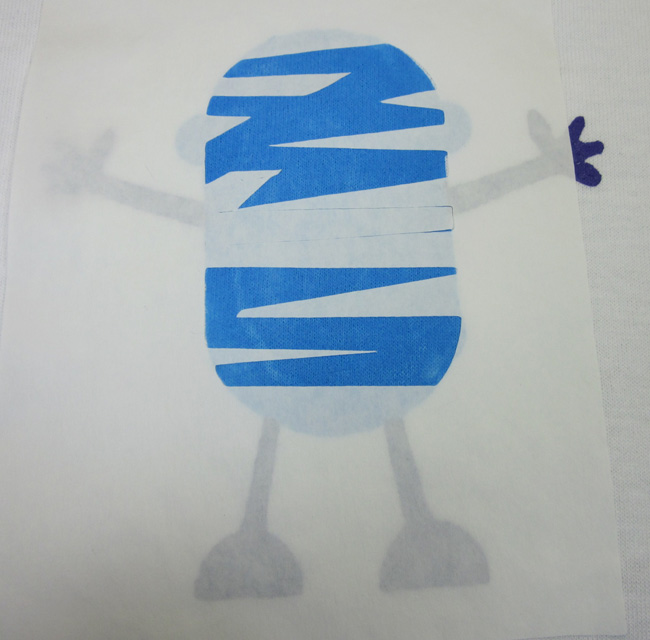
So here are the mummy wrappings all ironed down. Then I just painted over that with the white/glow mix. I also used the plastic cover from some tape I bought as a little mixing area. I’m becoming quite the recycler. 😀
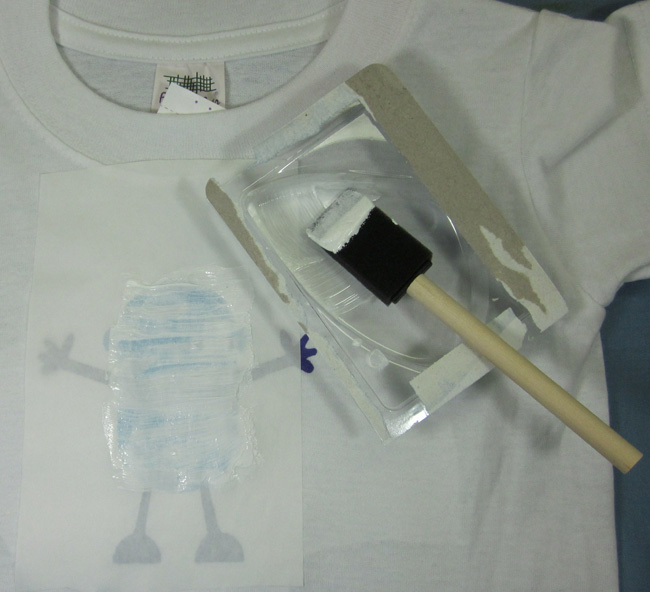
This was the hard part for me. I dotted on eyes and freehand painted on the mouth.
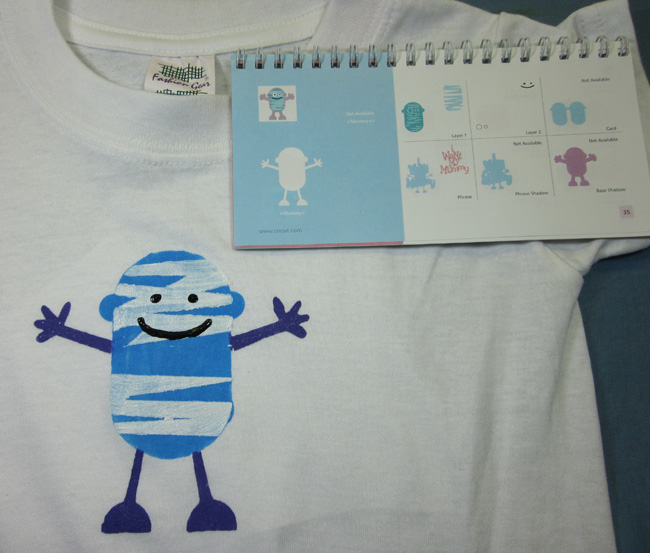
I think that turned out pretty cute! I have one more little tip that I found to be quite helpful. Pull the freezer paper off soon after you paint, don’t wait for it to dry. If you do, sometimes it’s harder to pull off. I remembered to pull it off early until I got to the bandages. I was working on another project at the same time and the bandages were close to being dry when I pulled off the freezer paper. In some places it didn’t come off easily.
Here’s the BEST PART!!! It GLOWS IN THE DARK!!
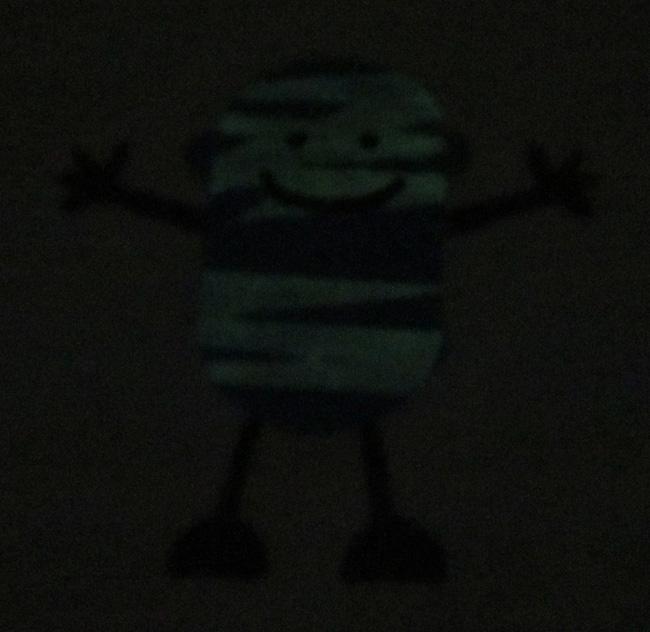
Isn’t that super cute?! I really like the way it turned out. This freezer paper technique is fun and inexpensive. I hope you have a good time making your things!
Don’t forget to hover over all of my pictures for some mummy related fun and facts.

Great project! He turned out so cute! I was just telling my two little bros that I could make them some shirts for Halloween this year. I’ll have to incorporate that glow in the dark paint.
P.S. Your mummy jokes totally make me want some Laffy Taffy. Yummm…
Bbcairlets,
Your little bros are going to think you rock more than I’m sure they already do. I bet your shirts will be AWESOME! For sure add the glow in the dark paint for 2 reasons: #1 you can hold your brothers under a bright light claiming it’s just for shirt reasons, #2 You can close your brothers in a closet claiming it’s to see if their shirts glow. LOL! 😉
~Joy~
Aww this is really cute and although time consuming it seems relatively easy too.
Kim xXx
Kim T,
Thank you! Also, it would be much faster if you just use a single layer. It’s super easy! 🙂
~Joy~
omg! omg! omg! That is the cutest thing ever! I love the mummy–I made my DD a card with him on there and it said “your mummy loves you” lol! I am going to have to try this! Super cute from Super Joy!
Thank you SharonS! I love the “Your Mummy Loves You” idea! Adorable!!
~Joy~
I enjoy your site so much! So glad I found you on the blog hop! Great project. Loved the step by step instructions and photos…. and the mummy info. 🙂 Janis
Janis,
Thank you so much!! 🙂 I’m so glad you found my site. I’m happy you’re here!
~Joy~
Super cute. Thanks for the show-n-tell on the glow in the dark paint–great photo! Love the corny jokes.
7524kes,
Corny jokes is my middle name. 😀 It’s sort of a stupid middle name, but my parents were kind of weird. LOL!
Yeah, that glow in the dark paint ROCKS! I’d never used it before and I’m thrilled that it worked out as well as it did even after I mixed it. Thumbs up to that!
~Joy~
What a great job Joysan LOL! I love this project and it is just up my alley 🙂 I may have to try this with my paper dolls dress up cart (since I dont’ have any of the new Halloween ones). Just curious did you put something inside the shirt between the layers when you painted, or did you have trouble with it bleeding through?
As always I am inspired by the things you do!
MaryJo,
THANK YOU for asking about putting something inside the shirt. I just updated the post based on your question! 😀 Yes, I put freezer paper inside the shirt so the paint didn’t bleed through. Just be sure NOT to leave the paper in there (or use something else) when you iron the different layers or you’ll end up with paper ironed to the inside of your shirt. You’ll be able to remove it, but still. 😛
Thank you so much!! 🙂 BTW, I think the paper dolls would be really cute!
~Joy~
Thank You for sharing this project. I am going to make my son a shirt & was going to do a search on how to. Now I do not have to search.
I want the Mini Monsters cart so bad. Trying to find a good sale cause I have been out of work. May have to just buy it. LOL
Tricia
PS Love the glow in the dark paint. Have you seen the Martha Stewert glow in the dark glitter?
Thanks Tas66! 🙂 I have seen that MS glow in the dark glitter and as much as I hate glitter (due to it ending up in my eye all the time, LOL), I really want to try that!
~Joy~
Absolutely adorable! What a fantastic idea, I can’t wait to try it out. Thank you so much for sharing! You also did a great job of painting you Expression purple. 🙂
Thank you Liliana! 😀 Love your name. My daughter is Lillian “Lilly”. 🙂
~Joy~
I like to use cardboard from my recycle bin (collapsed cereal boxes work great) when I craft paint on clothing, but couldn’t really see anything in the pics so thought I would ask 🙂
It would be great to go around the edges or detail with a puffy paint too! Gotta love the glow in the darks!
I see a custom Snow White tee in my daughters future 😀
Awesome idea Mary Jo!!
~Joy~
Such a cute idea Joy! Mini monsters is on my list of cartridges to get. Can’t wait. Have tons of ideas for shirts 🙂
This is such a great idea! I might have to try this one out!
So cute! I need that cart now! Love the jokes, too! So, when you iron over the parts you already painted, it doesn’t hurt the paint or the iron?
List of things to buy:
Freezer paper
mini monsters cart
tulip paint- don’t forget glow in the dark!
The one thing I have: sponge brushes! YAY!
I am thinking about sewing on buttons for the eyes…..and then maybe embroidery stitch hash marks for the mouth…..hmmmm……
Thanks so much for posting this! I love it!
Your ttorial is excellent and I think I’ll give this a try. Love, love, love your mummy jokes. As a long-distance Gram, jokes are one way to keep in touch with my granddaughters.
This is wonderful! I love your mummy jokes and shirt. Thanks so much for all the info.
Joy this is fabulous! I want to go to the store asap! So awesome.
Hugs,
Raven
What a great idea! I’d like to try this in the future! I could go crazy with all the designs available! I like the homemade look!
Love this project! I did one on an apron and made some t-shirts. Super easy! The face looks really cute. Thanks.
This is a great idea! I can’t wait to try with my niece and nephew!
Quick update Miss Joy! I just got back from the store and my hubby thought I was crazy buying Freezer paper (which he had never heard of) and tons of Tulip paint! You are making my craft store RICH! Oh and guess what I found while I was there those clear art blocks…….hum gonna have to pick those up soon tooo. lol
super cute! I used to paint t-shirts but this way looks much easier. have to make some stensils now. TFS!
How totally cute!! Like the idea to use glow in the dark paint, I’ll have to try that. I have used the freezer paper before without a lot of success. I like to use vinyl instead.
Woohoo! Sounds like a new adventure with my cricut. Have to say that I love this site- Helps me become adventuress 🙂 Thanks
Adorable!!! I love this one! I think grinning pumpkins would be cute too! 🙂
So cute! I’ve been playing around with using Freezer Paper to make shirts, but I didn’t think I could layer them for some reason! :-p Durrrr!! I might have to stop by the store to get some shirts to make for trick or treat night on Sunday!!!
Oh me like….great to do with the grandkids!!
Thanks Joy,
xoxoxo Mickey
This is terrific! Now I want to go out and buy a bunch of plain shirts & hats to decorate for my son. 🙂
(The jokes were cute, too! 🙂 )
Joy,Great project!Really cute. I also love your nail polish.Joy