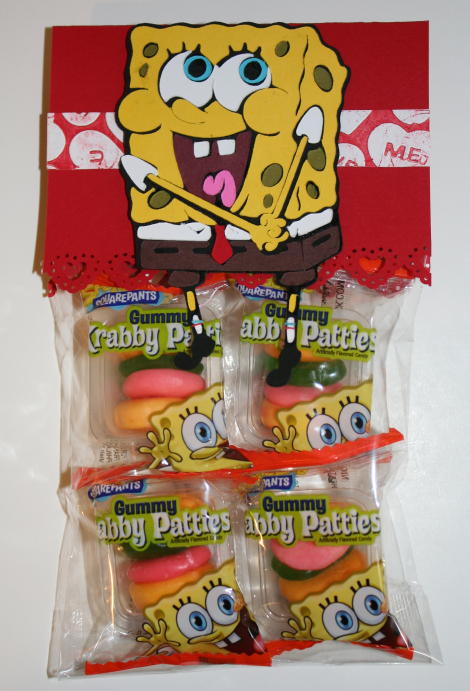
Spongebob AND edible Crabby Patties!! SCORE!
When I bought the Spongebob cartridge, I wasn’t even a fan. I’m still not a fan of the show (my kids are) but I LOVE this cartridge. I love how cute his is, I love Gary (the snail), I love how fun this whole cart is. How can you not smile when you see that happy sponge? I’ve used other cuts from it.
Click here to see other times I’ve used this cart.

Bob uses ALL of these colors. Wow, Bob! You’re a lot of work.
Bob can be difficult to make. You must start with the black body first and build up from there. He also needs a lot of different paper. I was so excited that I finally found the right red for his mouth that I actually sent DH an IM to tell him about it. He’s so sweet he actually thought that was pretty great. How nice. 🙂 Bob uses ALL of these colors. Wow, Bob! You’re a lot of work.
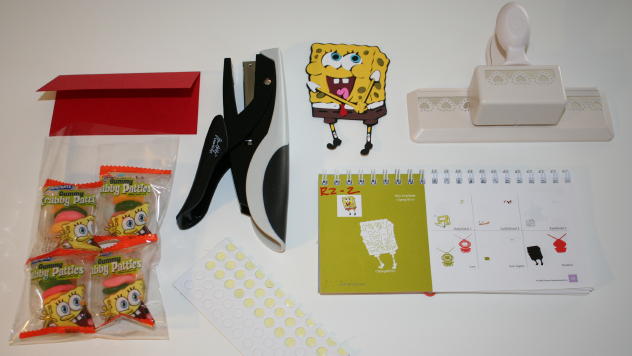
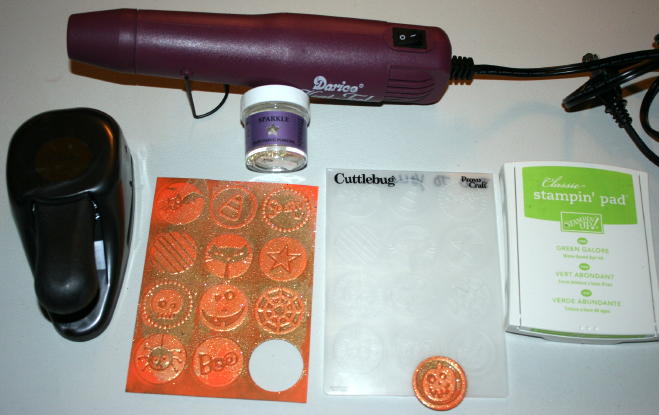
See that stapler? That’s the Tim Holtz Tiny Attacher. I LOVE it!
So, after I got Bob ready I had to prepare the treat bag. Have you ever made a little treat bag? It’s so easy. You’ll become addicted to making them. I made this one for my cousin’s little boy, Dylan. Dylan recently broke his leg. Poor thing. He’s just a little guy too. I sent him a little package and made this treat bag especially with him in mind. I hope he likes it!
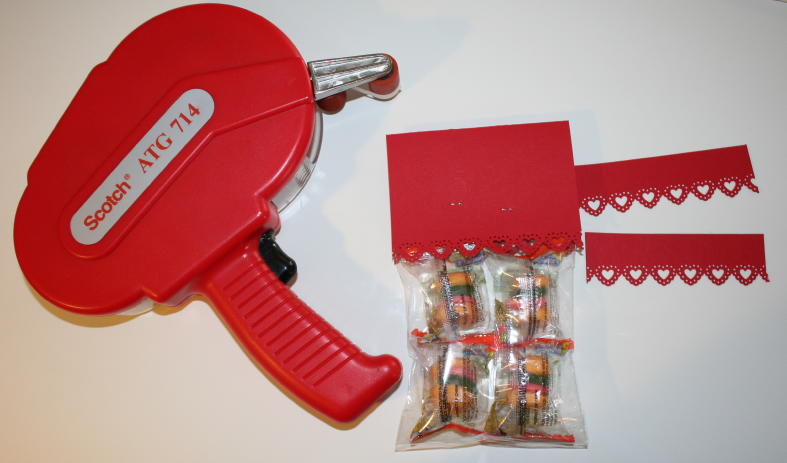
That hottie on the left? That’s my ATG gun. It ROCKS!
In this project, I used a Cello bag from Stampin’ Up to put the Crabby Patties in. If you are about to put an order in for some, I’d say get the medium and the large. I never use the small ones. The Cello bags are the best, I think, but you don’t have to use those. You can buy bags at any craft store. In a pinch, I’ve taken Ziplock sandwich bags (clear) and cut the Zip part off of them. Then you just tie them with a ribbon and you’ve got a cute treat bag. Very inexpensive and easy to keep on hand. Here’s a treat bag I made with a bag I got at a craft store (not a Cello Stampin’ Up bag).
Basically, all you do to make the treat bag is to fold over a piece of cardstock that is just a bit wider than your bag opening, so that it covers the whole bag top. I score my paper in half and use a bone folder to give that fold a nice crisp look. Then you just staple the cardstock to the bag. Cello bags take staples easily without them pulling out.

It’s important to have a clean, organized work space. Not important to me…but to some. LOL
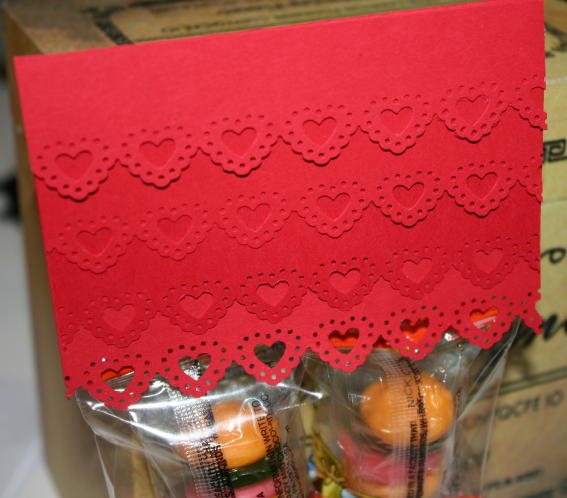
Are you freaking out at how cute those hearts are? It could just be me. Hmmm…
Ok, I’m a BIG BELIEVER in covering the places where you staple the topper to the bag, especially when you’re giving this to a child. The last thing you want is to scratch or hurt someone with your gift. Not good! (Unless you really don’t like the person, in which case you probably shouldn’t be spending your time making them a gift…also if you find yourself doing that you might need therapy ’cause that’s kinda twisted…just saying.)
So, this is what I used that Martha Stewart heart punch for…the one I showed you yesterday. I punched the bottom of the topper on both sides. On the back (above), I punched out 3 additional strips of red cardstock and used my ATG gun to adhere them in layers to the topper. I just thought that was a really cute idea. It covered the Tiny Attacher staples AND fit my Valentine/Love craft a day until V-Day promise.
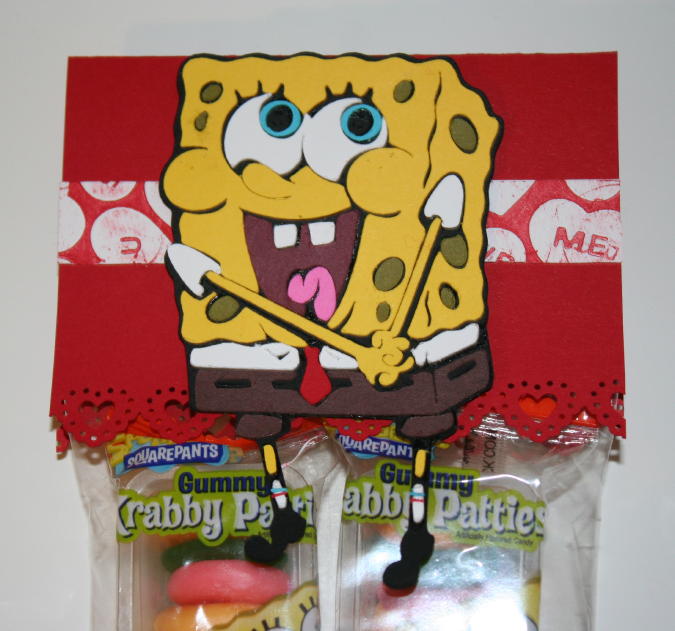
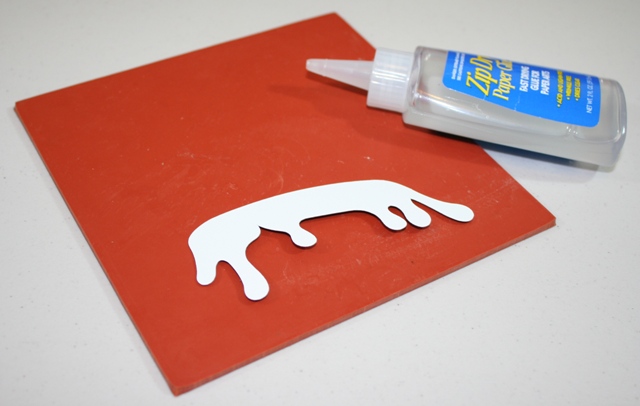
Lastly, I took a piece of white cardstock and ran it through one of my newest Cuttlebug folders (Conversations) which I had inked in red. Click here for more on how to do that. I glued that down and then added some pop dots to the back of ole’ Bob and stuck him down. Then…that was it!! TA DA!!!
I just love making these. So…Go Make a Valentine Treat Bag, They’re Fun!!
You might enjoy these other SpongeBob crafts and info!
- Spongebob Crabby Patty Valentine Treat Bag
- SpongeBob Cricut Card & Quick Candy Bag
- 1st Card Using Spongebob Cricut Cartridge
- Cricut SpongeBob Cartridge Contents
- How to Alter Altoids Tins


That is an adorable idea. I may have to do that with Mickey and Minnie . Personal Prayer……..can I win a big lottery so I can stay home and craft the night and day away? Will there be enough money so I can pay a maid? Will there be enough money that I can buy every known crafting die, crafting tool , crafting machine created ………….lots of paper and make beautiful things. (Maybe I should look for government grants and open my own store)
Have a great day everyone!
OMG!!! I love this – I will be “borrowing” this idea! You are awesome!
Cindy
I forgot to ask how big you cut Spongebob?
Costapuck, thanks for asking that question. I totally forgot to mention it. I cut Spongebob at 4″, I think you could still work with him at 3″, but 4″ really made it easier. 😉
~Joy~
I, like you are not a Sponge Bob Fan either.. Yet, all 4 kids are as well as the old hubby. But I have to say that this is got to be one of the cutest things i have seen.. You really did a great job… Love to see more. Keep them coming..
Thanks Joy 🙂
Cindy
What is this Tim Holtz tiny attacher?? And how come I don’t have one yet? Love the way spongebob turned out and the back of that is amazing!!
Oh Gale, the Tiny Attacher is a JEWEL among staplers!! It is basically a stapler, but the staples are….you …guessed it…TINY! I’ve meaning to do a post about it. I’ll get to it soon!
~Joy~
Wow, so impressive! I’m sure it will be a big hit. Thanks for the Tiny Attacher info.
WOW! This is SOO AWESOME! Kids just LOVE SPONGBOB and so do I! LOL
Ohh a variation of this bag would be perfect for my son’s b-day party this year. We’re doing it in Sponge – love love love this for the treat bags.
I’m strange. I love Sponge Bob. I find my self watching it even if the kids arnt home.I know wierd right.
Oh ya! we are talking about the treat bag. “LOVE IT”