Learning a new serger can feel overwhelming at first. That’s why I put together this beginner friendly class order using Sookie Sews tutorials. These 4 projects helped me master my Bernina L890 step by step and they can help you too!
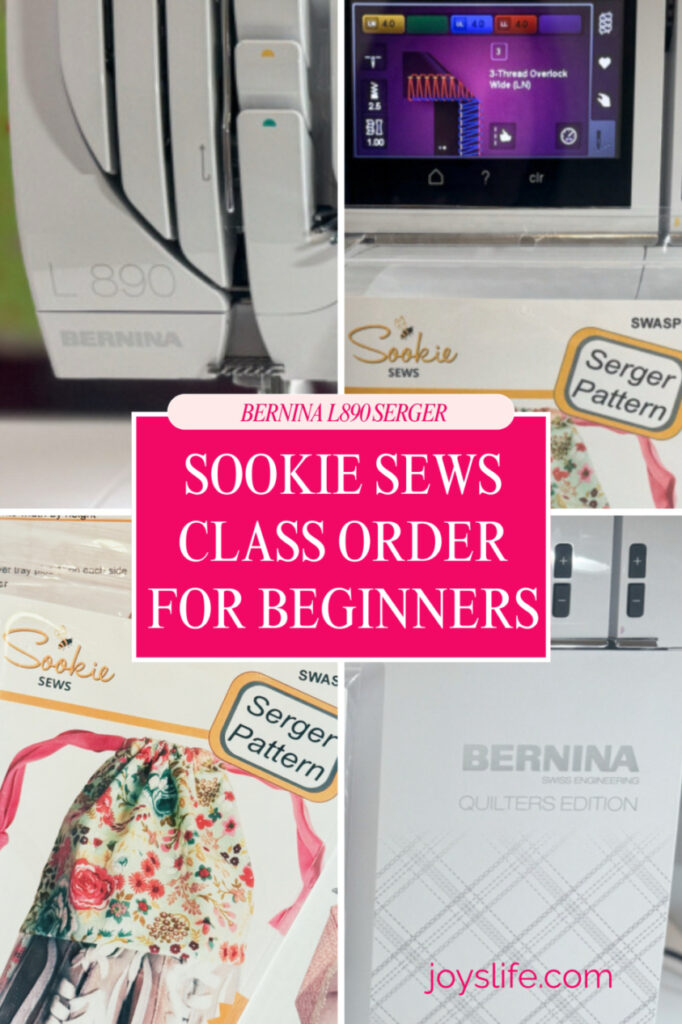
As a new Bernina L890 serger owner, I decided to learn my serger by taking a variety of classes. I started with serger classes by Sookie Sews, and they have taught me so much about my machine while giving me a ton of ability and confidence.
These are the first four projects I’ve done, following the Sookie Sews class order I recommend for beginners. Her video classes are extremely helpful and well filmed. Taking them in this order worked out perfectly for me, helping me go from being a basic beginner to a much more confident user.
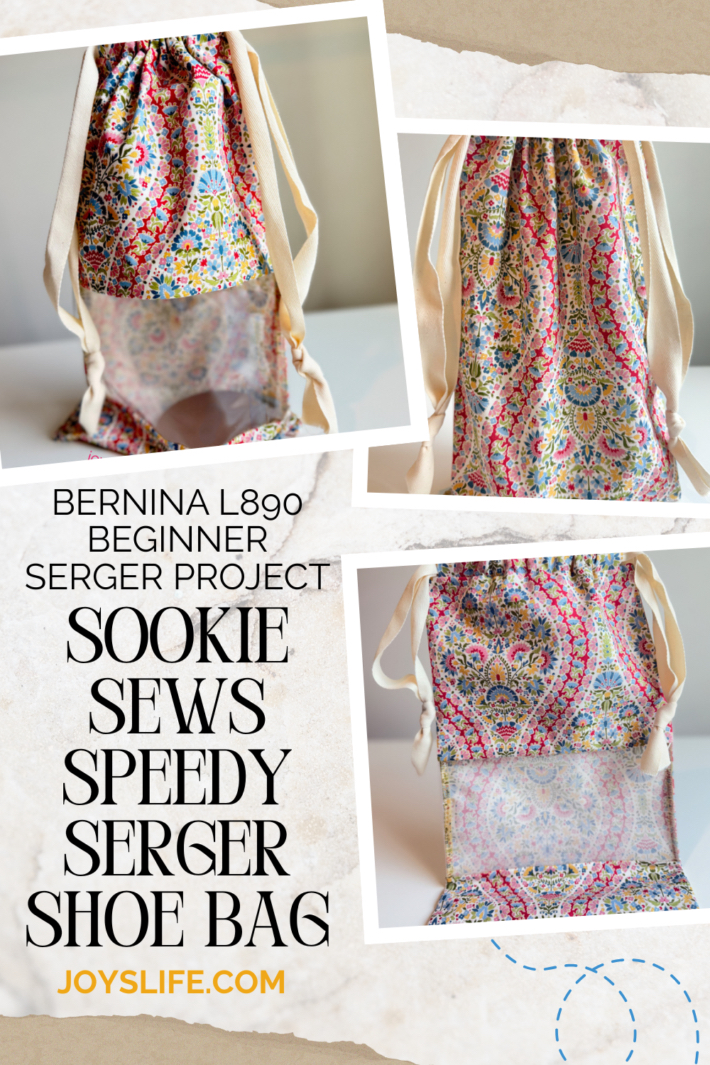
Project 1: Speedy Serger Shoe Bag
This was my first Sookie Sews serger project. In this first class, I learned so much about my Bernina L890 serger. It was simple and a great way for me to get started. I have used a serger before and a 4-thread overlock was not new to me, but new to me on this machine.
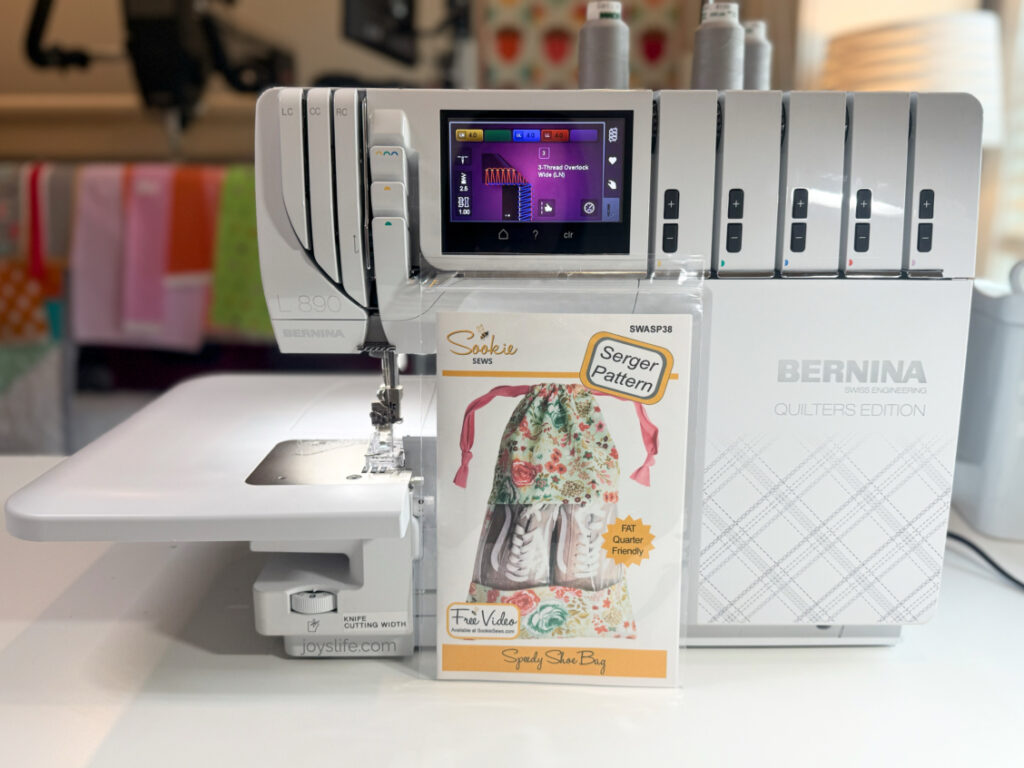
Sookie Sews Class Order – What I Learned in Project One
- How to sew with clear 8 gauge vinyl. I’ve done a lot of things with iron on and heat transfer vinyl, but I’ve never sewn with plastic clear vinyl.
- Gained more experience using the 4-Thread Overlock and standard foot
- Adjusting differential feed
- Determining seam allowance from the needle to the blade
- Tips on prepping wrinkled vinyl
Thoughts on this project:
I’ve made drawstring bags before, and I LOVE THEM, but making one on the serger really was like leveling up. It’s so freeing to learn how to use other machines and techniques to make things that you enjoy and can really use.
This was a great first project because it was quick and perfect for a beginner. The class dealt with basics and didn’t go into too many different things, like some later classes.
Learn more about the Speedy Serger Shoe Bag
Here is some more info about the Speedy Serger Shoe Bag class and how I made mine.
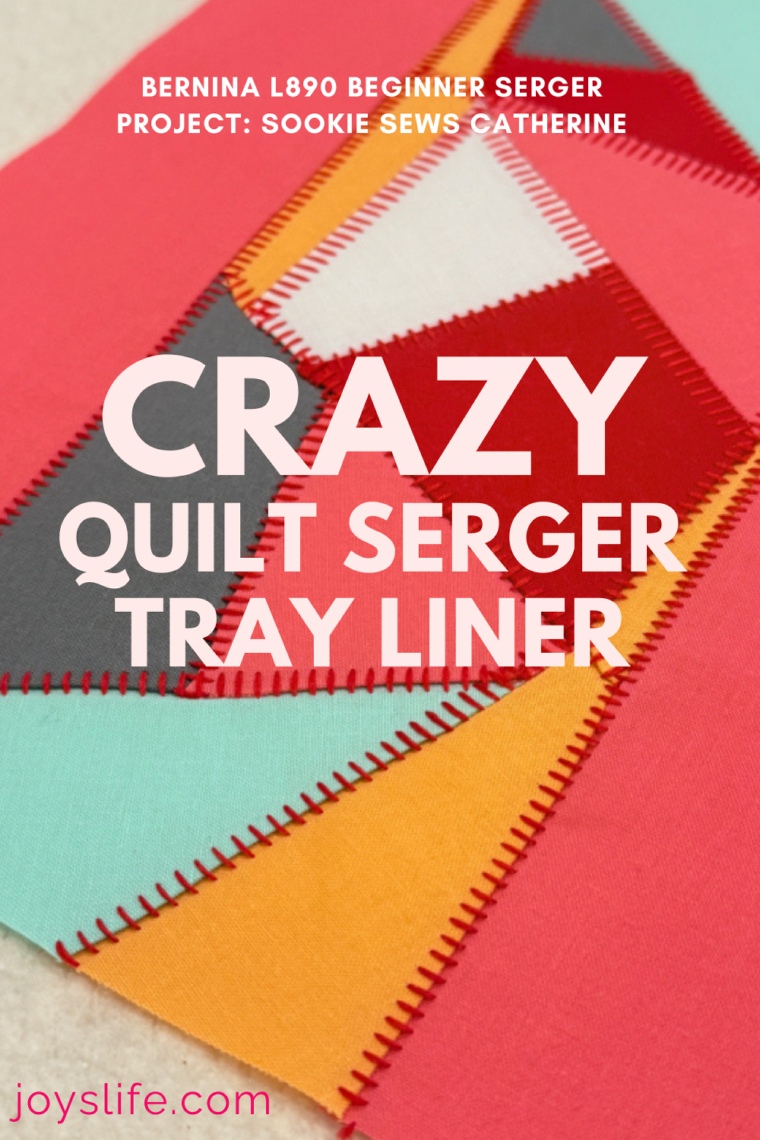
Project 2: Catherine Crazy Quilt Serger Tray Liner
So far in my fabric arts journey, I’ve primarily been a quilter, but I’ve never made a crazy quilt. This project really helped me be able to see and undertstand what makes them special. Going forward, I will take more time to study crazy quilts when I see them in real life. This was my first time using 12 wt Wonderfill Spagetti thread and Wonderfill SoftLoc.

Sookie Sews Class Order – What I Learned in Project Two
- 2 thread Flatlock stitch
- How to make a crazy quilt
- How to thread needles and loopers with decorative threads (I was so impressed that there were several tips with options for threading depending on what you may or may not have available)
- How to use decorative threads in creative ways
- Sookie’s “cotton candy stitch”
- How to bury threads (I knew how to bury threads, but it’s so helpful how many tips she gives about finishing thread ends)
- Then, she had 6 more helpful bonus videos
Thoughts on this project:
This was so much fun to make and my first time trying a flatlock stitch. I was amazed by how beautiful and functional it was. I followed her instructions, but in the end, I decided to cut my project in half and sew it back together differently using more flatlock stitches. I felt confident enough to change it up! I turned it into a mug rug that fit a space right in front of my keyboard – perfect for a small plate for when I eat at my desk! I also love looking at it and remembering how much I learned and enjoyed making it.
Learn more about the Catherine Crazy Quilt Serger Tray Liner
Here is some more info about the Catherine Crazy Quilt Serger Tray Liner class and how I made mine.
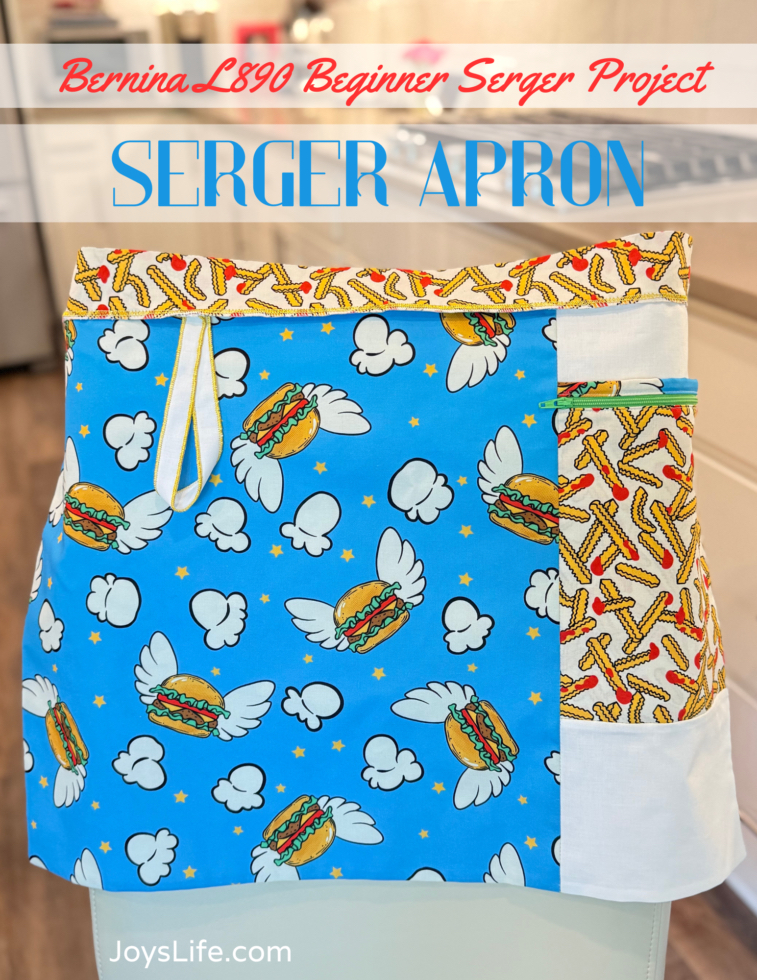
Project 3: Cookin’ In Color Serger Apron
I was really glad that I had taken the other classes first, because I used some of the things that I learned previously. Plus, the familiarity with my machine made what I thought might be a complicated project, much easier. I truly enjoyed making this and am so thrilled with how my apron turned out. I had such a sense of accomplishment and I knew that my skills had really grown.
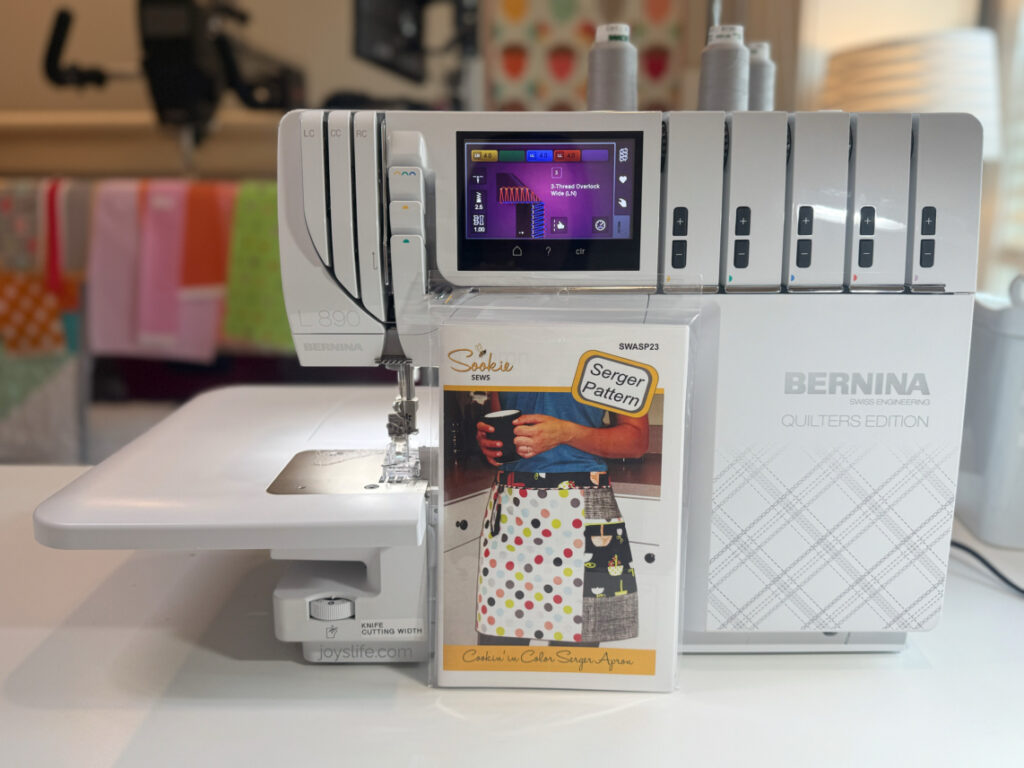
This was my second time using 12 wt Wonderfill Spagetti thread and Wonderfill SoftLoc, because I used it in my second Sookie Sews class. I was really glad that I had previous experience with it, because it felt even more important here, probably because I’d purchased specific fabric, zipper and threads. When I made the 2nd project, I used scraps. I would not have wanted to learn specialty threads on this project because I didn’t want to mess it up.
Sookie Sews Class Order – What I Learned in Project Three
- How to use the 5mm piping foot for zipper installation (SO COOL)
- 3-thread rolled hem
- 3-thread wide overlock
- How to make perfect corners
- Double sided Pocket
This class teaches many more things, but some I had learned in the classes mentioned above.
Thoughts on this project:
Honestly, this project blew me away with how satisfying it was to make. I can’t say enough good things about it. You should make it.
Learn more about the Cookin’ In Color Serger Apron
Here is some more info about the Cookin’ In Color Serger Apron class and how I made mine.
Project 4: Hideaway Hanger Safe
This was my fourth Sookie Sews serger class. I wasn’t sure that I would use the item, but I knew it would be a great skill builder, and it was.
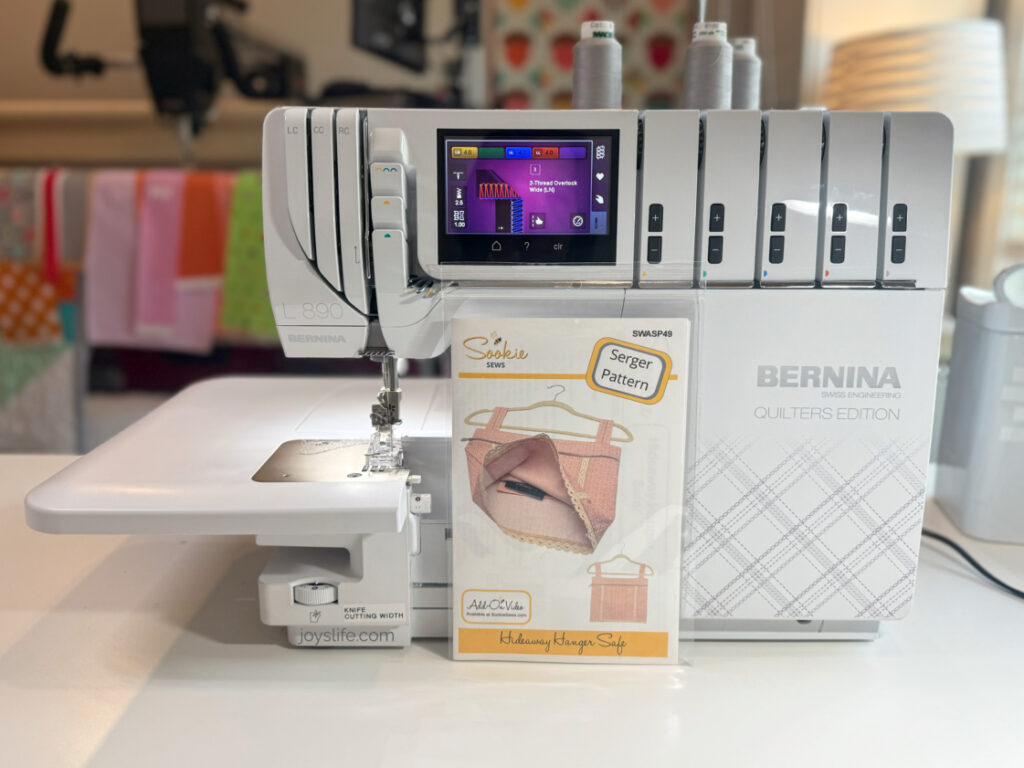
Sookie Sews Class Order: What I Learned in Project Four
- Rolled hem pin tucks – (I had done a rolled hem in the last project and was glad I had tried it before because it made me more confident to try the pin tucks using it)
- Lace insertion
- How to use the blind stitch foot
- How to put zipper pulls on zippers by the yard (used Pink Stripe Zipper Tape with Nickel Teeth by Sassafras Lane Designs).
- I also used Handy Zipper Jig by the Gypsy Quilter for the first time. (You can burn the ends of the zipper tape to keep it from fraying…which I should have done because that zipper tape frayed like crazy.)
- I used my Brabantia Sleeve, Neckline, Shoulder, Small Garment Ironing Board (24 x 4 inches) for the first time to steam an inside seam, and I was so happy that I bought it previously. You do not need it for this project, but I bought it because I want to make clothes and this was a suggestion for making some items.
This class teaches many more things, but some I had learned in the classes mentioned above.
Thoughts on this project:
I am SO GLAD that I made this. It gave me so many new ideas for how I might use these skills on garments AND now I want to take this project to a new level and turn it into a bag with multiple large pockets.
Learn more about the Hideaway Hanger Safe
Here is some more info about the Hideaway Hanger Safe Serger class and how I made mine.

Final Thoughts on My Sookie Sews Class Order
So, finally … what I’m trying to say is… this was an amazingly perfect Sookie Sews class order to take. I did it this way mostly by accident, plus a tiny bit of planning, and it totally worked out. But you should follow the Sookie Sews class order on purpose if you’re new to serging. I think you’ll agree this order is totally doable and will build your serging confidence quickly. Plus, it’s super fun!
Sookie Sews offers more classes than these four, so be sure to check them all out!
I’m not affiliated with Sookie Sews in any way; I just truly enjoyed taking her serger classes and found them incredibly helpful for learning my Bernina L890.
Want to Explore a Little More?
- Speedy Serger Shoe Bag – Beginner friendly project to practice serger skills while making a useful bag.
- Crazy Quilt Tray Liner – Learn the flatlock stitch in a fun project with decorative stitching.
- Cookin’ in Color Apron – Practice coverstitching while sewing a colorful, practical apron.
- Hideaway Hanger Safe – A clever storage project that adds zippers, lace, and pintucks to your skills.
- UPS for Sewing Rooms – Why a power backup protects your machines and keeps sewing stress free.
Check out my favorite sewing & craft resources — just a curated list of the thread, tools, and supplies I use most.

