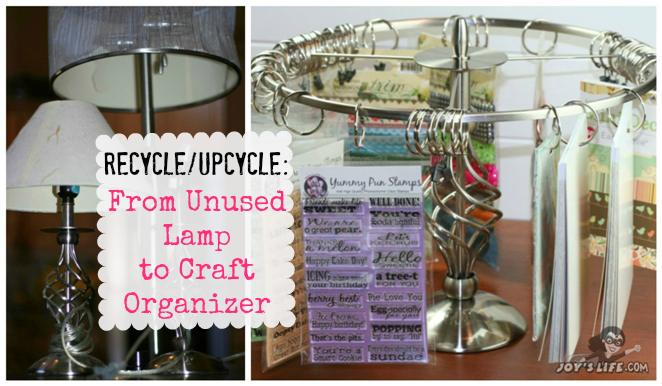
Have you seen the Simply Renee Clip It Up? I haven’t used one but it looks like a great product to me. About a month ago, I came across Kat’s tutorial about how to make your own Clip It Up. I was so thrilled because she used lamps she got from a thrift store to create hers. I just happened to be getting rid of some lamps and they were PERFECT for this project. I knew it was worth a try!

This is one of my favorite upcyle project that I’ve made so far! Check out these projects for more upcycling inspiration!
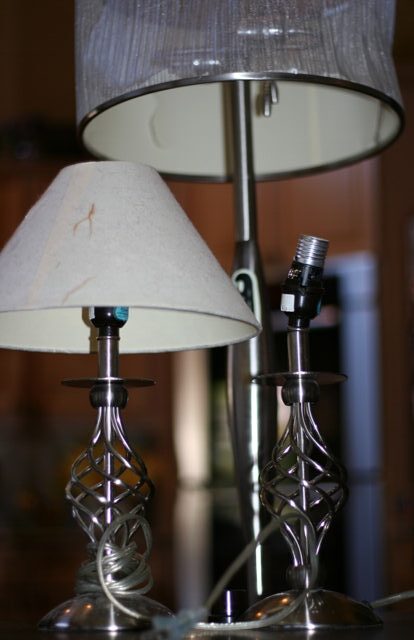
I’m so glad I let these lamps live in the garage on the borderline between garbage and give away a few more days. I’d be kicking myself all over town if I’d let these babies go! The nicest thing for me about this project is that I was able to use things I already owned. If you decide to try this for yourself I definitely suggest checking out a garage sale or thrift store if you don’t already have a junky lamp or two…or three. 😉
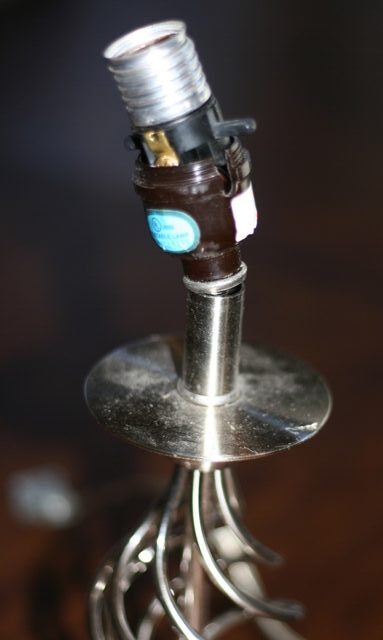
If you don’t know much about lamps, you’ll be happy to learn that they aren’t usually too hard to take apart. MAKE SURE IT’S UNPLUGGED. Remove the light bulb and shade. Next, hold the lamp at the neck (or at the base depending on your lamp style) and begin twisting in opposite directions. You should notice some movement there. That’s where you’re going to want to begin taking it apart.
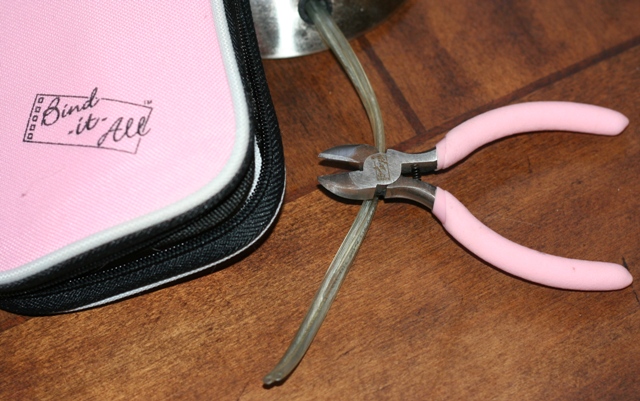
Years ago I took a class on how to rewire lamps. It was so cool. I’ve rewired a bunch of them and find it very satisfying. When I took that class I bought some great wire stripping and cutting tools. Guess where they are? Gosh. I was hoping you’d tell me the answer because the last time I saw them…MY HUSBAND HAD THEM! Now all I can find are my Bind It All tools which I keep next to my Bind It All (see here for Bind it All posts). You know what I think? I think you should buy any tools you want to keep in PINK so SOME PEOPLE don’t take them for their own. Just sayin’. 😉
So, if you can find some wire cutters…cut the plug and pull it out of the lamp. Ya don’t need it anymore unless you just like getting tripped or electrocuted.
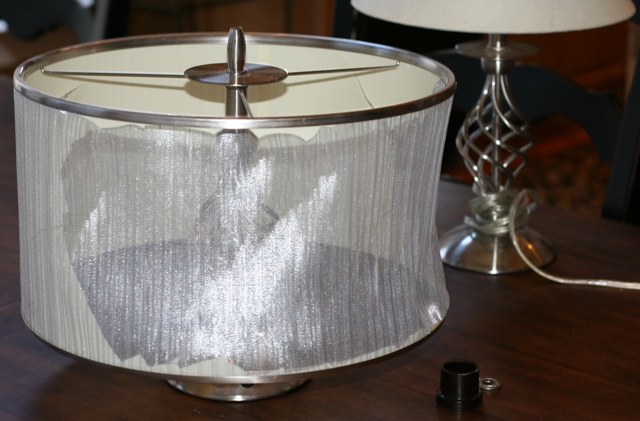
Here’s where I tested out the shade from the tall lamp on the short lamp base. It looks like it’s dressed as a ghost for Halloween. I rearranged pieces of the lamp until the shade fit like I wanted it. If you follow Kat’s link at the top of this post you’ll see that her creation is tiered and will spin. Mine is one level and won’t move. I’m seriously considering putting it on a lazy susan that I own and don’t use. Who knows what I’ll makeover next? Maybe I’ll turn my cat into a bunny. I’ve always wanted a bunny. LOL!
I was very fortunate to have lamps with parts that turned out to be interchangeable. My small lamp’s finial even fit over the new shade giving it a nice finished look. Don’t get discouraged if you don’t have simple lamps. You can buy the things you need at the hardware store. The only thing you absolutely MUST HAVE (to make an item most like the Clip It Up) is a shade like the one I’m using.

Next, I had to take the lampshade apart. I’m only using the top part of the shade. (I saved the bottom part for a future project.) I thought it would be fun and easy to remove the fabric and lining of the lampshade. I was SO WRONG. That stuff is much stronger than you’d think. I put my all purpose kitchen scissors to work on it. It was a pain in the bad word.
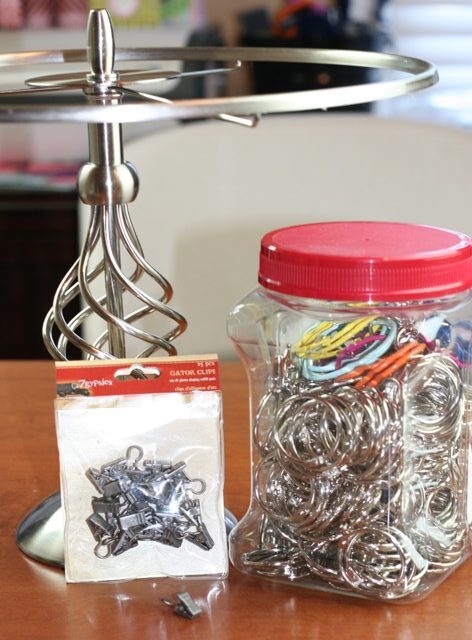
I thought these 7 Gypsies Gator Clips were going to be perfect. They weren’t. The ones I have are extremely hard to open AND the hanger part on them is too small to hang on my shade. Darn. I went on Amazon and ordered the Simply Renee Clip It Up Swivel Clips (you can also try these small curtain clips) but they aren’t going to be here for a few days so I decided to use those 1″ metal rings
that I have in bulk. I bought them a year or more ago when I got a ton of them for a few dollars. They turned out to work well for my purposes. However, if you’re often removing your items from the ring, that would be a pain. That’s why a good functioning clip would be better. Having the swivel ability is even nicer.
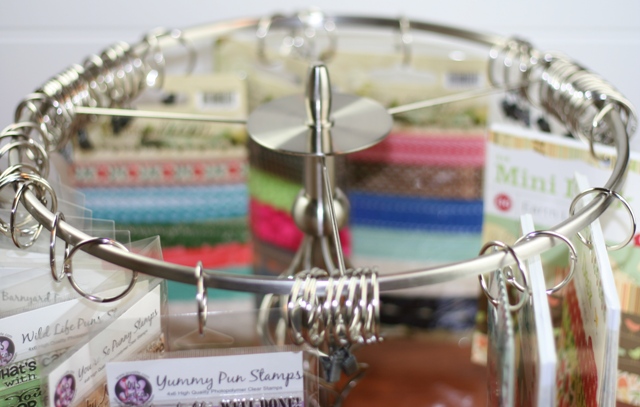
I’m thrilled that my little project worked out and that I was able to upcycle my tired and pitiful lamps for a new use. Now I can hang up paper packs and some of my Joy’s Life stamps! I hope your project goes well! You know what works even better than my faux Clip It Up? The real Clip It Up. LOL! You can always buy one here.
UPDATED 2025: I don’t think they make the Clip It Up anymore. I have looked and looked. I used to link to it here. If it’s still around let me know and I’ll fix the link. That was a great product, but meanwhile, you can still make one!
I love to reuse and upcycyle things! Check out these other repurposed items!


OOoooo I have to make one or maybe two. All of my clear sets are in a tote and I can’t see them well enough to use them as much as I would like.
Thanks for the idea!!!!
OMG!! That is a super idea.
WOW! That is such a BRILLIANT IDEA!!! Of course I don’t have any lamps around my house….. I guess it’s because I have really good ceiling lighting… tehehehe Oh well… I own a thrift store sooo when I get a lamp in I’m gonna try this idea! TFS! 🙂
Theresa
YOU…are a genius!
You have got to be kidding me, I am gonna have to try this too, thanks JOY!
This is TOO cool! And so what I need! Thank for sharing this. I am going to send all my friends over to see it. They are going to want one for themselves.
Cool project Joy!
Awesome idea! and Yes! Maybe I’ll dig out that lamp from storage–
You could also use drapery rings with clips. I haven’t tried them for anything–so I don’t know about the size or anything; just an idea . . .
Coolest thing ever!
LOVE IT!!!! **Looking around my house at all my lamps!!** LOL!
This is such a fabulous idea!! I already own a Clip It Up, but it’s completely filled. I have thought about getting another one, but they are quite pricey. I think your home made clip it up looks prettier than the orignal, plus it’s way more economical. Thanks for the great tutorial. I am definitely going to make one. 🙂
Thank you, Lori! I can’t wait to see what you make. I bet it will look awesome!
~Joy~
Joy,
Awesome idea! I have a booth at a local antique mall, and am always looking for better ways to display small items. This is PERFECT for so many things that I already sell in little baggies… cards, scrapbook supplies, jewelry, magnets and mini note pads. I am so excited to make a couple of these!!!
Thanks so much for sharing,
Desiree 🙂
Desiree,
I’m thrilled that this will be able to help you in your booth! That’s so great!
YAY!!!
~Joy~