Here’s what I wanted to do:
I wanted to make raised images, that I created using embossing folders, really “pop” off the page just using ink.
Here’s what I used:
For this experiment, I used the Cuttlebug Swiss Dots embossing folder in my Big Shot and some leftover pieces of black cardstock. I also used a white pigment ink pad and a Brayer roller.
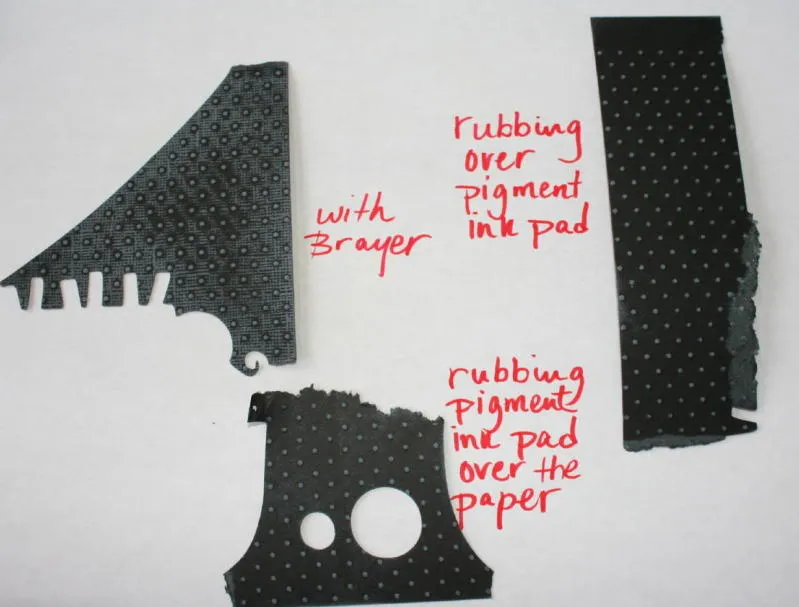
These are the 3 things that I tried:
- First, using the Brayer to go over the Swiss Dots folder embossed paper.
- Next, rubbing the paper over the pad (pad sitting on table).
- Lastly, holding the paper and rubbing the pad over it.
Here are the results of my experiment:
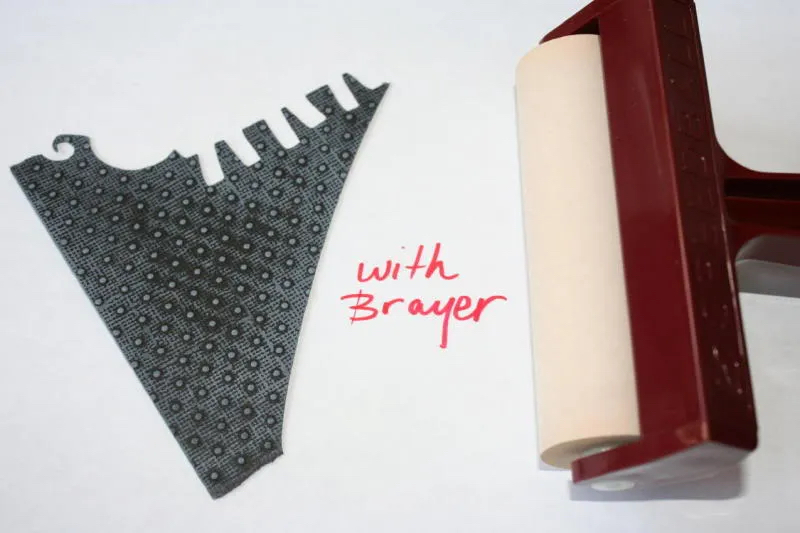
Using the Brayer produced a cool modern look.
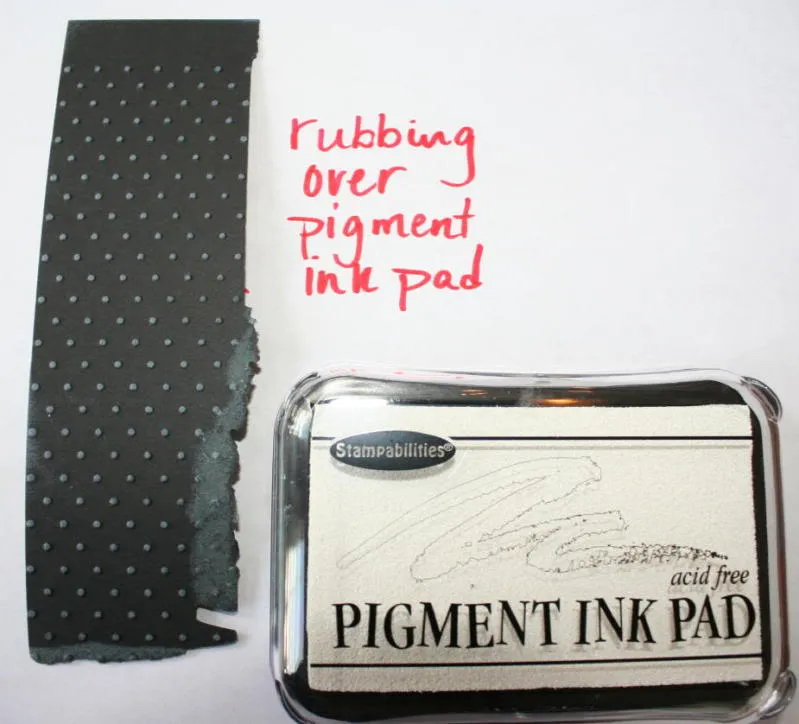
Gently rubbing the paper over the ink gave me the result I was looking for. Yay! The dots pop and there isn’t a lot of ink on the flat part of the paper between the dots.
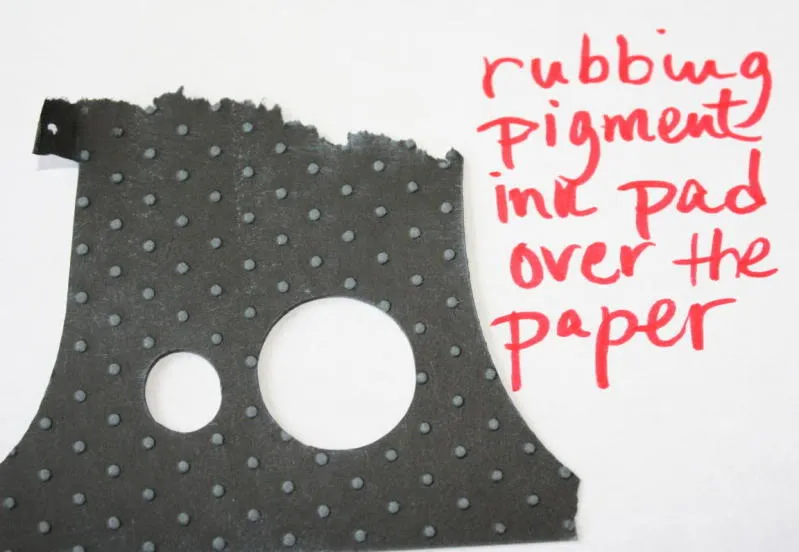
Holding the ink pad and rubbing it on the paper gave me coated raised dots, but also produced a lot of color on the flat parts of the paper between the dots, which I didn’t want.
I hope this helps someone (besides me)…or at least is found mildly interesting, LOL. I think I like embossing things with my Big Shot as much as I enjoy my Cricut Expression!