Why did the police arrest the turkey?
They suspected it of fowl play.
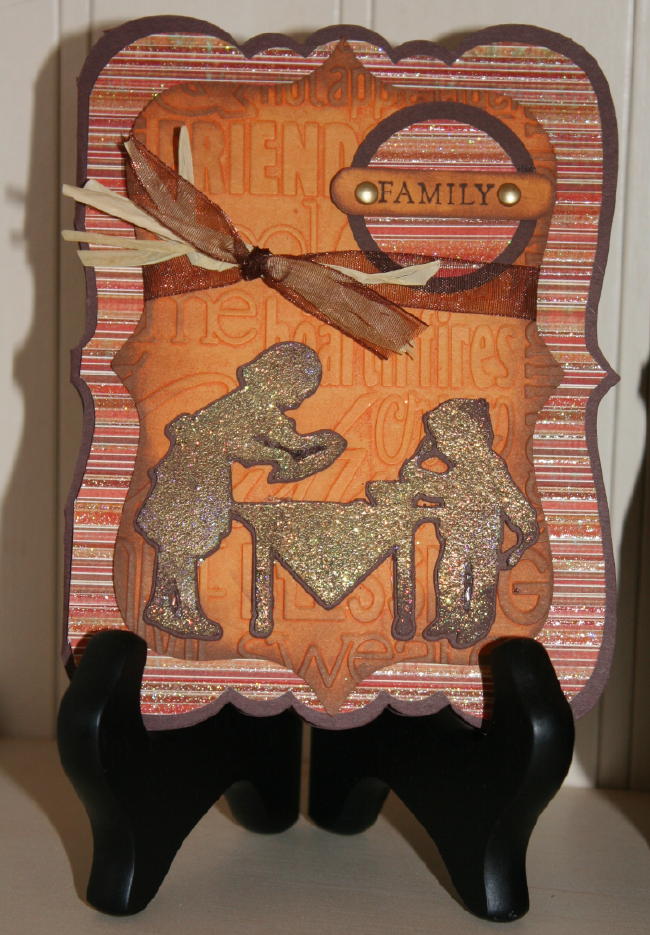
Do you just love these invitations?! Please say yes. I think they turned out so well! I started making them using a yellow cardstock for the background where the mother and child are, but I ran out of yellow 1/2 way through. That’s why I have a yellow”ish” background and another card has an orange background. See…
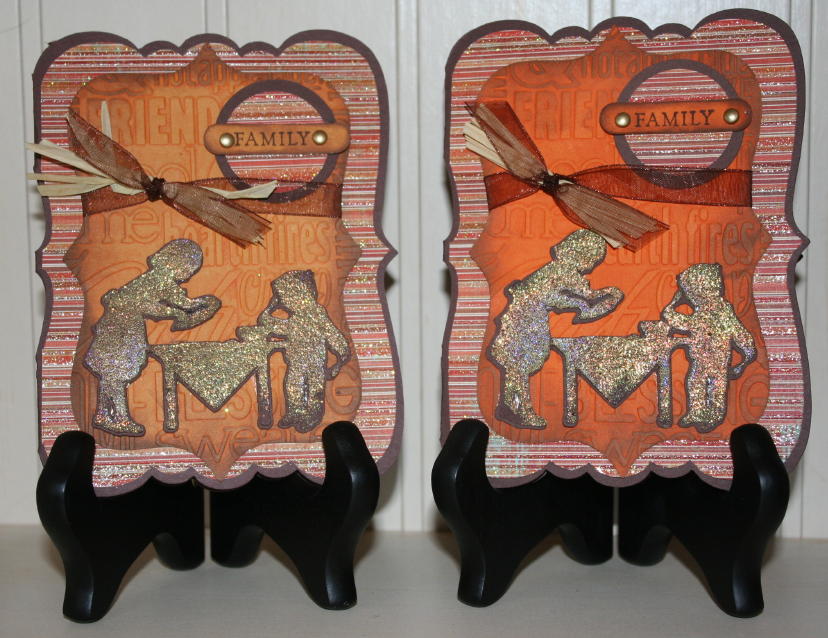
… and honestly I don’t know which one I like better!
Here’s What I Used:
Cricut Cartridges: A Child’s Year (mother and child setting table pg. 67 & card shape pg. 54); Storybook (orange or yellow colored shape background pg. 66); George (largest circle pg. 108)
Punch: Stampin’ Up Word Window Punch (where “Family” is stamped), Fiskars hole punch, 1 3/4″ circle punch EK Success (smaller circle)
Stamp Set: Stampin’ Up Fundamental Phrases (“Family”)
Paper: All Solid Paper is from Stampin’ Up: Chocolate Chip, Pumpkin Pie and a yellow/gold paper from Earth Elements; striped glitter paper from My Mind’s Eye, Fall in Love by Jen Wilson (bought at Michael’s)
Ink: Stampin’ Up More Mustard & Chocolate Chip; ColorBox Fluid Chalk Inkpad Chestnut Roan
Embossing Folder: Cuttlebug Autumn Type
Other Supplies: Raffia, Brown ribbon, Gold brads, ATG gun, heat tool, gold embossing powder, glue pad

Here’s How I Made them:
- I cut the card (A Child’s Year pg. 54) to fit a standard A2 sized envelope.
- I made the striped background by cutting out another card shape, but smaller and then cutting it in half.
- I then cut the solid color background (Marquee1 from the Storybook cart pg. 66).
- I inked up the Autumn type Cuttlebug folder using Stampin’ Up More Mustard ink. Click here to learn how to ink embossing folders.
- I ran the folder though my Big Shot.
- I chalked the edges of the embossed part of the card with the ColorBox Fluid Chalk Inkpad in Chestnut Roan.
- I cut the mother and child image and the shadowed image.
- I pressed the mother and child image into a glue pad and then covered it with gold embossing powder.
- I used my heat tool to melt the embossing powder.
- Then I assembled the embossed image to the shadowed image.
- I cut small pieces of raffia from a large bundle I have. You can buy that at most craft stores. I got mine at Michael’s.
- I tied raffia into the knotted ribbon. The ribbon is tied all the way around that part of the card.
- I had a punch that could make the smaller of the circles where “family” is stamped, but I had to use the George cartridge to cut a larger circle.
- I stamped paper with the “Family” sentiment using Stampin’ Up Chocolate Chip ink.
- I punched out “Family” using the word window punch.
- Then I punched holes in the sides of the word window and added brads.
- I glued everything down with my trusty ATG gun.
I hope I didn’t leave anything out. I enjoyed making this card. Even though there were a lot of steps to making it, I found the whole process to be fun. Now, if I’d hated the result, I probably wouldn’t be so happy. Remember when I tried a whole bunch of things on that burned donut card? Nothing could save it from its true ugliness. LOL As the saying goes, “That’s like putting lipstick on a pig.”
I hope all the recipients of this card enjoy it. It’s an invitation to Thanksgiving at our house!


Nice! I like the yellow.
No wait….orange!
eek, I can’t make up my mind. lol
LOL, Tammy!! I feel the same way! 😛
This is so nostalgic. Brings back childhood memories. ; ) Great job!
What a neat card! I need to go check out my child’s Year cartridge! 🙂
Thank you for such detailed instructions! I won’t lift your whole idea, but I may play with pieces of it if you don’t mind! 🙂
What a beautiful card. Thank you for your detailed instructions.