Tutorial: How to Glass Etch…Cricut Created Stencil

This was my first glass etching project in 2009.
That was super fun!
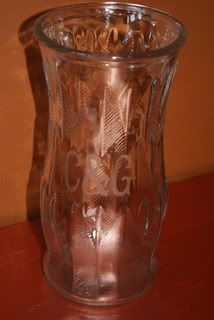
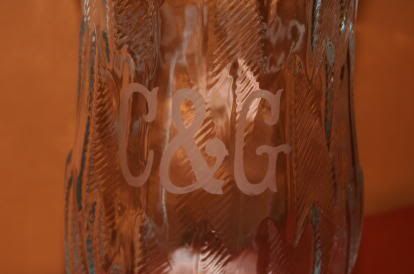
I glass etched an inexpensive vase that I had sitting around. I LOVE the way it turned out! It’s amazing to me that you can turn something so ordinary + ugly and boring, into something personalized and cool! This first project I made for my inlaws anniversary.
First, I used my Cricut Expression with a marker in it and traced out what I wanted on some paper using the Cricut Cartridge Storybook.
After I decided what would make a good etching, I made a template in vinyl. I used the Cricut vinyl that I bought from a craft store, but you could use any vinyl. I have heard of people using contact paper, but I haven’t tried that.
Next, I smoothed the vinyl down on the vase, making sure the sides where the etching cream was going would be well stuck to the glass. (I only had a slight problem where it leaked on the “5”. Better luck next time.)
It’s tough to re-align vinyl if your design is complex or has small parts to it, so be careful that it’s where you want it when laying it down on the glass. You can move it, but it can be a bit of a pain.
Then I painted on the glass etching stuff: Armour Etch cream

I used a new, but inexpensive ($1) round brush, the kind with long bristles. Got it at Hobby Lobby. (I now use super cheap Foam Brushes.)
Next I painted on the cream, being careful not to get any on me. It has some scary warnings about it…read them.
I let it sit for about 5 minutes, but I’ll probably go closer to 10 next time. I thought it could have gone a bit longer for a better result, so I’ll try it again later.
I just stuck the whole thing under water and washed off the etching stuff before removing the vinyl. It might be better to use a paper towel to remove it, but it worked just fine.
Then I peeled off the vinyl and had this:

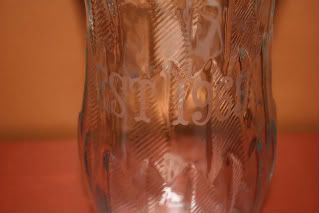
This last photo says “Est 1965” (the year they were married). On the “1” and the “6” it seems a bit more deeply etched in places. That’s also where the vase is ridged. Also, I did get some etching cream around the top and middle of the “5”, so it almost looks like a “P” or a “9”. I gave it anyway, it didn’t look that bad at all. Also, I was out of cheap vases! I wasn’t about to try my hand on some Waterford, LOL.
I’m pretty happy with the way it turned out.
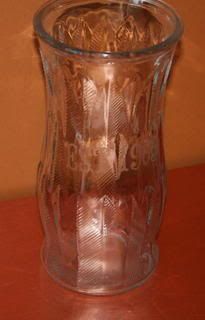
If you don’t have a bunch of inexpensive vases sitting around…you can practice on any glass that you can find. I suggest perusing your local Dollar Store for some glassware. That way if you totally mess up, it’s not the end of the world. KWIM?
Good luck!!
Need to learn this by video? No problem. I have a glass etching project in my Cricut Vinylology DVD. It teaches you how to use vinyl with your Cricut to do all kinds of cool things!
Learn more about it here.
You can see more of my glass etching projects by clicking here: Glass Etching Projects



I usually leave my etching cream on for 1/2 hr or so. Seems to do better.
I also use a light box. That way I can see(old eyes, ya know)if i missed any spot’s.
I was looking at this vase. Look’s like what they called “Carnival Glass” but in the day.
Sure turn out pretty, joy.
I have been doing this for a few years now…Surprising how easy it is to turn something so simple to a beautiful piece of work ! And fast too !!