Design Team Thursday
I’m so excited to share what the Joy’s Life Design Team has created this week using Joy’s Life stamps. They all did such a nice job!

Tammy
I created this gift box and card set using MTC and several svg files. The box was created using Lettering Delight’s “Handled Boxes” svg set. The label is from the Lettering Delights “Delilah Tags” svg set and the sentiment is from Joy’s Life “Father and Son Stamps” set. This box was cut as large as possible on a 12×12 sheet of card stock.
The matching card was created using matching papers, a Lettering Delights “Delilah Tags” tag, Joy’s Life “Mother and Daughter Stamps” set for the sentiment and the frame, I created using a few different svg files layered together. The card is 6×6 and I also added some ribbon, a button and some twine.
You can visit Tammy’s blog here: http://tammyjennings.blogspot.com
Jin
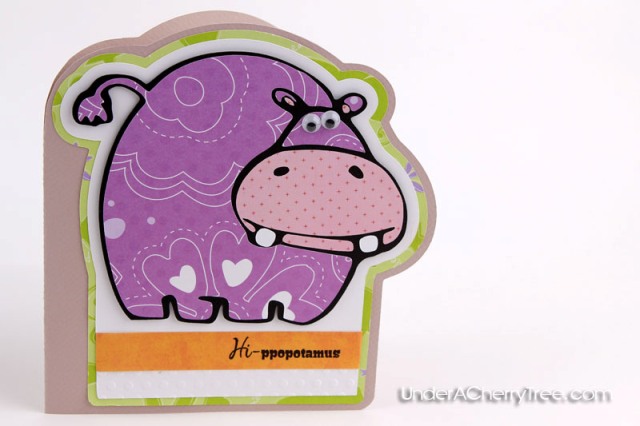
1. Stamp the sentiment from Lots of Pun onto a strip of cardstock.
2. Use Make-the-Cut and Lettering Delights’ Ark Alphabet graphic set.
3. Pixel Trace image at threshold 170 to import into MTC.
4. Using Layer to create layers for the image.
5. Break and delete the number “2”, so that only the hippo is left.
6. Create shadow layer and weld that to a rounded rectangle to form the layer to which the hippo is to be adhered to.
7. Create a shadow layer of that in step 6.
8. To make the card base, create shadow of layer from step 7 and weld a rectangle to the side of it.
9. Make a duplicate of layer from step 8, mirror and position the 2 layers so that they just touch. Weld both sides together to form the card base.
10. Cut out all layers and assemble hippo
11. Emboss the bottom of layer 6 before wrapping the strip from 1 around it.
12. Adhere all layers as pictured, using foam tape on the hippo.
You can visit Jin at her blog: https://www.underacherrytree.com/
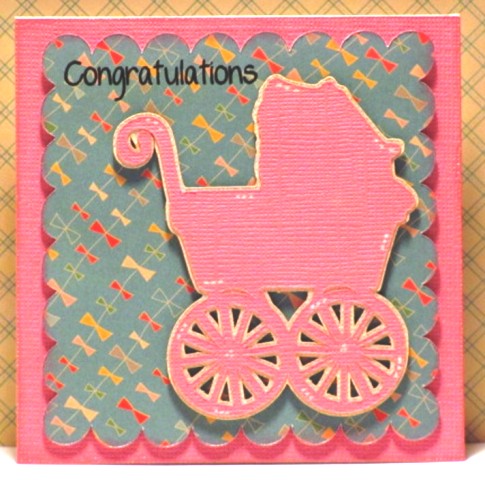
Ruthie
“Congratulations” comes from the Mother & Daughter stamp set. They are interchangeable with the Father & Son set too!
You can visit Ruthie at her blog: http://www.septemberninth.blogspot.com/
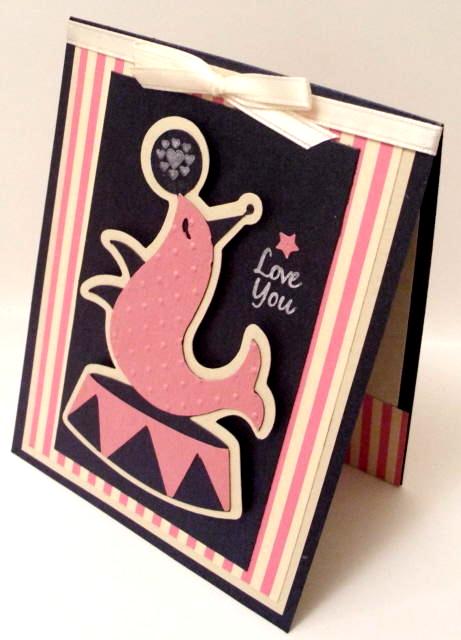
Melissa
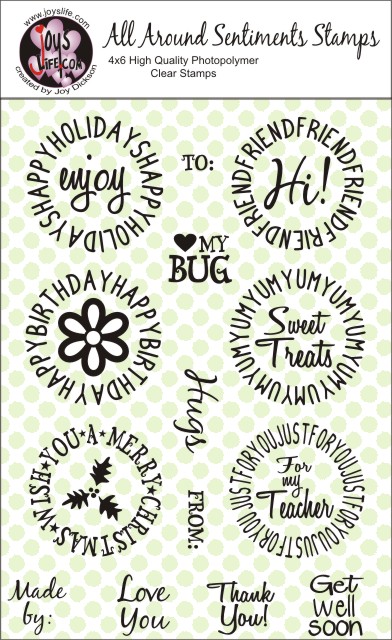
I am so excited, Joy has put together some wonderful stamp sets. I am using Joy’s All Around Sentiments and Lot’s of Pun Stamps for my project. This is an A2 size card, my matting is cut at 4.25 x 5.25, 3.75 x 5 and 3 7/8 x 4 5/8. I used the seal from Birthday Cakes cartridge, it’s cut at 3.9 (Gypsy) and embossed with Swiss Dots. The “Hearts” from Lots of Pun fit perfectly in the ball!! The “Love You” stamp added just the right touch to finish the card.
Products:
Stamps- Joy’s Life
Dark Blue Paper – Recollections
Pink Paper- Bazzil
Striped Paper- GCD Studios
Ribbon- Offray
Adhesive- ATG
Pop Dots- EK Success
Joy’s life Stamps are definitely a must have to add into your craft collection!!
Check out Melissa’s blog at: http://melissa-moecreations.blogspot.com/
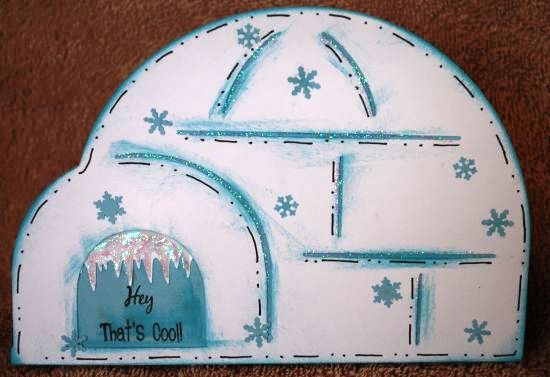
Amanda
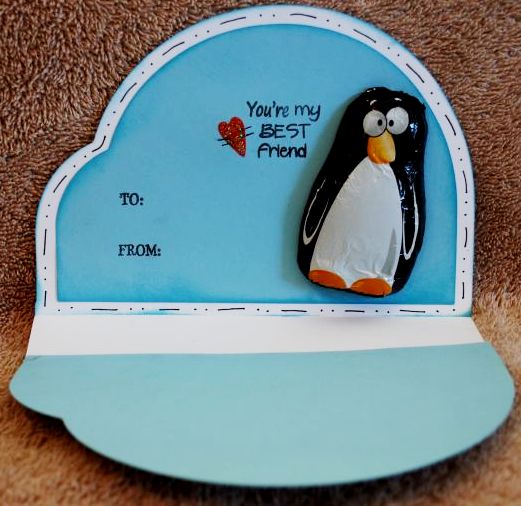
To create my Valentine I used three sets of Joy’s Life stamps. I used “All Around Sentiments Stamps”, ” Lots of Pun Stamps” and “Father & Son Stamps”. You can find all of these stamps in Joy’s store. The base of the Valentine was created with a Gypsy, the Create A Critter Cartridge and the Plantin SchoolBook Cartridge. I finished my project by adding an adorable foil wrapped chocolate penguin, some doodling, some inking, stickles and a snowflake, heart & icicle punch.
You can visit Amanda at her blog: http://amandascraftsandmore.blogspot.com

Theresa
You can visit Theresa at her blog: http://www.thescrapbookingqueen.com
Kyle
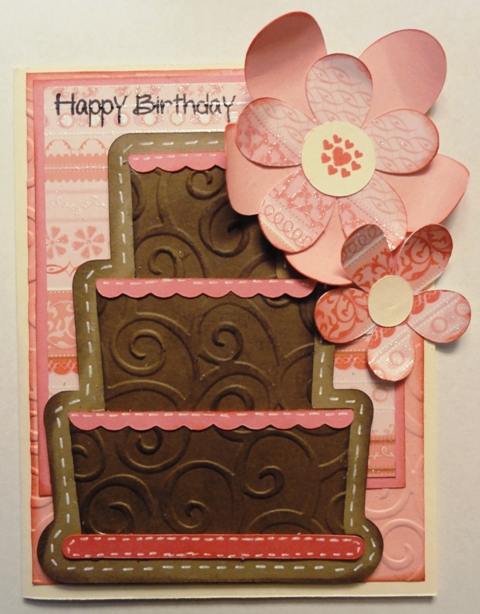
I am honored to be a part of Joy’s Design Team and am looking forward in creating more fun and exciting projects with these wonderful, high-quality stamps. For this simple Birthday Card, I used the “Father and Son Stamps” as well as the “Lots of Puns Stamps”. Here is how I made my card:
Recipe:
– Card stock (Cream (base): 8.5″ by 5.5″, folded in half, Light Pink: 4″ by 5.25″ embossed with CuttleBug-Divine Swirls, Dark Pink: 4.25″ by 3.75″, Patterned Paper (from DCWV Sweet Collection): 4″ by 3.5″
– Sweet Treats Cricut Cartridge (Cake cut at 4 inches with shadow, Brown Layer Embossed with Divine Swirls)
– George and Basic Shapes Cartridge (Big Flower: Light Pink: 2.65″, Patterned Paper: 1.99″, Cream: 0.75″) (Small Flower: Patterned Paper: 1.59″, Cream: 0.5″)
*To assemble roll up all edges and ink with red ink. Stamp the hearts in the middle of the bigger flower. Attach together with adhesive (I used Zip-Dry)
– Joy’s Life Stamps: Father and Son (Happy Birthday), and Lots of Puns (heart)
– Ink (I recommend using Staz-On or Studio G ink for these stamps)
* Also have different coloured ink for the different paper layers.
– White gel pen for stitching
– Adhesive (Zip Dry, ATG)
Go visit Kyle at his blog: thegreencricut.blogspot.com
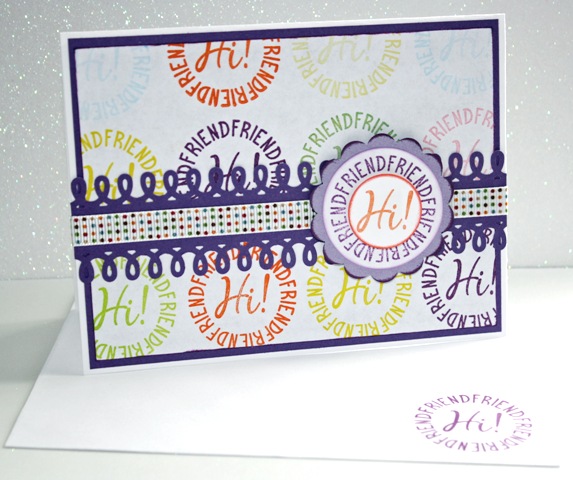
Rosy
Supplies Used:
Joy’s Life All Around Sentiments Stamp- “HI FRIEND”, Studio G Ink Pads (Various Colors), Loop Border Punch, Dollar Bin Polka Dot Ribbon, White Solid Cardstock, Purple Solid Cardstock, 2″ Scallop Circle Punch, 1″ Circle Punch, Circle Cutter, Stamp Block 2″ Square, Small Foam Squares, Bone Folder, ATG 714 gun, Scotch Glider Adhesive.
Card Measurements:
*Base Card: 8 3/4″x 5 3/4″ (Folded: 4 3/8″ x 5 3/4″), *Envelope: A2- 4 1/2″X 6 1/2″, *Purple Solid Cardstock: 4 1/8″x 5 1/2″, *White Solid Cardstock: 4″x 5 3/8″, *Purple Solid Cardstock, Border: 1 1/2″x 5 3/4″ Before It is Punched, *Ribbon: 11 1/2″, *Scallop Circle: 2″, *White Solid Cardstock Circle: 1 5/8″ Diam., *White Solid Cardstock Circle: 1″.
Directions:
*Card Base: Cut White Solid Cardstock to 8 3/4″x 5 3/4″. Score with Bone Folder at halfway point. Fold and run Bone Folder through crease.
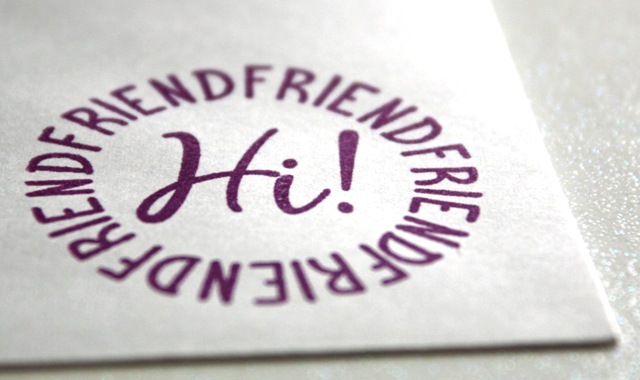
*Front of Card: Cut a Purple Solid Cardstock to 4 1/8″x 5 1/2″. Adhere the Purple Solid piece of Cardstock to the Base Card for background color. Cut a piece of White Solid Cardstock to 4″X 5 3/8″. Stamp with various ink colors the Joy’s Life All Around Sentiment Stamp “HI FRIEND”. For a uniform look Stamp 1/8″ to 1/4″ apart. This technique gives the White Cardstock a Designed Printed Paper look. Adhere the White Cardstock piece with Stamped background to the Purple Cardstock. Cut Purple Solid Cardstock to 1 1/2″x5 3/4″. Take the Border Punch and begin punching the strip of Cardstock at the Center working to the outside edge. Punch the same way on the other side from the center. Again working to the outside edge. Turn the strip of Cardstock to the opposite side. Follow the same punching procedure starting at the center and work your way out to each edge. Adhere Border Punched Cardstock to Stamped Background. Adhere the Polka Dot Ribbon on top of punched Border. the ribbon is to go around the inside of the Card Base. Making sure both ends of the Ribbon meet where the the Scallop Circle will be placed. This is to hide both ends of the Ribbon.
*Scallop Circle Embellishment: Punch a Lilac Solid Color Cardstock with the 2″ Scallop Circle Punch. Ink the edges of the Scallop Circle with Purple Ink. Punch a White Solid Cardstock with a 1 5/8″ diam Circle Punch or Circle Cutter. Stamp the “HI FRIEND” All Around Sentiment in Purple Ink on this Circle. Ink the edges of the Sentiment Cirlcle with a Lilac Ink. Adhere it to the 2″ Scallop Circle. Stamp the “HI FRIEND”All Around Sentiment Stamp on a White Solid Cardstock Scrap in Orange Ink. Punch the word “HI” with the 1″ Circle Punch. Ink the edges of the Circle with Orange Ink. Use the foam dots or squares to adhere it to the center of the white stamped in purple sentiment circle. Adhere the 2″ embellished scallop circle to the card where the The two ends of the Ribbon meet. For a 3D or raised look, adhere the Scallop Circle with foam dots or squares.
*Envelope: Stamp on the bottom right corner the “HI FRIEND” All Around Sentiment with Purple Ink.
You can go visit Rosy at her blog: http://sweetdelightspapernmore.blogspot.com/
Thank you to all of the designers!! You did a great job!!

Your DT did an outstanding job, especially loved the igloo, they are all wonderful!!
I’m a teacher and the igloo is perfect for my upcoming penguins unit. Also, love the “Nuts a bolt you” card; it’s always nice to see non-fru-fru cards for the guys! 😉 Thanks for all of the wonderful inspiration, ladies!
Wow! These are all so awesome! I’m digging the igloo and the cake!!! TFS
hugs,
joni
Love them all…great job ladies!!!
Can I just say WOW! I think everyone’s card was unique and nicely done. But I would love to give a great big SHOUT OUT to Kyle, great card! I am now heading over to his blog, to check out more of his work. TTFN.
Monique
[email protected]
Great cards! I love the igloo, and I’m happy to see the Handy Man cart one since I have such a hard time coming up with men cards. Love the stamp on the Handy Man card. Great job everyone. Joy, you picked a great team of designers.
Great job everybody! I love the igloo!
Wow, great projects everyone!!! You all did an amazing job..
Amanda:0)
What a cool collection of cards.
they did such a great job!
Wow! Great job by all the DT members 🙂 You all made some beautiful projects!
LOVE what your DT has come up with!! Time to get making cards!! Thx for sharing!
Super cute your design team rocks for sure… I blessed to be apart of all the talent… going to leave some blog love for my fellow DT {{{ HEART}}}
The Scrapbooking Queen
I’m loving these! All are great. I love Rosy’s use of the same stamp multiple times. Very nice!
Cute, cute, cute. Gave me lots of ideas.
Great projects, one and all! Now I have to come back when there’s more time so I can visit each of the designers’ blogs!
Thanks so much!
LOVE ALL the DT designs but I think the “nuts a bolt” you card is super cute. Perfect for a male valentine!
The DT team did an amazing job with these projects. My favs are the igloo and tool cards.
Great job…the sentiments are wonderful on them too.
Great Job DT!!!!!!!
love your stamps Joy….
This DT ROCKS!!! Each project is amazing! Thanks for all the inspiration!!!
Your DT did a great job they are very creative!!
kacee
youhadmeatscrap.blogspot.com
Beautiful array of projects, your design team did really well.
Kim xXx
Great job; now if I visit each blogspot; I’ll be looking forever!
Joy,all these cards are so cute,I want to get into card making,Joy
Wow, Joy , you have a GREAT design team!! Love ALL of these cards!
What a great start to the Design team members! It was great fun to see the creative ways they used the stamps!
Thank you DT for sharing. Your cards are inspirational.
Great cards! Love seeing the creativity. 😉
Everyone did a fantastic job. My favorite is the igloo. Great job ladies!!
Joy thanks for sharing…I really love the igloo card, my daughter likes penguins so I might give this card a shot.