Joy's Life

Food, Recipe, DIY & Craft Blog - With Tons of Helpful Tutorials!

  • Home
  • Food & Recipes
  • Silhouette Cameo
    • All Silhouette Cameo Projects
    • Silhouette Cameo Tutorials
    • Cut Files
      • Joys Life Silhouette Files
      • Cutting Files
      • .cut files
      • .studio files
    • Silhouette Studio Designer Edition
    • Silhouette Pinterest Board
    • Vinyl Projects
      • All Vinyl Projects
      • Vinyl Projects Pinterest Board
  • Cricut
    • All Cricut Projects
    • Cricut Tutorials
    • Cricut Expression 2
    • Cricut New User Series
    • Why I Don’t Accept Free (or Discounted) Cricut or Silhouette or Brother Die Cut Machines
    • Cricut FAQ’s
    • Manual Die Cutters
      • Big Shot
      • Cuttlebug
  • Sewing
    • Embroidery
    • Sewing
    • No Sew
    • Brother SE400
  • Home Decor
  • Technology
  • Vinyl Tutorials
  • Store
  • Contact Joy

October 19, 2012 Crafty Projects Crafty Supplies Halloween Holiday Themes Home Decoration Lori Whitlock Design Team Mod Podge Silhouette Cameo vinyl

Trick or Treat Halloween Painted Sign
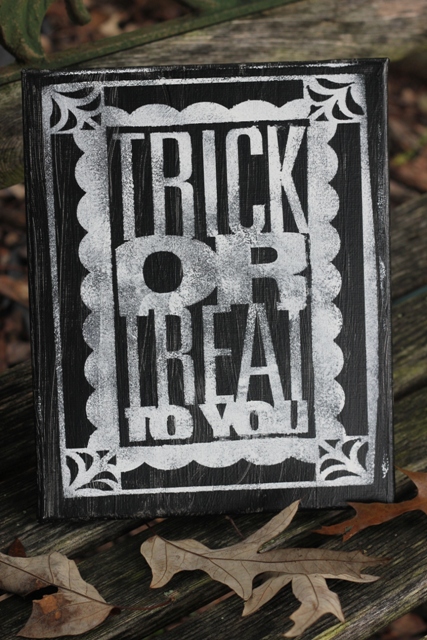
Halloween Sign All Ready for Displaying!

You can make a great spooky Halloween card using Lori’s 3D Card Trick or Treat file. I thought the card was such a cool design that I wanted to be able to use it as part of my yearly Halloween decor, so I grabbed some paint, vinyl and a canvas and created this fun seasonal art!

Need vinyl?  I like to buy mine from Expressions Vinyl.
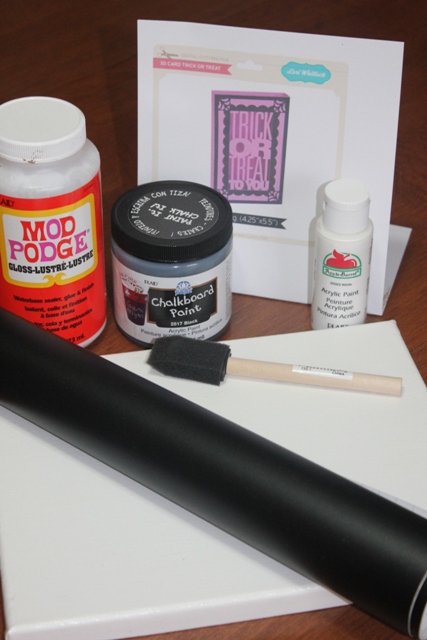
The Supplies

I used Lori’s great file, a canvas, vinyl, two kinds of paint, Mod Podge and some time. You don’t have to have chalkboard paint, that was just all the black paint I had on hand.
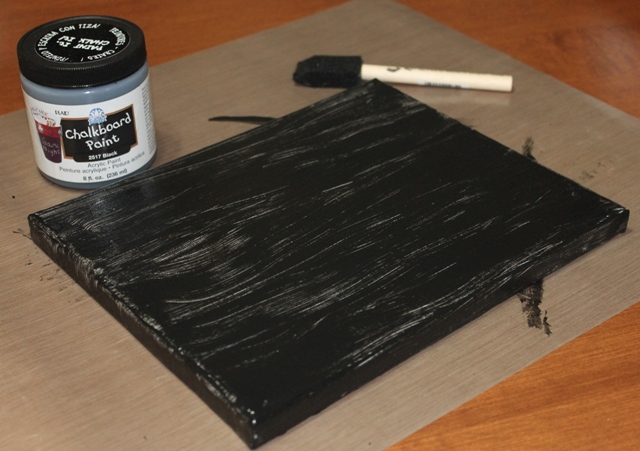
First, I used Mod Podge and then black paint!

The first thing I did was Mod Podge the canvas and let it sit for a few days.  I really only waited that long because I was busy with other projects.  I use Mod Podge because I’ve found that it helps vinyl stick.  Next, I covered it with black paint and let that dry.  I tried to give it a scratchy look.
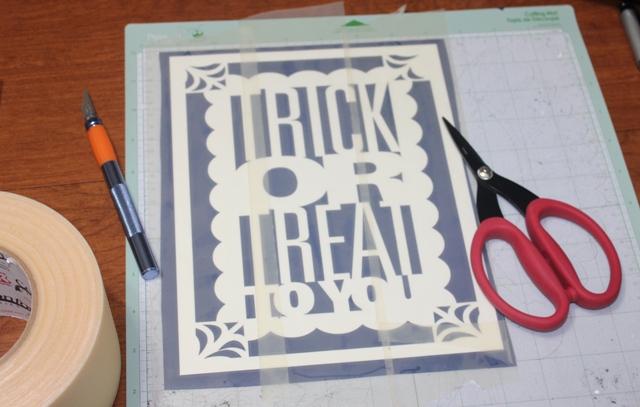
Vinyl & Transfer Tape

I cut the card file out using vinyl in my Silhouette Cameo.  Next, I covered the vinyl with transfer tape so I could move it to the canvas.

Here’s a helpful guide explaining the differences in the current Silhouette Cameo machines.
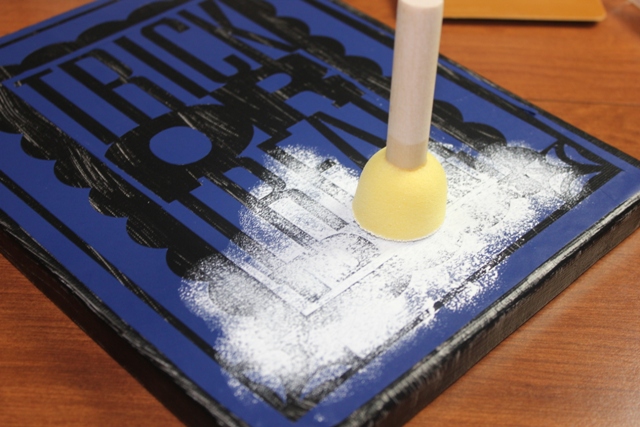
Now for the White Paint!

Once the vinyl was stuck down to the canvas well, I covered everything with white paint.  I used a pouncing motion to help give it a vintage look.  Between you and me, I wish I’d pounced a little less to make it look a little spookier. Oh well.  I still like it.  I’m using a white acrylic paint by Apple Barrel.  You can find it at most craft stores.
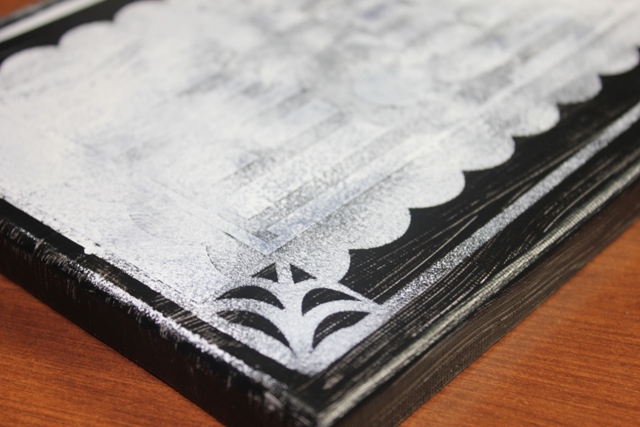
Let dry and peel!

After the paint dries, peel off the vinyl and you’re all done!

Here are other vinyl  projects that I’ve done.
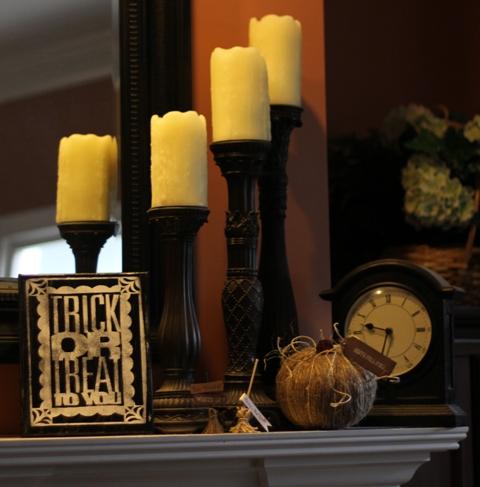
Hey, there’s my sign! …and witch’s brooms … and twine pumpkin … I love Fall!

Happy Halloween!

If you have a Cricut and would like to learn about vinyl check out my Cricut Vinylology DVD!

I wrote this post while participating on the Lori Whitlock Design Team.

Have a Crafty and Wonderful Weekend!


« Fall is Here Chipboard Sign
Simple Spooky Decor for Your Desk – Lettering Delights Exclusive Free Download »

Comments

  1. Joydee1963 says

    October 19, 2012 at 5:26 AM

    Joy,Love how you use the Modge podge and the black paint together,Great project,I love all your fall stuff,Joy
    • superjoy says

      October 19, 2012 at 6:37 AM

      Hey Joydee! Happy to hear from you! Thank you! Hugs, ~Joy~
  2. June Houck says

    October 19, 2012 at 6:14 AM

    Very cool technique! TFS this wonderful tutorial...spooky!
    • superjoy says

      October 19, 2012 at 6:37 AM

      Thanks so much, June!! :) ~Joy~
  3. Michele Hauck says

    October 19, 2012 at 9:23 AM

    wonderful decor! love it.
  4. TeresaK says

    October 19, 2012 at 9:37 AM

    This came out perfect Joy! I love this and love autumn decorating, including Halloween!!
  5. jksmitley says

    October 25, 2012 at 5:55 PM

    I made a bow/clip hanger for my daughter using a piece of canvas and has a hard time getting the vinyl to stick...should have used the mod podge! Cute decor piece for Halloween!
  6. Mary W says

    September 24, 2013 at 12:55 PM

    I love this project and you make it look sooo easy. I'm going to have to try it. I bought some canvas on sale at Michaels, so I'm ready to go! Thanks for the inspiration

Trackbacks

  1. Creative Team Member Joy » Lori Whitlock says:
    October 19, 2012 at 10:48 AM
    [...] instructions on her blog on how she created this cute project. Hop on over and check it out, Joy’s Blog. BEAUTIFUL Joy, great [...]
  • Bloglovin
  • Facebook
  • Instagram
  • Pinterest
  • Twitter
  • YouTube

Hey Y’all!

Joy from Joy's Life

Hi friends! I’m a North Georgia/Atlanta mom, wife, crafter, DIYer, foodie who loves to travel and spend time with my husband & 3 grown kids. Our furry housemates include, Scout, a blue & brown eyed rescue pup and a 5 year old English Mastiff, named Saban. (Roll Tide!) They rule our home. We’re currently working on updating our house after watching way too much HGTV. We’re reno obsessed!

Search

Crafty

Things

You might also like these vinyl tutorials!

Vinyl Snowflake Personalized Jingle Bell

Vinyl Gift – Danger My Inlaws Have Matches!!

Bronze Vinyl Cabinet Makeover – Lori Whitlock Design Team Post

Vinyl Tank & Yin Yang T-Shirts with Cricut

Make the Cut Happy Halloween Glow in the Dark Vinyl Sign Part 2

Affiliations

Joy’s Life is a participant in the Amazon Services LLC Associates Program, an affiliate advertising program designed to provide a means for Joy’s Life to earn fees by linking to Amazon.com and affiliated sites.  Privacy Policy

Copyright © 2019 · Divine theme by Restored 316

Copyright © 2019 · Divine Theme on Genesis Framework · WordPress · Log in