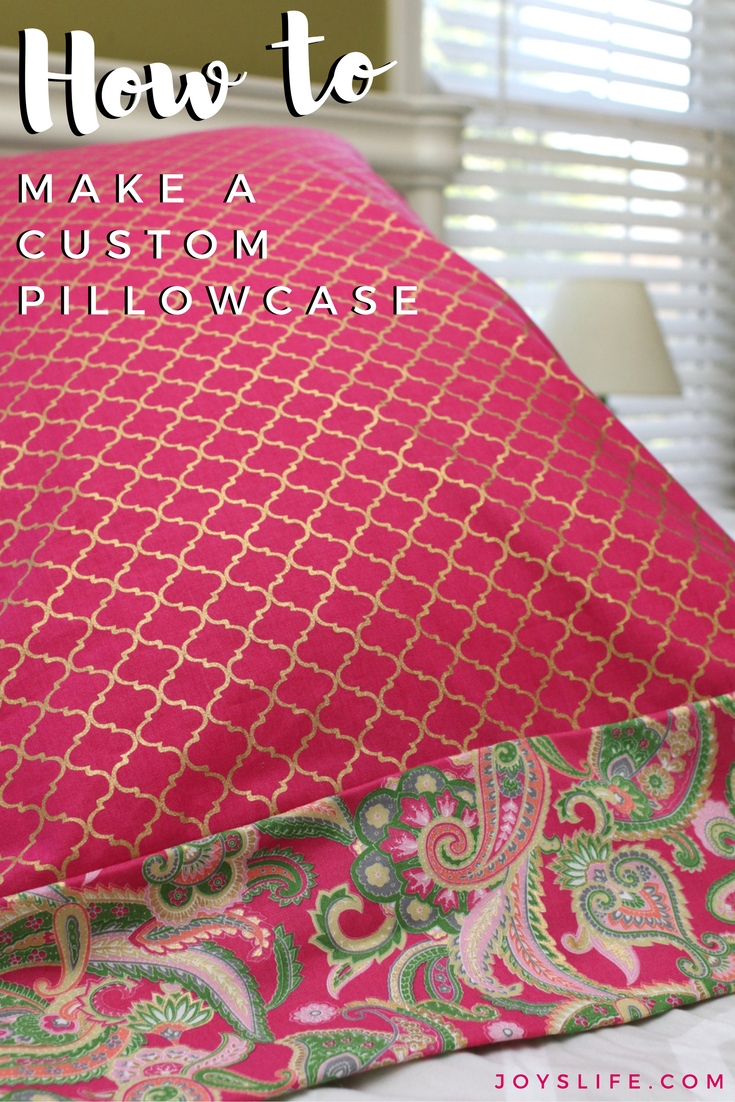
How to Make a Custom Pillowcase
Last night, I slept great for the first part of the night, and then I was up at 3am unable to figure out what woke me. I have a habit of waking up and not being able to go back to sleep for a while. I usually blame my husband’s snoring for waking me. Then, I elbow him and tell him to put on one of his Breathe Right® Nasal Strips. He’s been using them for years, and they work great. If you don’t know about them, they’re a clinically proven way to instantly lift your nasal passage and open your nose to help you breathe better. They’re a great way to help relieve his nasal congestion fast, and they have multiple uses: colds, allergies, or mouth breathing. Plus, they’re drug free.
There’s just one problem. He was out of town last night. So…I think I’m the one waking myself up! Don’t tell him. Well, actually, he knows because he claimed I was waking him and myself up, but I didn’t believe it. LOL! I believe him now. I’m going to use a nasal strip and fix this situation. A better tomorrow starts with getting your night’s right!
You know what else I need? Pretty new pillowcases so I can sleep in style! Here’s how to make a custom pillowcase!
How to Make a Custom Pillowcase
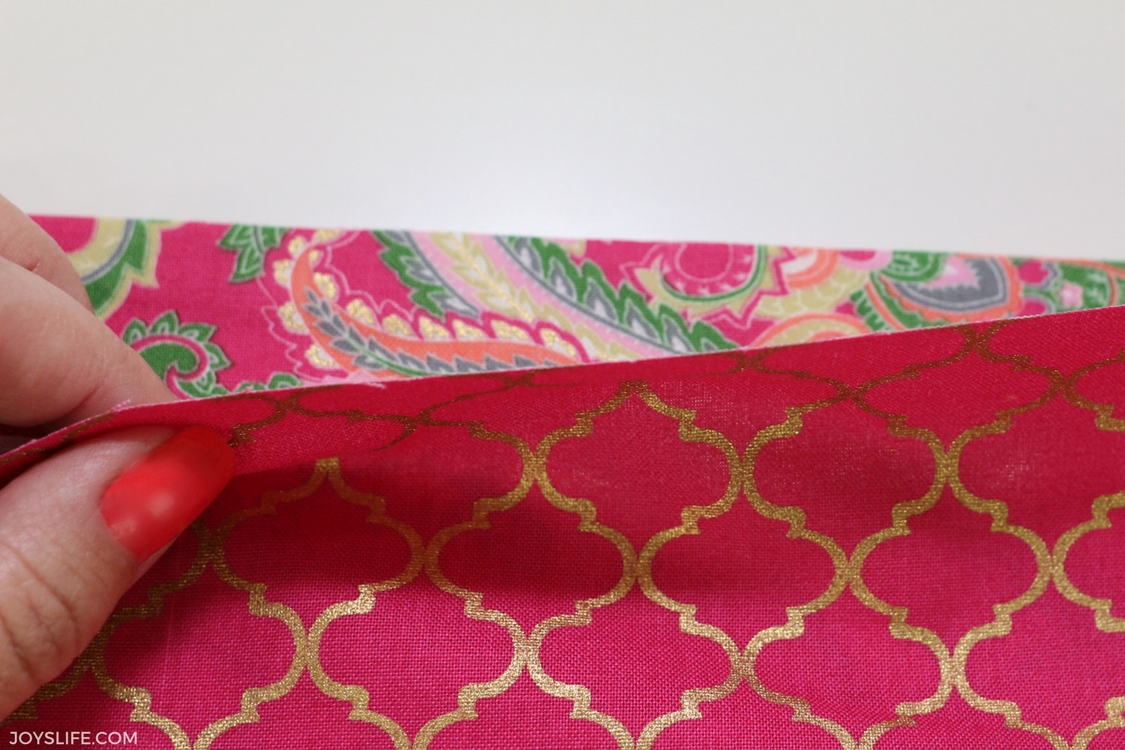
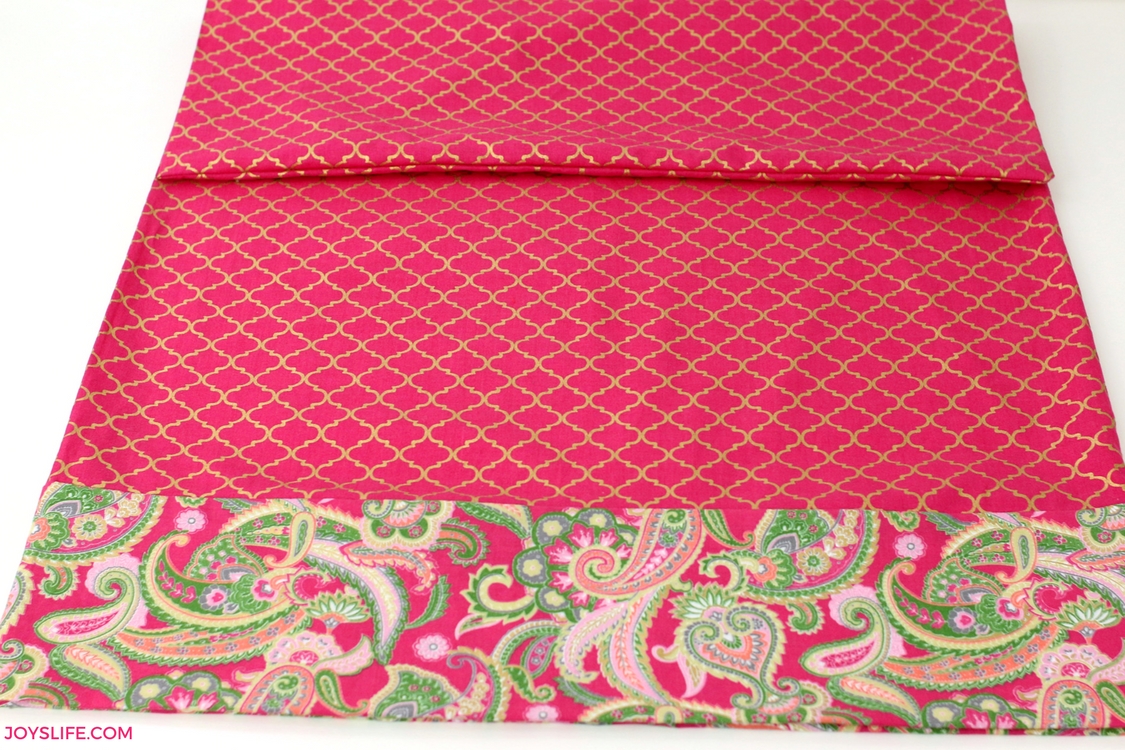
I’m in love with this fabric. Buy yourself 100% cotton or quilting fabric.
For one standard size pillowcase you’ll need:
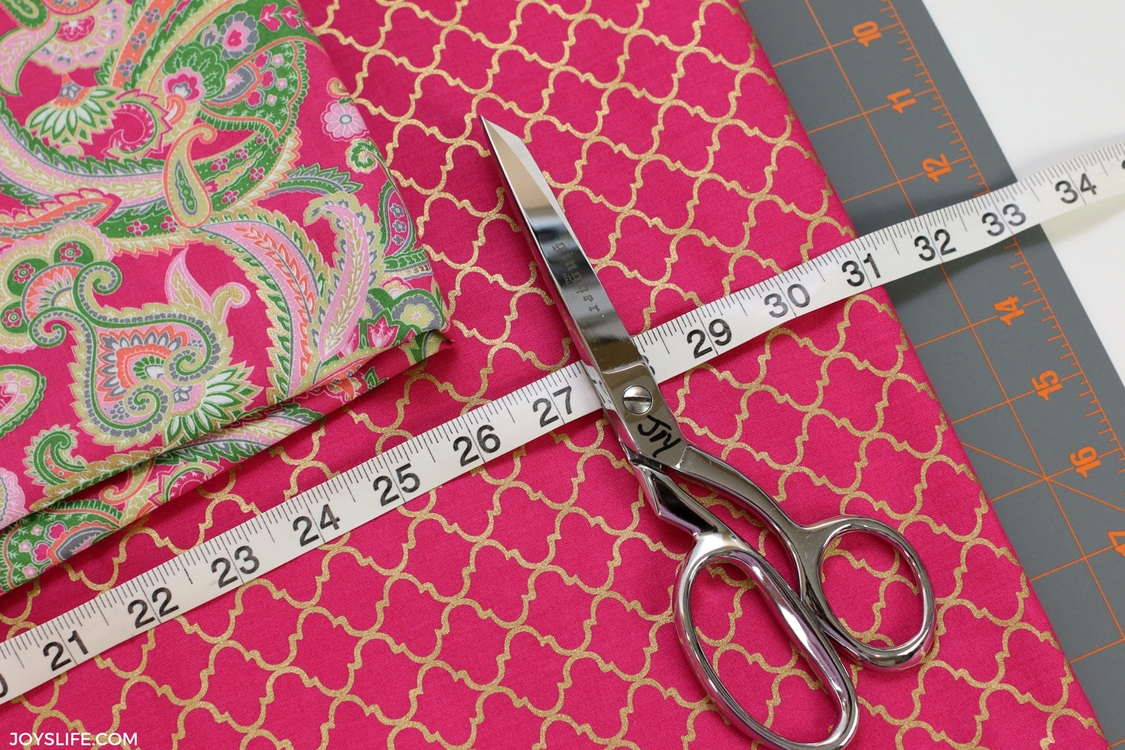
One 27″ x 42″ piece of fabric for the main body. (Buy 42″ wide fabric.)
One 10″ x 42″ piece of fabric for the cuff.
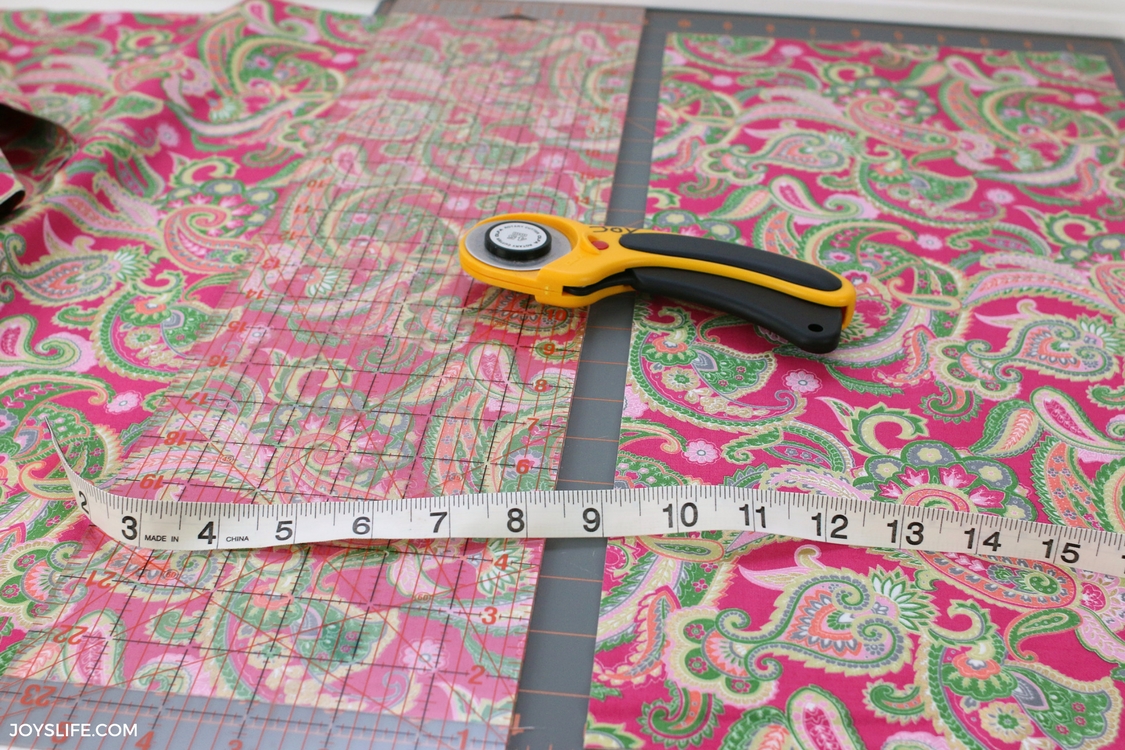
You’ll also need: A sewing machine, thread, scissors or rotary cutter, self healing cutting mat, ruler and/or measuring tape.
To begin, Cut your fabrics to the proper sizes.
Lay the cuff fabric right side up, lengthwise. Place the body fabric, right side up, lengthwise, over the cuff fabric. Line the raw edges of the fabric up, and pin them.
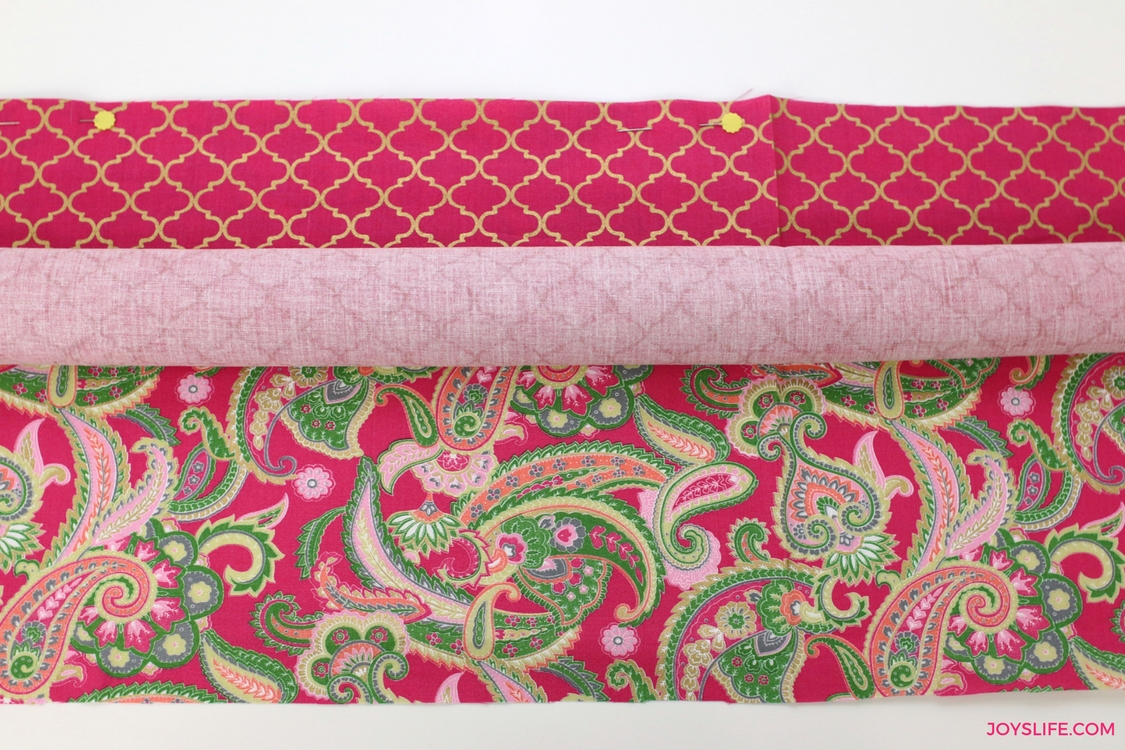
After the edges are lined up and pinned, roll the body fabric toward the pins.
Now, pull the cuff fabric to the pinned edges. Take one pin at a time out of the previous layers, and pin the new layers together.
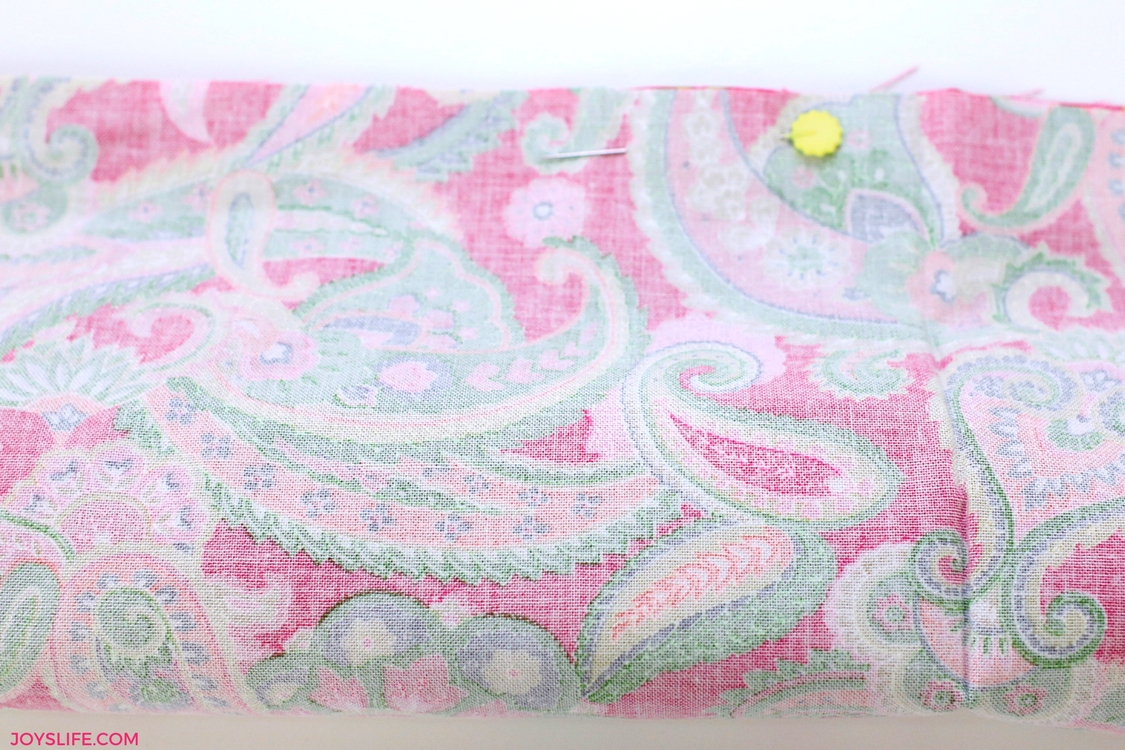
Your pillowcase layers should look like this. The body is rolled up inside the cuff and the layers are pinned at the top. Now it’s ready for sewing!
Sew a 1/4″ straight stitch seam along the pinned edge. I make sure to back stitch at the beginning and end.
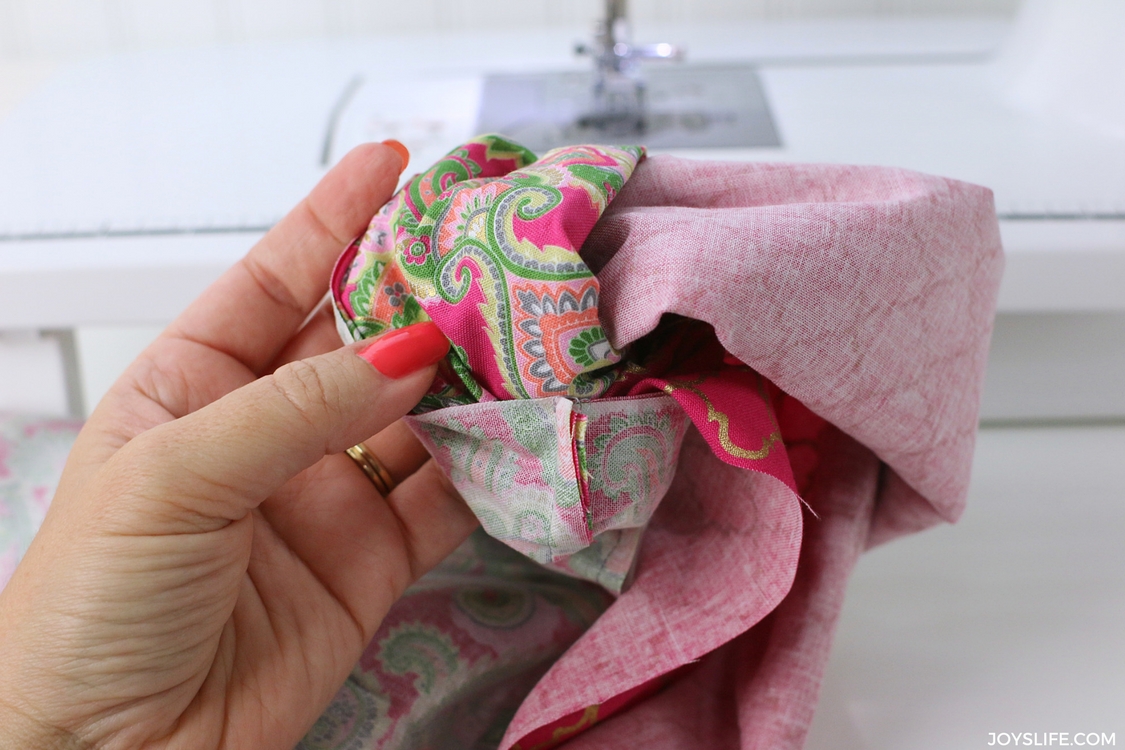
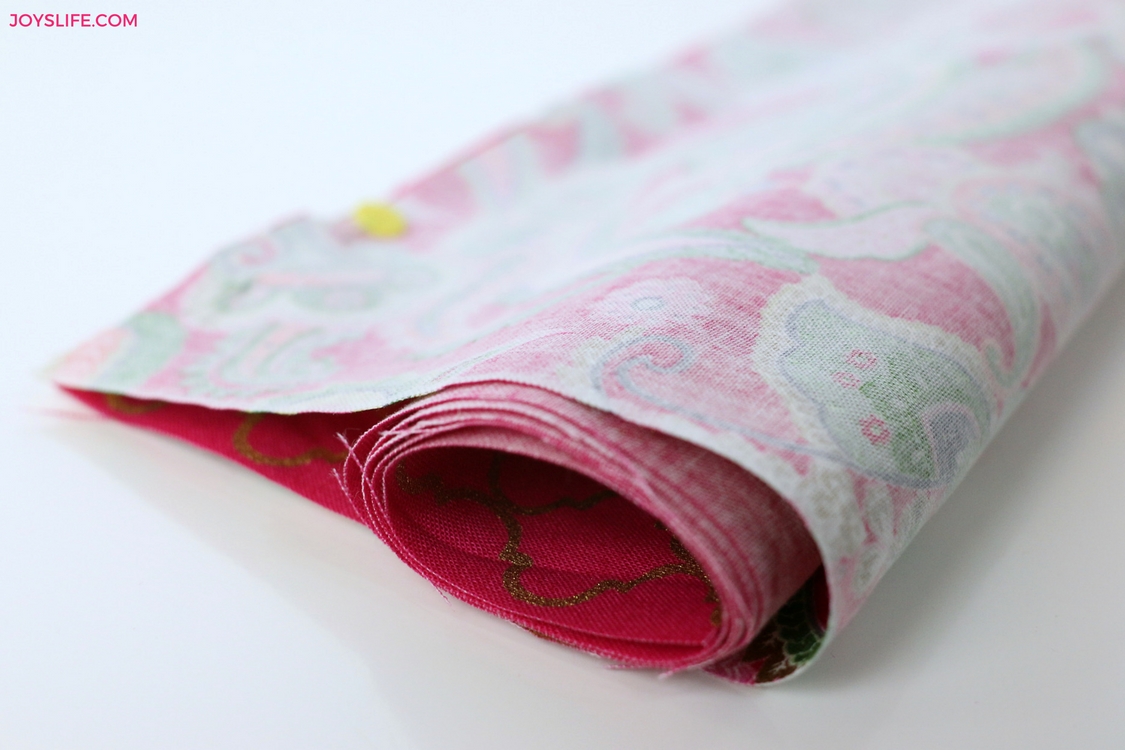
This is the amazing part! You’re about to see your new pillowcase for the first time! Carefully pull the body fabric out of the sewn tube you’ve created. Marvel at your genius!
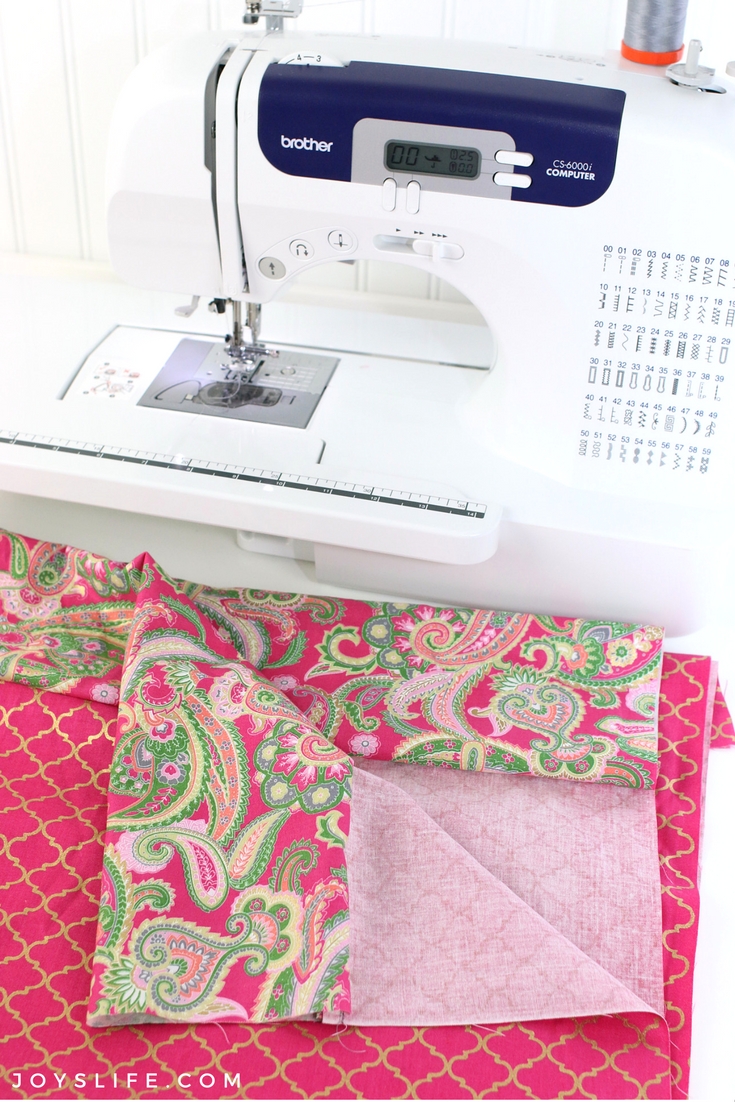
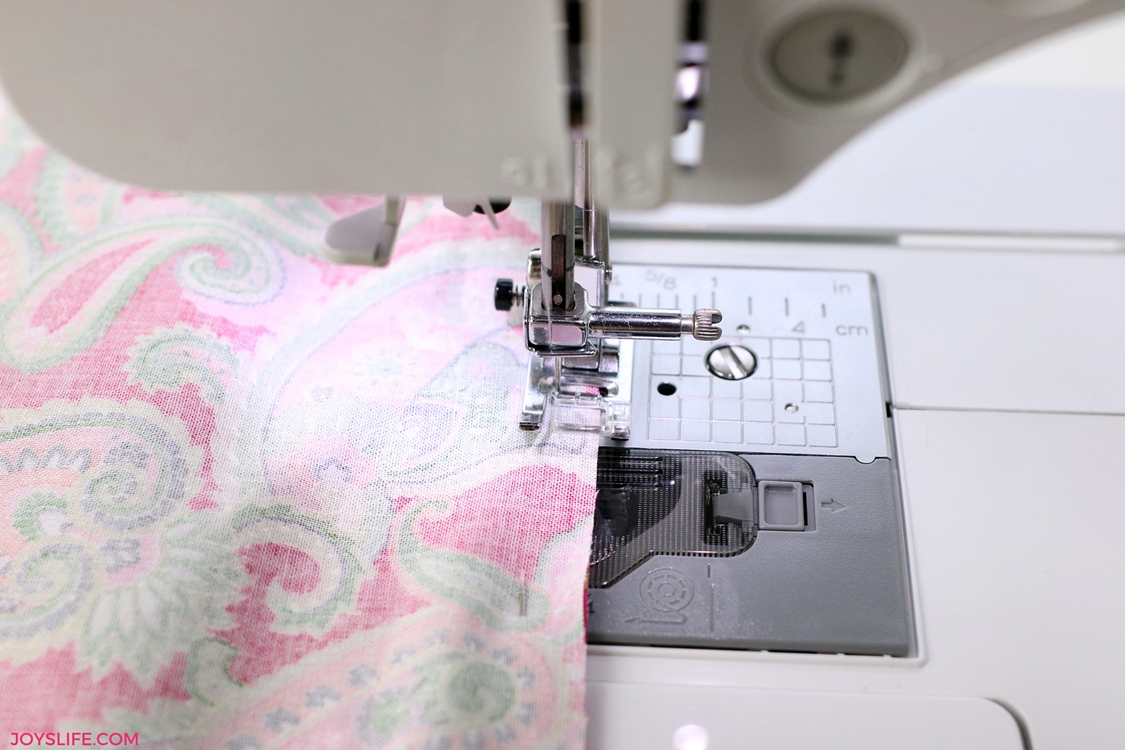
Now put the wrong sides of the fabric together. (The “wrong” sides are the ones where there is no print or lighter print on the fabric. It’s the ugly side. LOL!) You’re going to sew the side and the bottom. Make sure to match the cuff edges together, so you don’t sew it all wonky. Pin at the cuff and wherever needed to keep it in line.
We’re going to create a “French Seam” now. It’s not as scary as it sounds. You’re basically just hiding the stitches and creating a much stronger pillowcase. These stitching steps will help your pillowcase hold together in the wash.
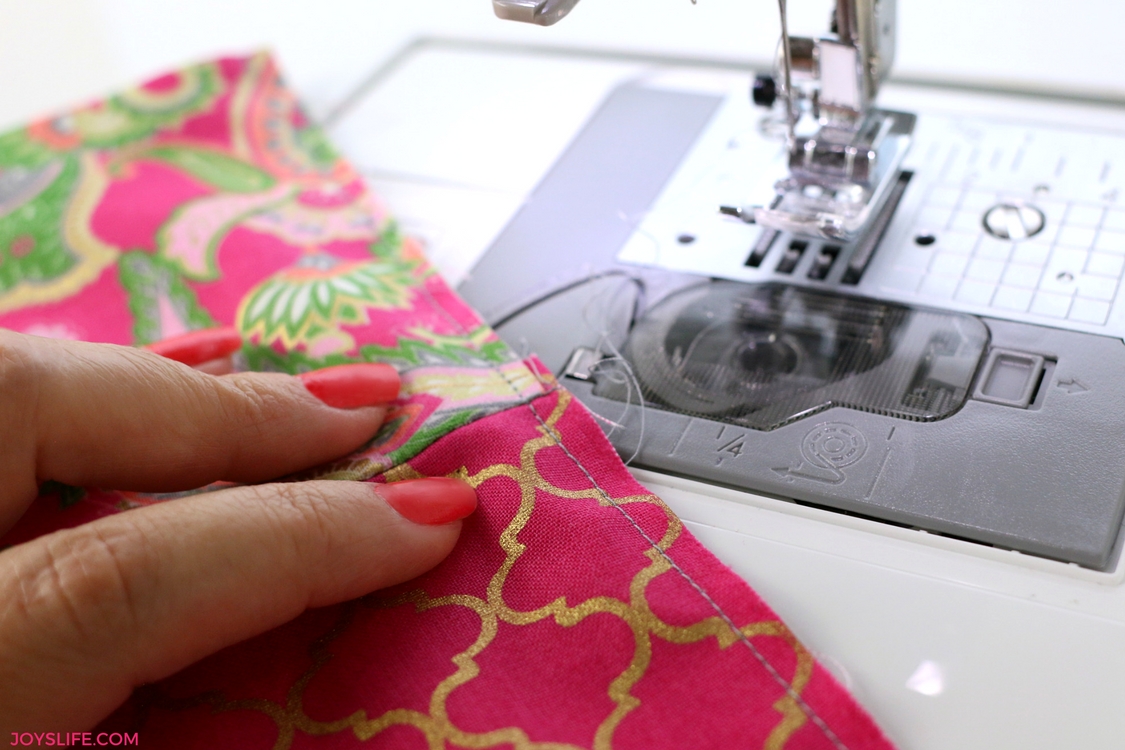
Sew a “scant” 1/4″ seam along the side and bottom.
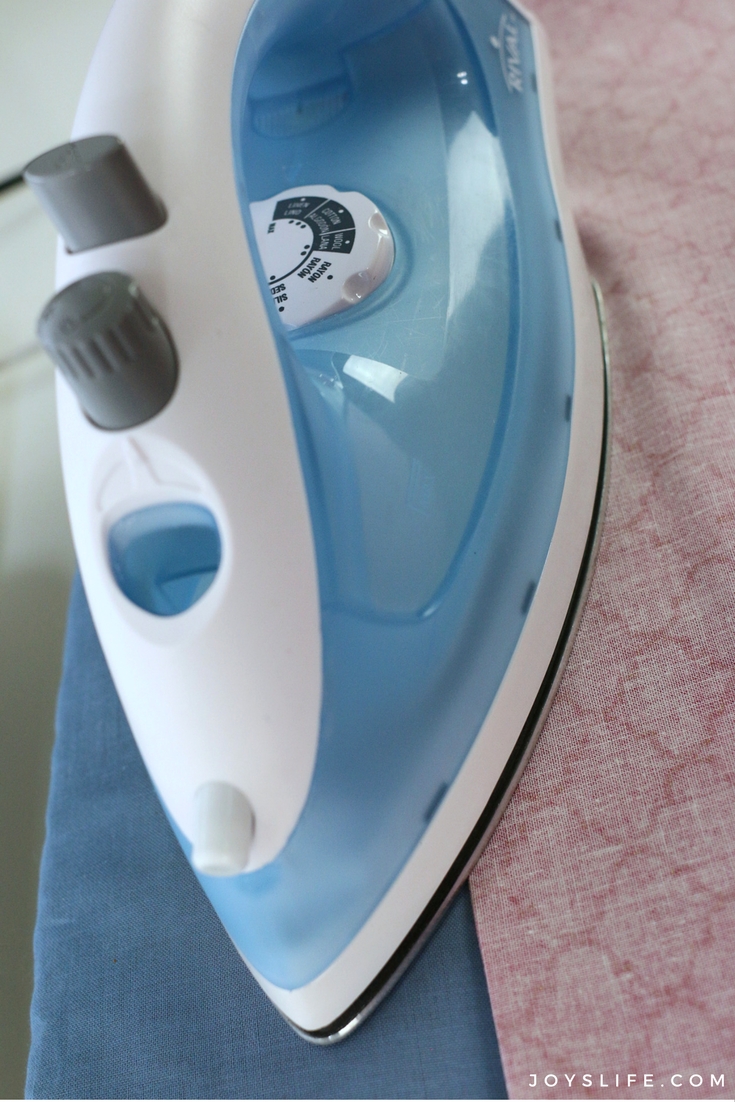
After you’ve sewn the side and bottom. Turn the pillowcase wrong side out and press the seams. This will help you find the edges of your “scant” 1/4″ when you’re sewing your next seam.

You’re almost finished!!
After pressing the seams, sew a 1/4″ seam along the side and bottom. Important! When you’re sewing this 1/4″ seam you want to make sure you’re not catching the previous seam. If you need to be more generous with your 1/4″, that’s ok! Just make sure the previous seam is getting tucked into and hidden by this one!
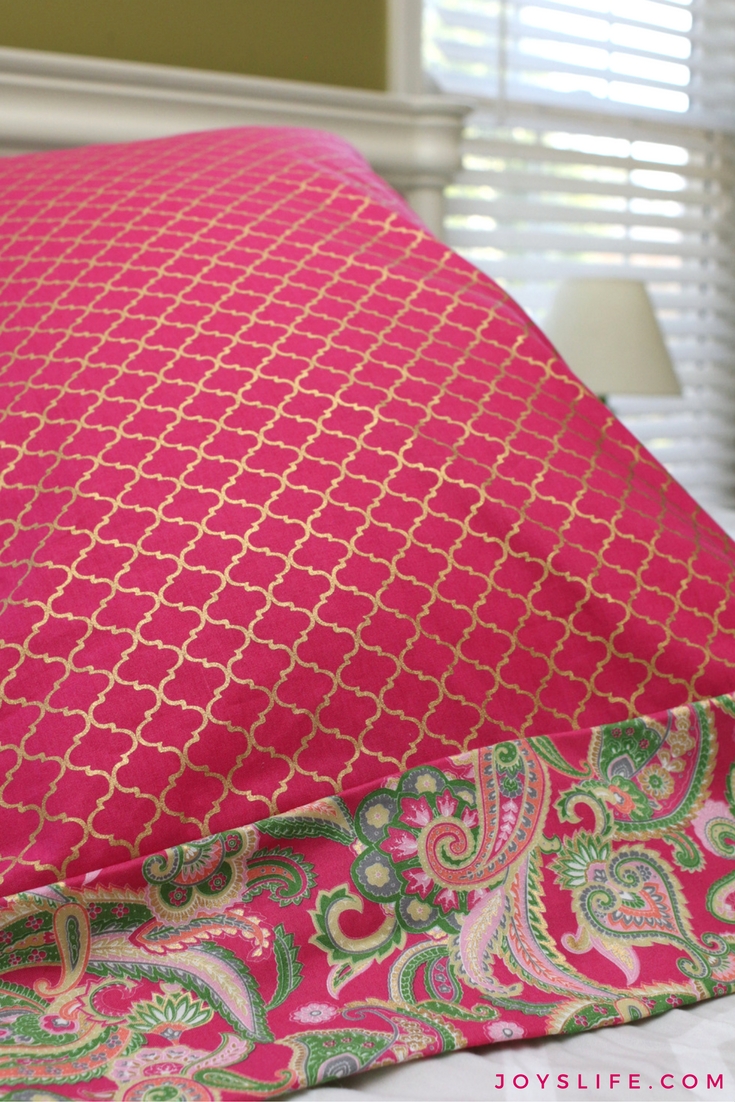
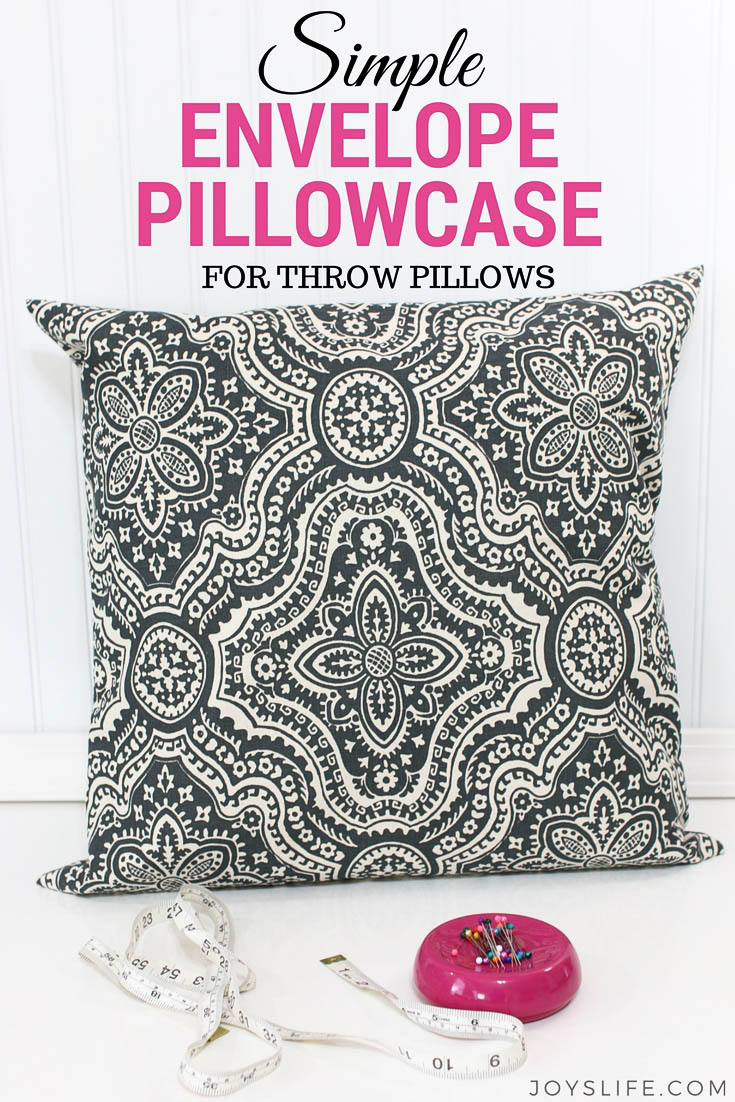
When you’re done, you’ve got a beautiful new pillowcase, custom made!! I LOVE MINE!
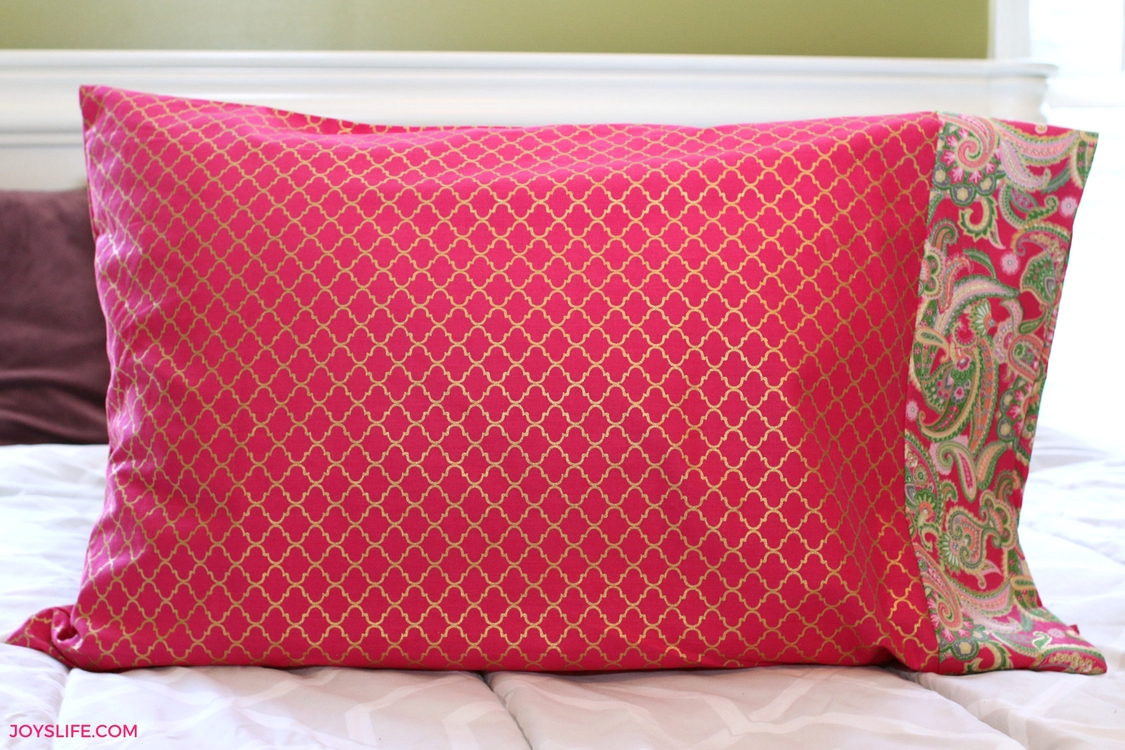
It’s hard to take a picture of a feather pillow in a pillowcase and have it look good, but it’s easy to be proud of this!
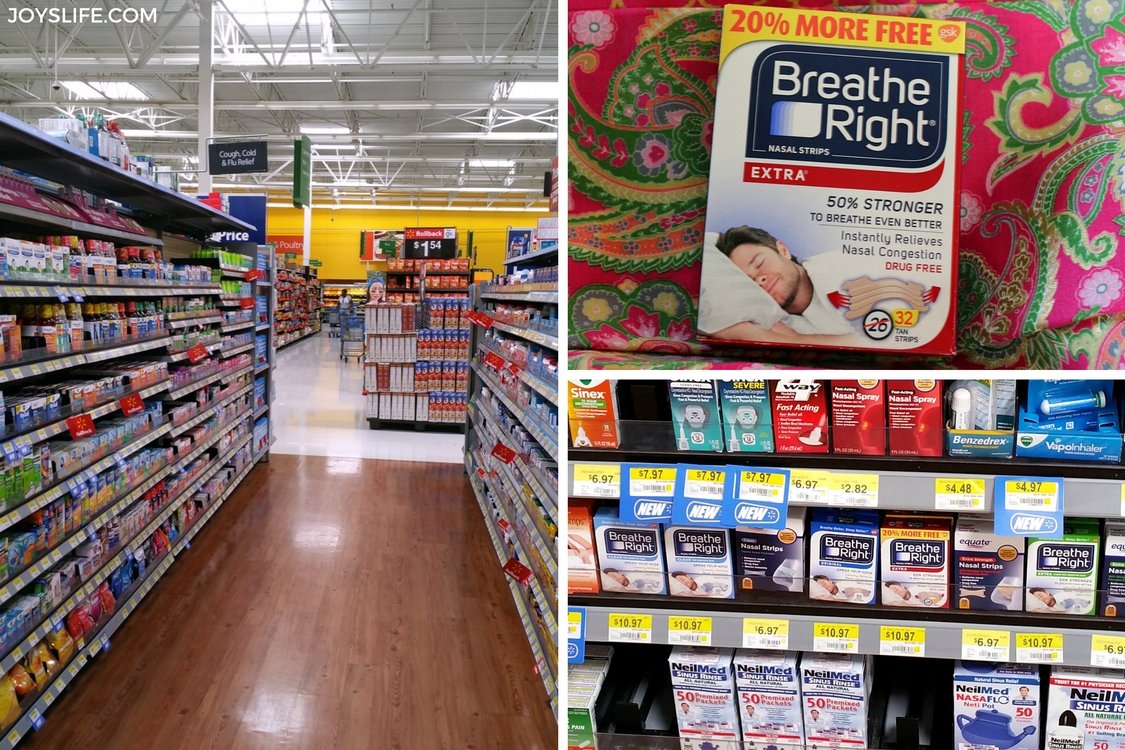
I’m all ready for a good night’s sleep! I picked up Breathe Right at Walmart. These are the ones we’ve bought for years. It’s about time I give my husband a break and try these for myself. I know that they’ve made a huge difference in the quality of sleep I get when he uses them. I just need to give myself (and him) the same opportunity!
This shop has been compensated by Collective Bias, Inc. and Breathe Right® Nasal Strips. All opinions are mine alone. #TomorrowStartsTonight #CollectiveBias

You are really making me wish I knew how to sew! That pillowcase looks great #client
I have made a lot of these and they are so easy to make and so much fun, especially when you pull the main part out from the border. You’ll wonder how did that ever work. Most of the time I also put a coordinated piece of material about 3″ wide between the border and pillow case as a little trim which also looks nice. The 3″ piece gets folded, wrong sides together and layered with the raw edges toward the top between the other two pieces. I think I need to start sewing again!
Bunny, I totally agree! I just started making a pillowcase like the one you mentioned. They’re so cute like that too! I’m going to make some more pillowcases for Christmas presents. I can’t believe how excited I am about it. Sewing is so much fun!
Glad to actually see instructions for these cases, I do want to add the extra color between the cuff and case, very professional looking. Will make some team color cases.
Hi LouAnn! I’ll share a tutorial in the next few weeks for making some with the color in between the cuff and the case. I’m with you, I wanted to make some team colors! 🙂 I made some Alabama ones. They turned out really well, except that I accidentally embroidered in the middle of the cuff fold prior to assembly. Ugh! It was awful. I had to take the embroidery stitches out of three pillowcases. It took longer than the actual embroidery. LOL! Have fun with your pillowcase making!
Love the beautiful fabric as well. Would you give us the name or brand name? Thanks so much.
Hi Barbara! I fell in love with that fabric in Joann! I think the name of the paisley one is: Buttercream Olivia Collection Cotton Fabric-Paisley Metallic Gold Metallic. It’s a lot like this one. I can’t find it at Joann online or in the store anymore. I hope you can find it!
Oh! The mostly pink case is Buttercream Olivia Collection Cotton Fabric-Pink Quatrefoil Gold Metallic.
How does that Metallic design feel on your face? I just can’t imagine sleeping on that!
It feels completely smooth! I was pretty amazed with this fabric. It washes well too.
I make them for Christmas and use them to wrap gifts. Recipients get two gifts!
That’s the best way to give them! 🙂 My mother in law gave us some that way, and I thought it was so smart…and so sweet! You’re so thoughtful to give them this way!
I’ve made many of these pillowcases in my one year of sewing and love it
Your fabric is beautiful. Where did you purchase it?
Thanks for the easy to follow directions and pics!
Thank you for your sweet comment, Donna! I bought that fabric at Joann a few years ago. Happy sewing!