Make a Flower Embellishment from Scrap Paper
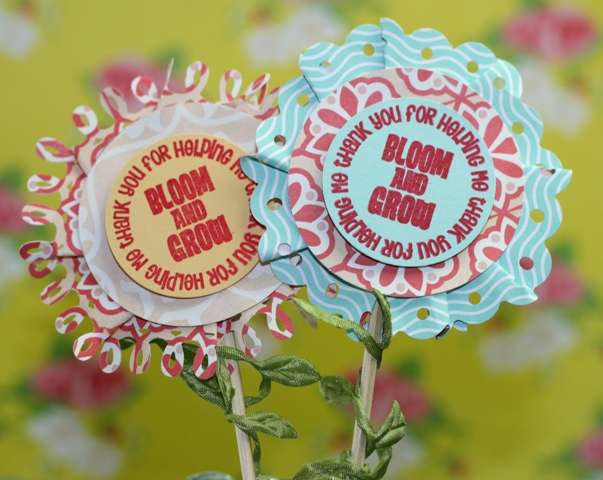
This was a fun project. I read about how to make these flowers in a scrapbook magazine last year and now I’ve finally tried it! I used my scraps from a few sheets of 12×12 paper and created these fun flowers. In general, I don’t like making flowers because they always seem way too time consuming. I admire them when I see them, I just don’t make them. If you’re like me, I think you might like taking a little detour and trying your hand at these. They’re really easy and fun to make. I think they’d be GREAT on a scrapbooking page. I stole skewers from DH’s BBQ stuff and used those to create flowers that can stand. One day, he’s gonna need some more skewers.
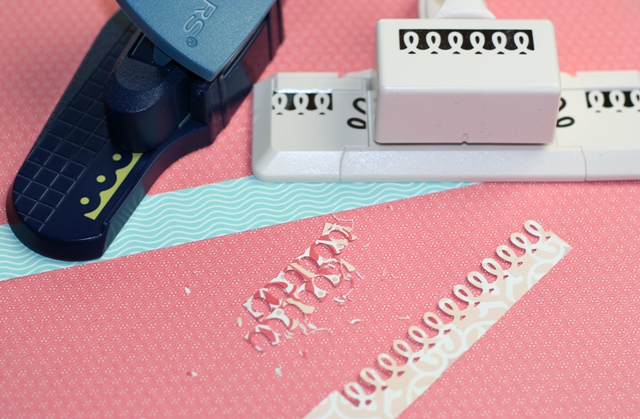
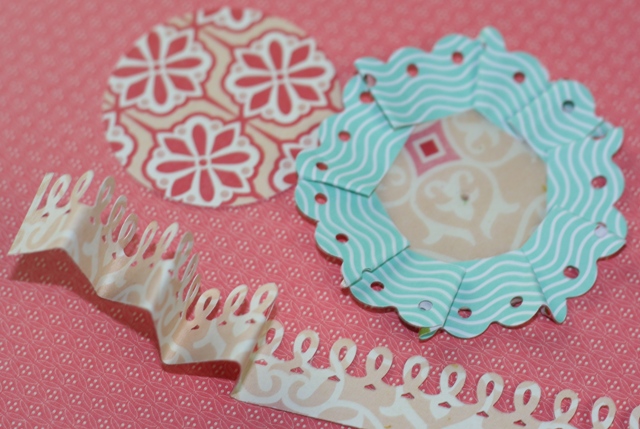
I’m using the Martha Stewart Loopy punch and the Fiskars Threading Water border punch. Make sure your paper pieces are about 12″ long. The width can vary they just need to be wide enough that you can punch them without them falling apart.
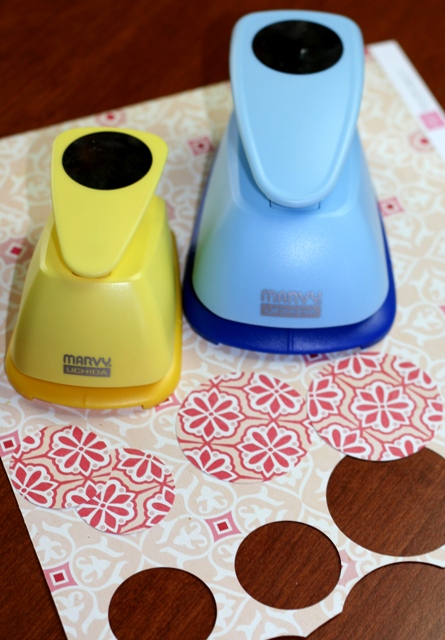
After you’ve punched out the long strips of paper, punch out a few circles. I’m using Marvy 1-1/2″ circle punch so I can add a stamp from Joy’s Life Tag You’re It Two stamp set.
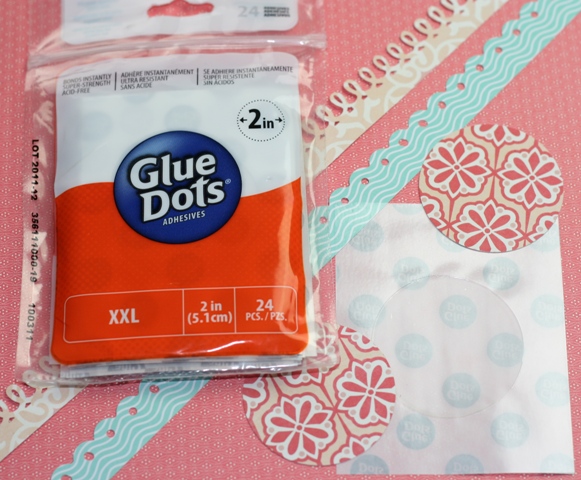
I’m also using a Marvy 2-Inch Circle Punch so I can quickly add a 2 inch XXL Glue Dot to it. The Glue Dot is the key to the whole project! It’s what holds the border in place around the edges of the flower.
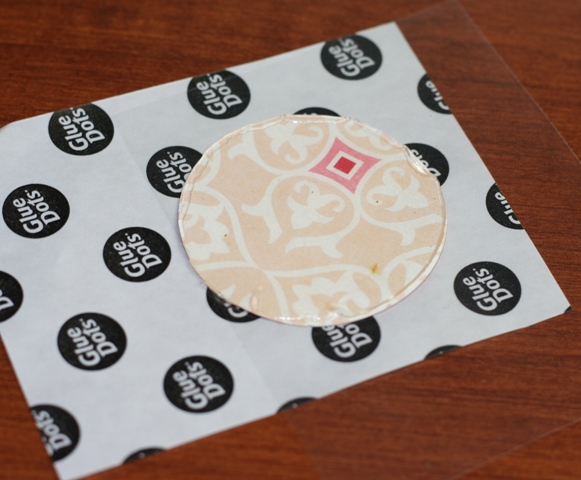
You know what I love about these Glue Dots? They are strong and they cut WAAAAY down on glue mess. YAY! The Glue Dots XXL are 2″ and completely cover the circle I punched out. Sweet!
Simple. You fold the punched strip and stick it to the Glue Dotted circle. This doesn’t look perfect and it doesn’t have to look perfect. Just enjoy the process. That’s what creating is really about, making something you like and enjoying the process of creating it. When your crafting starts to feel like work, it’s time to take a break. 😉
See the hole I punched in the circle on the right? I had ideas that this would make a great Mother’s Day pin. That idea never made it to reality. “Sometimes that’s how it goes but sometimes it goes the other way.” Ok, that’s totally a quote I stole from the movie True Romance with Patricia Arquette.
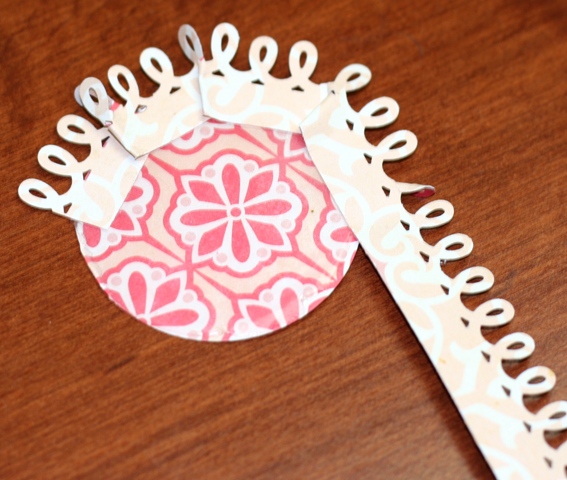
Bend and stick. Bend and stick.
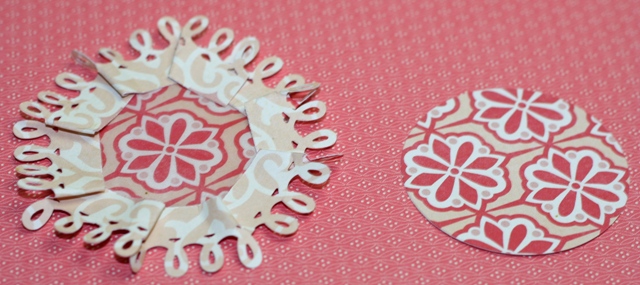
Now that the punched strip has been bent and stuck down all around the circle, stick the other circle on top of it. You’ve now got a flower…or frilly sort of circle.
I hope you’ll try making a few of these simple flowers. They’re sort of shabby chic but fun.
I wrote this post while participating on the Glue Dots design team.
Cute! Will have to try and make these.
Another great way to use these punches! LOVE it!
Oh WOW! These look great! I Think I’m gonna have to try and make these…. I got an idea in my head after seeing yours…..
hummmm…. brains working in overdrive! LOL Thanks for the inspiration! 🙂
Theresa
I need to add this to my “to-do” list. Not enough hours in the day!
If there was one, I would hit the “LIKE” button!!
Cool flowers! At first I thought they were stuck onto suckers. That would also be a good gift idea. 😉