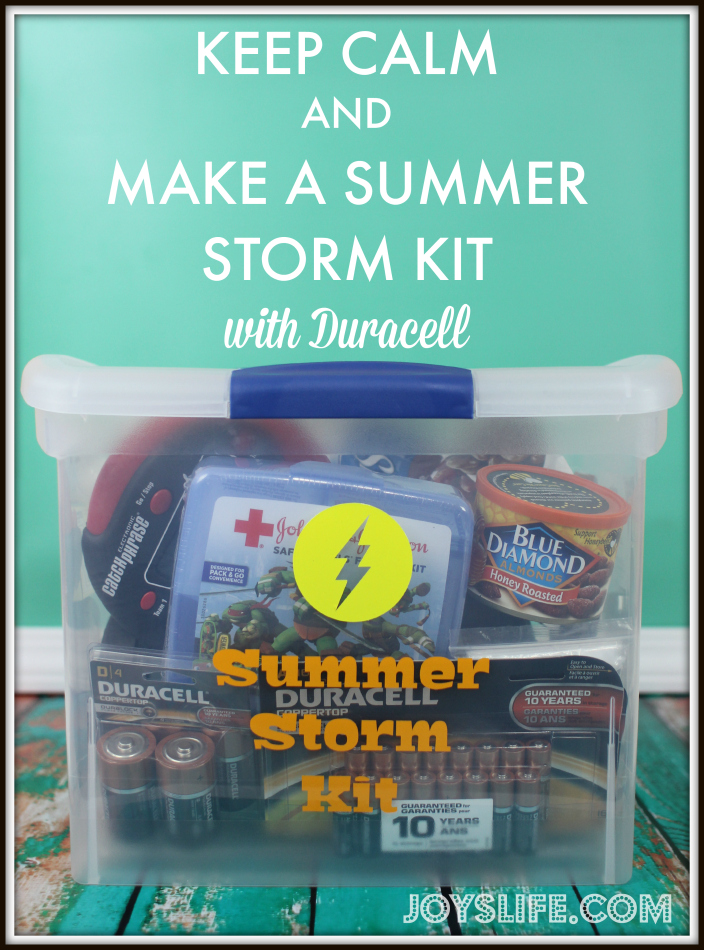
How To Label Cricut Booklets
Labeling your booklets is an easy way to quickly decipher your overlays.
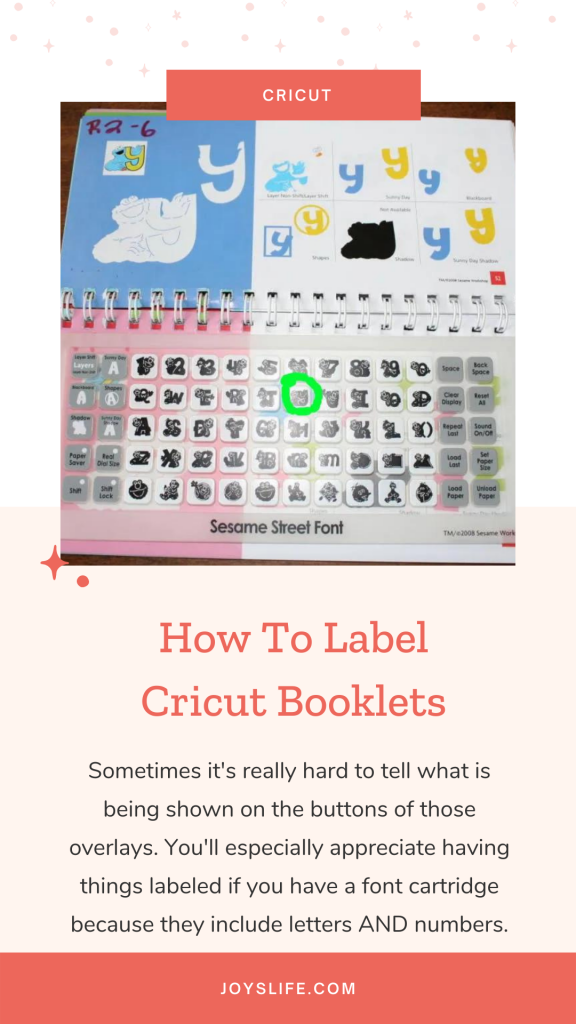
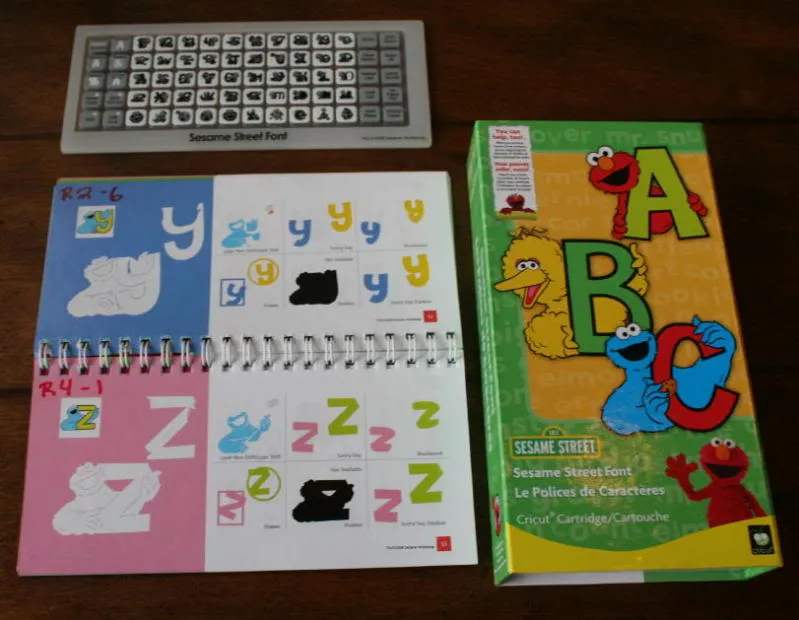
Every time I buy a new cartridge, I must label my booklet before using it. I’m getting pretty obsessive about it. However, I find that it makes finding everything a breeze. Sometimes it’s really hard to tell what is being shown on the buttons of those overlays. You’ll especially appreciate having things labeled if you have a font cartridge because they include letters AND numbers. You’ll think everything is easy when it’s numbers, but those letters are all over the place. Here’s an example using the Sesame Street Font Cartridge.
Here’s How I Label my Cricut Booklets:
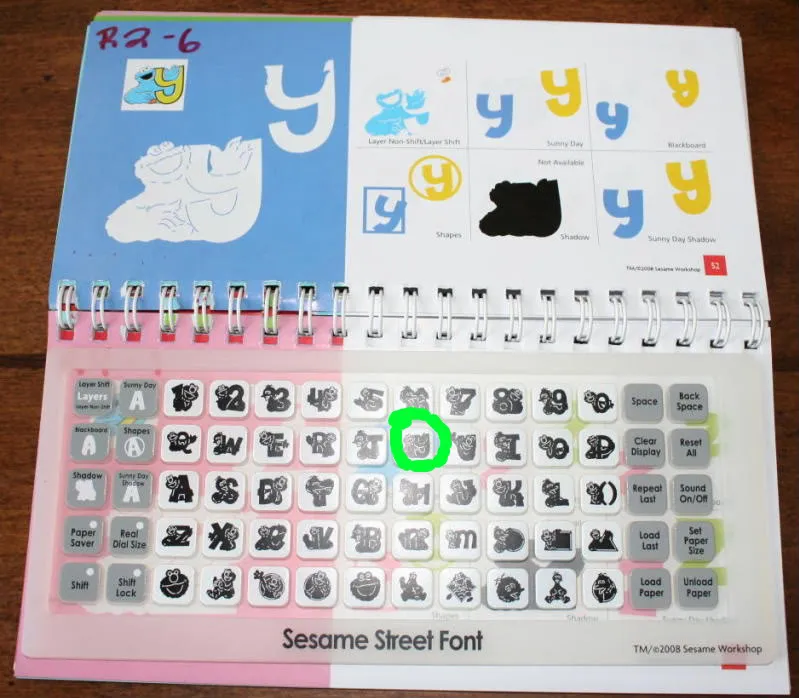
I actually use a Sharpie marker to write my handy guide on the top left hand corner of each page.
The “R” stands for the ROW on the overlay where the item is found.
There are 5 ROWS on every overlay. So R2 = ROW 2.
There are 10 BUTTONS in every ROW.
So R2 – 6 = ROW 2 BUTTON 6. Meaning, go down to Row 2 and over 6 buttons and in this case you will find Cookie Monster with the letter Y and all the offerings on that page in the booklet.
Here’s Where Labeling Comes in Really Handy:
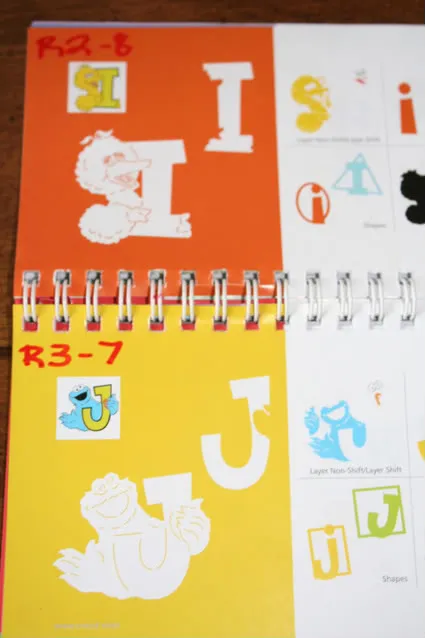
Seem like “I” should naturally follow “J”, but it’s a QWERTY overlay, so “I” is actually located at R2-8 (Row 2 Button 8 ) and “J” is located at R3-7 (Row 3 Button 7).
You might not feel like you need to do all this labeling, but it’s helped me a TON!!
Brilliant! It takes me forever to find a darn button sometimes
Thanks for sharing…mind if I share this tip in my next video? I’ll give you credit of course! 🙂 Let me know! This is great!
I think I saw that “The Pink Stamper” does this, but differently, I think, I don’t really know. But I love this and will have to do it!
Thanks Again!
Megan
Hey Megan,
That would be fine. Mind adding a link back to my blog with your video? That would rock. Glad you like the tutorial!! Yes, Robyn (Pink Stamper) does label her booklets, she just does it differently than I do. Whatever works, right?! 😀
Thanks!!
Joy
Great idea! As a newbie Cricut user, figuring out where the figures in the book are on the keypad is tough!
Thank You! 😀
~Joy~
Been using the cricut for a couple of years now but still have trouble finding figures etc when i need them. Thanks so much for your excellent work and for posting the how to do it.
Kat,
You’re so welcome! I’m glad it helped you! 🙂
~Joy~
I just found your website and I love it! You take all the extra time we don’t seem to have and figure things out, I am forwarding your site to all my scrapping friends. Thank you
Thank you so much, Fun Police! 😀 I really appreciate that!
Thanks for being part of my site!
~Joy~
This is where I find the Gypsy handy…I was trying to make a card the other night and could not find the palm tree so I got my Gypsy and there it was….The longer I have it the more I like it.
It is also great for getting sizes right. I am going to try doing some labeling with my booklets also ..I thank .
you Joy, for the tip I learn so much from your site..
This is awesome, it makes life so much easier!!!!
I’m so glad! 🙂
~Joy~
Okay, so this is the first day of August and I’m finally getting to read this. What can I say.
Wow joy, this is GREAT!!!!! as you know I’m forever getting lost, so this is going to help me out so much.
I was working with one cartridge, pressed a button and up came “Happy Father Days”, it was not what I expected to come up. I thought something was wrong with cartridge….LOL. DUHHHH.
So yes, this is going to help.
never thought of doing that before but oh what a time saver…. thank you for this ever so smart post!
I SENT YOU AN EMAIL THINKING I COULD NOT LOCATE THE “CRICUT BOOK LABELING SYSTEM YOU HAD MENTIONED, BUT ALAS, PATIENCE IS A VIRTUE AND I FOUND IT. LOL!!!!! LOOKING FORWARD TO SURFING YOUR SITE FOR MORE HELPFUL HINTS! 😉