Graduation Party DIY Cake Stands for Under $2
This post is part of a campaign with Shutterfly and LooksiSquare. All opinions are entirely my own.
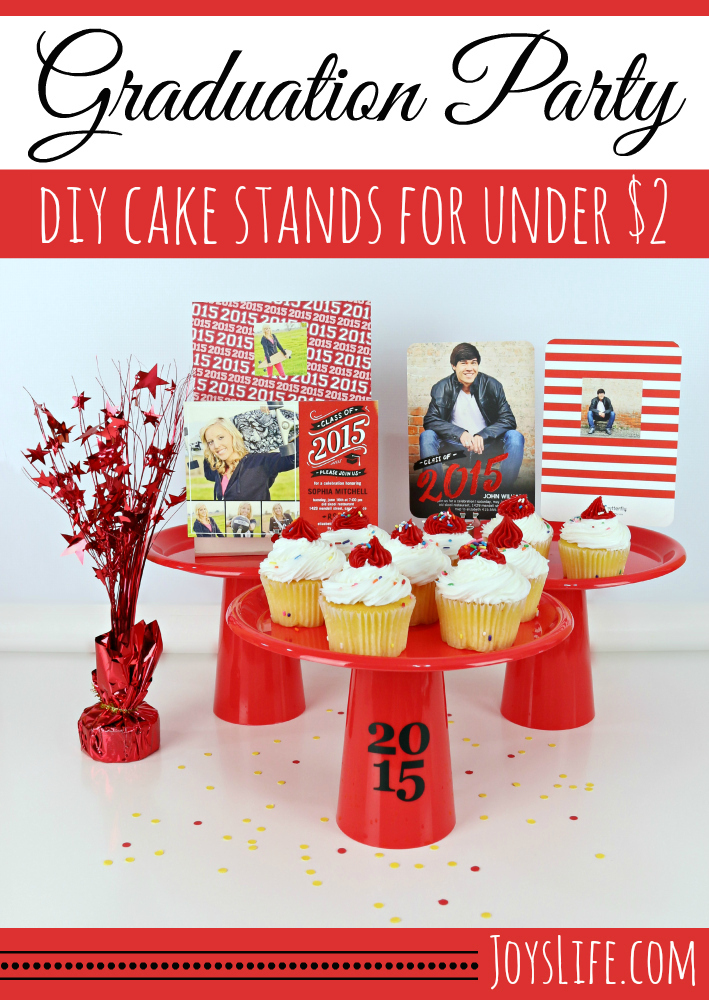
With graduation just around the corner, this is the perfect time to start planning your party! I’m going to show you how to make low cost cake stands that are great for cake or cupcakes and also a fun way to show off your beautiful announcements and invitations. By the way, if you haven’t seen Shutterfly’s invitations and announcements, you’re in for a treat. They are gorgeous. Where were these when I was graduating? I’m getting them for my sons’ graduations for sure!
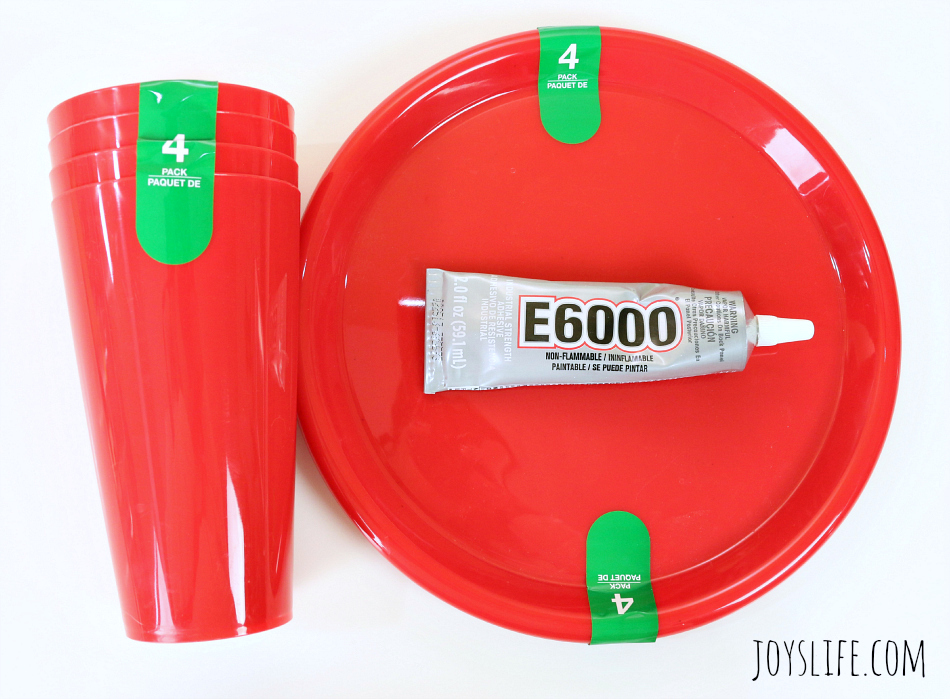
First, let’s talk about simple cake stands. This doesn’t get any simpler. I bought these four packs of plates and cups at my local dollar store. That makes each cake stand cost only .50 cents each. You’ll also need some E6000 adhesive. You can find it at Walmart and most craft stores where they keep the glue.
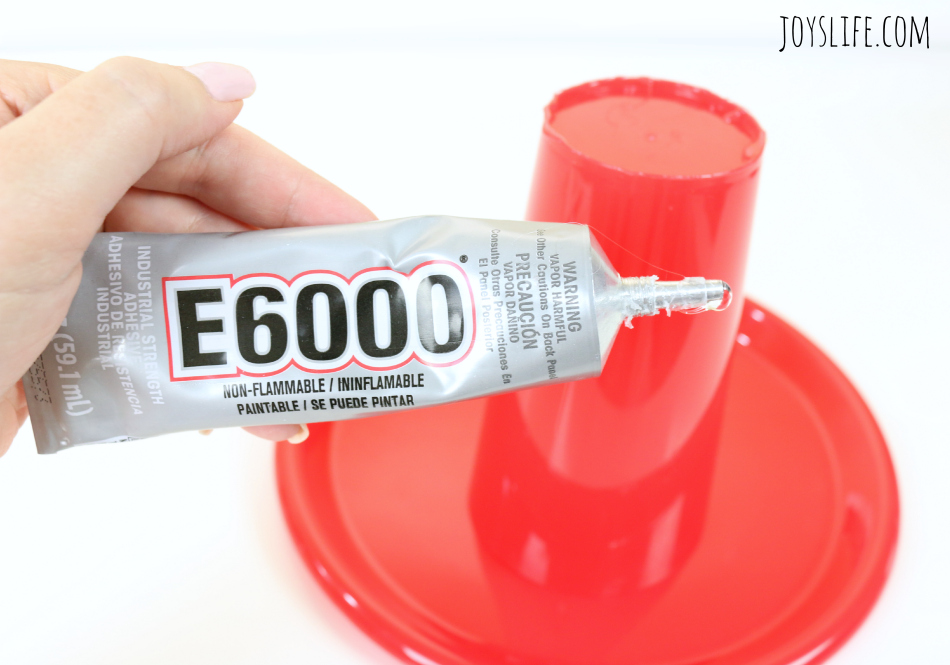
Add E6000 around the bottom of the plastic cup. Stick the cup to the bottom of the plate. Let it dry. You’re done! Seriously. That’s it. One important note: You might want to add some weight to the inside of the cup so it doesn’t easily get knocked over or this might happen. You could glue weighted things to the inside of the cup near the bottom. Sit it over a 12 oz. soda can for some quick stability. If you’re at the beach, this will sit right in the sand and make a perfect table. Bonus!
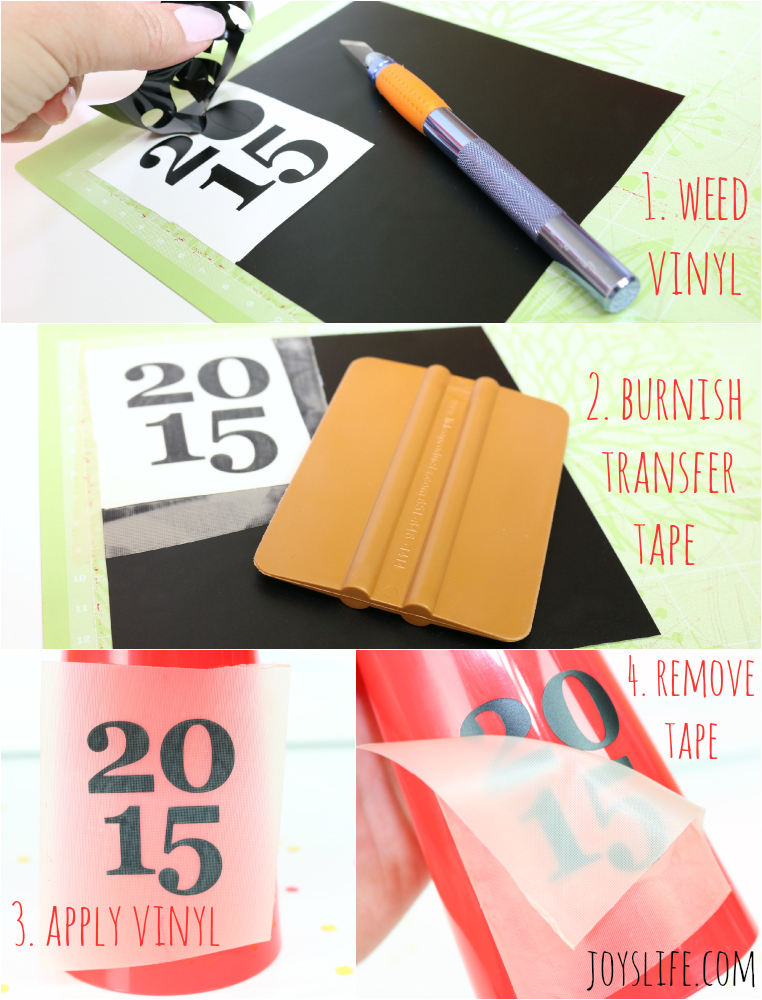
Easily add the graduation year with vinyl. I used my Silhouette Cameo to cut this out using a font from my computer. After you cut it out, remove the vinyl that you don’t want to use. Cover the vinyl you want to use with transfer tape. Burnish the transfer tape over the vinyl using a squeegee or gift card. Peel it up and apply it to your cake stand. Peel off the transfer tape. You did it!
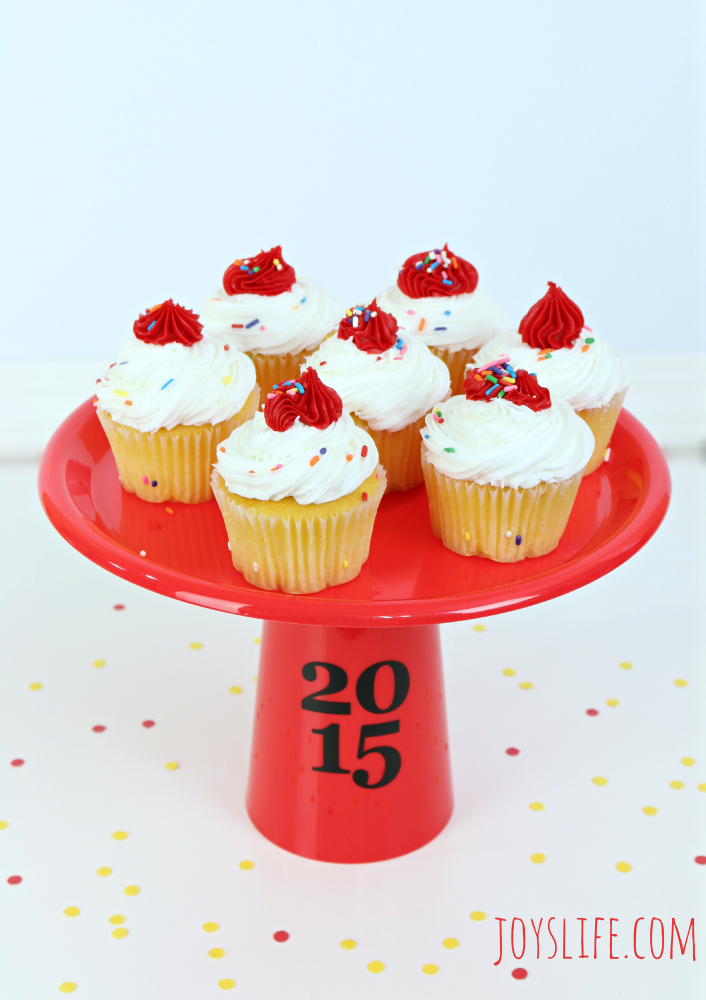
All done and looking good!
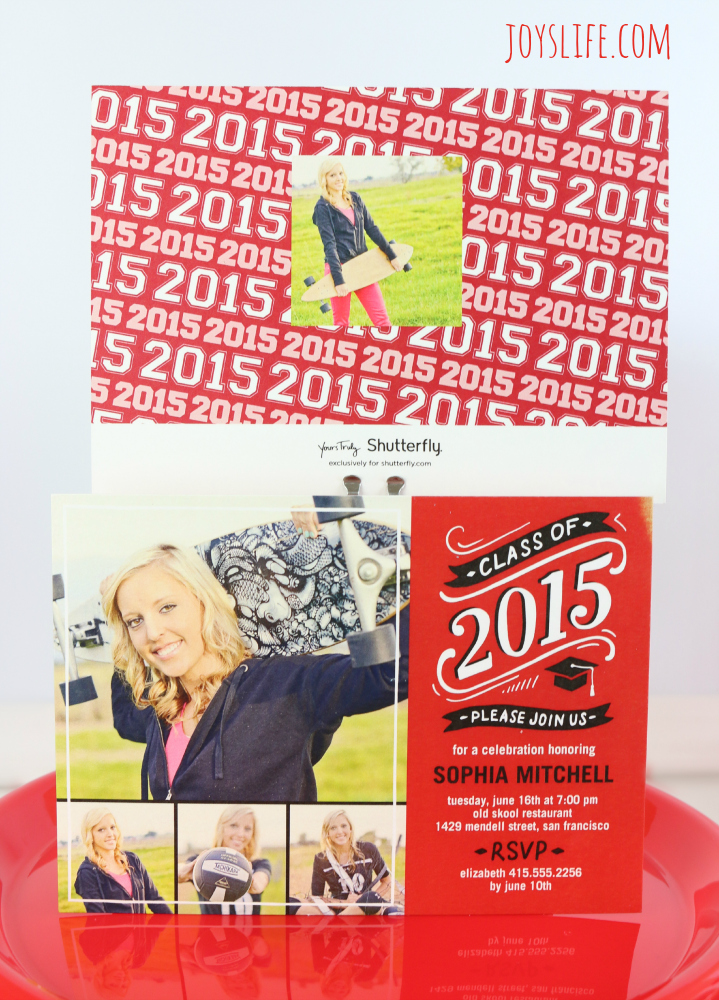
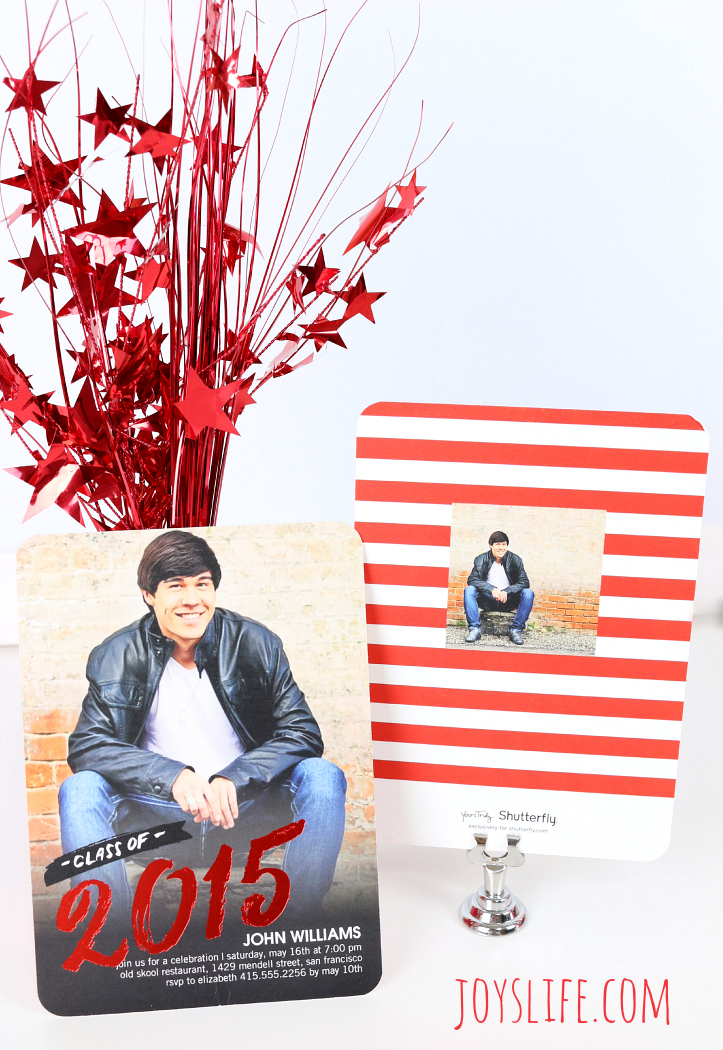
How awesome is this fun square trim graduation party invitation from Shutterfly? I love how it really captures her personality.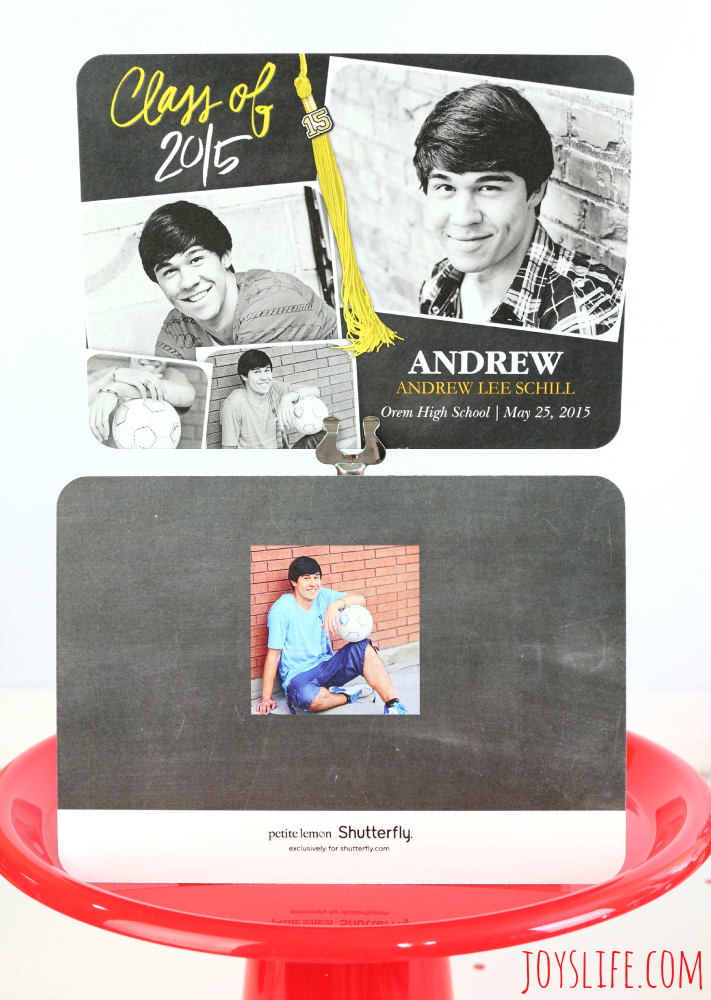
This Timeless Tassel announcement has rounded corners and a custom color palette.
With Shutterfly, you can make your grad’s announcement and invitations super special too!
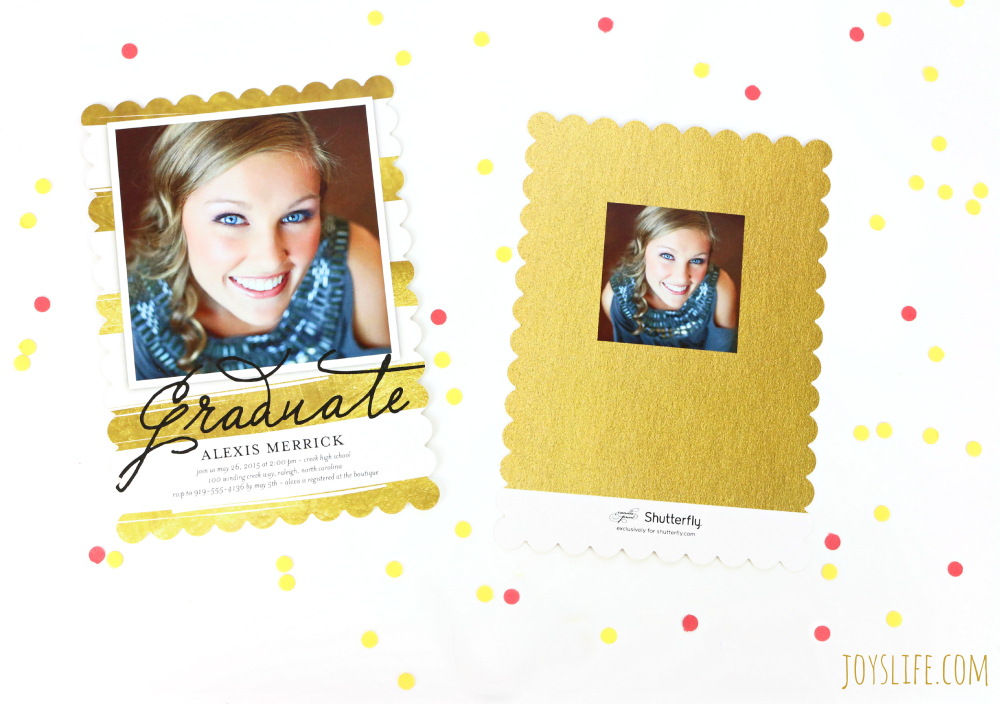
I love the gold stripes and scalloped trim on this graduation invitation. Isn’t it pretty?
You have so many options with Shutterfly. You can choose your school colors from a custom color palette, choose foil-stamped designs and pick from different formats (flat, ¾ fold, tri-fold) and card sizes (6×8, 5×7, 4×8, 5×5, 4×5).
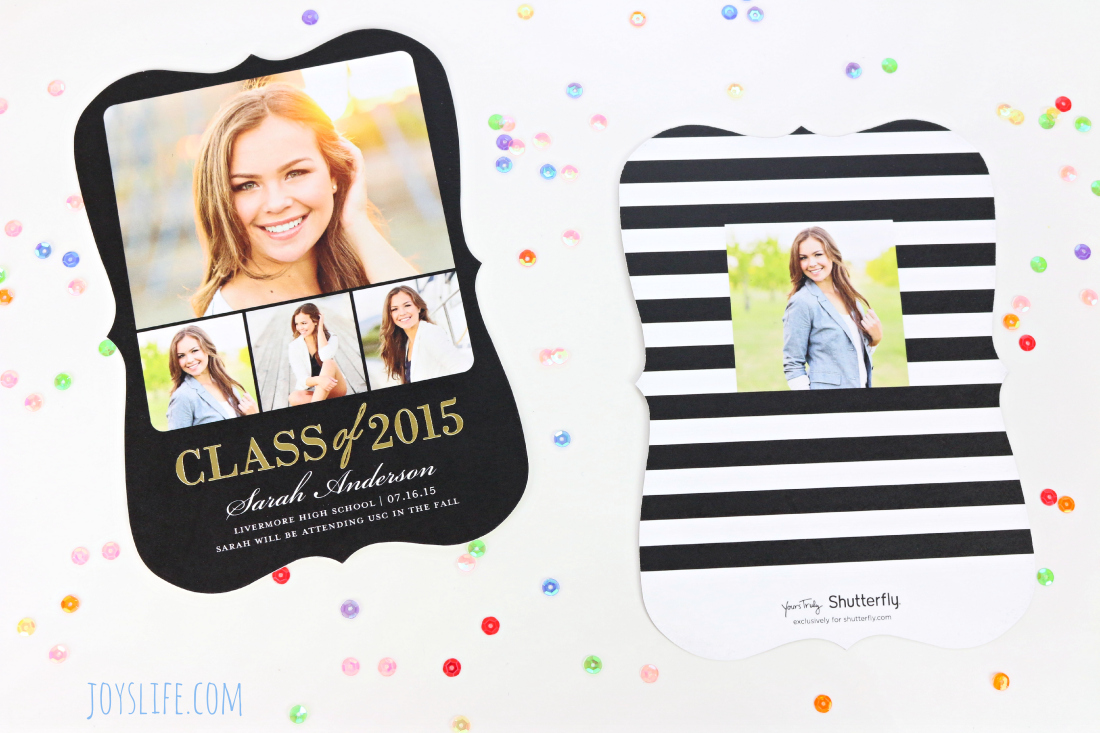
I’m such a fan of the bracket shape! So, this bracket trimmed foil stamped graduation announcement is a hit with me. Shutterfly offers such great trim options (square, rounded, bracket, ticket & scallop), notice the edges of all the invitations and announcements I’m showing you. Gorgeous! Plus, you can have cool designs on the back of the cards. Check these photos out!

Notice this announcement’s ticket trim. Cool. Shutterfly even gives you the option of importing your grad’s Instagram pictures!
Did you ever think that the back and front of an invitation could be so unique and fun? This rounded trim announcement is great! It’s foil stamped and debossed with real foil. What a stunning effect!
I just love all the options for creating these unique invitations and announcements. I know if you get some, you’re going to be as impressed as I am. The only tough part is deciding which style to pick because they all rock!
Which one is your favorite?
These are so simple and do-able but still have a real wow factor! Love the project and those announcements are GORgeous! Like you said, where were those when I graduated?! #client
SUCH a great idea — and so accessible! Anybody could totally do this!! Loving the bright colors of the Shutterfly stationary and the accessories you chose!