Glass Block Decorated Using Gypsy & Cricut

I had fun making this today!
This whole project started because I bought these orange lights at Halloween and didn’t use them. See, I needed a smaller set of lights so they would fit in these things I have in my kitchen, but I bought this huge set of like 250 lights or something and I couldn’t cram them into the kitchen thing no matter how much I tried. So, basically I waited too long to return the lights and instead of cutting my losses, I bought a glass block to cram them in and then built a project around that. I never learn. The worst part? I have another box full of those lights. Guess there’s another glass block in my future huh?

Now shall we stare at the side view? I think so.
Wanna Know How I Did This? Sweet! I was hoping you would ask.
- I bought the glass block at Hobby Lobby. (It’s hollow inside…the block is, not Hobby Lobby. Hobby Lobby has a chocolate center.)
- I cut a little slit in the rubber stopper that’s in the bottom of the glass block so I could fit the stopper around the light strand and plug it in.
- I plugged it in and stared at my new creation called, “Lights Crammed in Glass Block.” I let that sit for a few days as “art”. Then I realized that “Lights in Glass Block” is only art in the mildest form…so I started planning how I would decorate it.
- I used the Cuttlebug Maple Leaf combo Die Set in my Big Shot. It’s a die that you run through an embossing machine that cuts out, in this case, a Maple leaf. After you cut out the leaf, you place it in an embossing folder of the same shape and it embosses the leaf. Very Cool. So, I did that for all the leaves.
- I used several different (basically black, brown and white) Colorbox catseye chalks to ink each leaf so the embossing would show up better.
- I created the Happy Fall Yall sentiment on my Gypsy using the A Childs Year Cricut cartridge for the font.
- With the Gypsy, I was able to weld all my letters together and then cut them out on my Cricut Expression.
- I used the Deep Cut Blade (blue) and a disassembled cereal box to cut out “Happy Fall Yall”. So cool! The cereal box cardboard worked GREAT! Sadly, I had no luck cutting actual chipboard. So, I had to use the cereal box backup. I’ve got to practice more with cutting chipboard.
- I cut “Happy Fall Yall” in 2 sizes so I could do that shadow effect. I applied cardstock over the final cuts using Zip Dry. That stuff is AWESOME!
- I taped some black velvet ribbon around the sides of the block. Really…I just used Scotch tape and taped it on at the bottom. Simple! Oh and I found that ribbon when I was cleaning out a drawer in my dresser the other day. Weird.
- Then I just used some pop dots to stick the leaves and sentiment to the block.
- I pop dotted some leaves to the top and….
- TA DA!!! I plugged it in and I was finished.
Honestly, the only reason I used paper, tape and pop dots on this project was because I planned to disassemble it after Thanksgiving and either do a vinyl design or glass etch the block for Christmas. However, DH likes it so much, he wants to just put it away as is! This means I have to go to Hobby Lobby and buy another glass block. Woo hoo…a trip to Hobby Lobby!!!
Wow that’s amazing!! I’m going to look for these the next time I’m at HL. I want to make a Christmassy one.
Thanks Gale! I want to do a Christmas one too! They’re fun to make!
That’s beautiful! I get SOO many ideas (maybe TOO many??? Nah, no such thing as too many!) from your site!
Too Cute. I love it!
your writing style makes me more happy than your craft style! thanks for all the fun reading and ideas
I love this! Went a picked up a glass block yesterday at Hobby Lobby with my coupon!
Really cool! What a compliment that DH likes it enough to keep it together and not recycle it.
One of these times I’ll be brave and try this project. 🙂
This is so very pretty and I love the idea that it is a lighted decoration for fall. Love it!
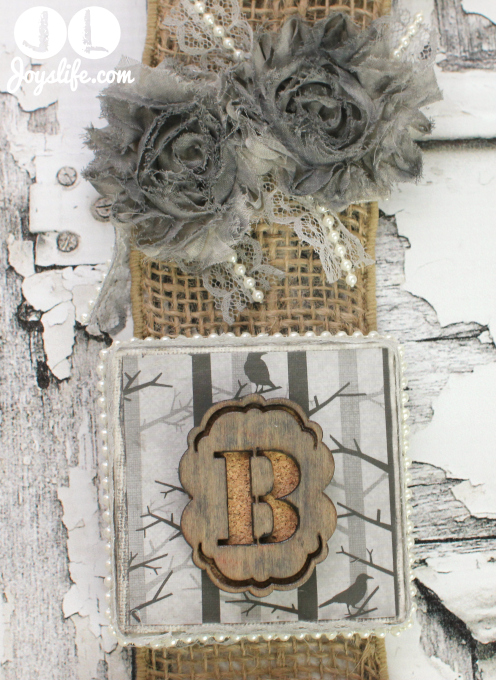
I am making mono-grammed ones for Christmas gifts this year.
This is adorable. Wish HL was closer(50 miles away) guess I may have to make the trip and buy several to make it worth the time. Thanks for the great idea, these just may be gifts. Great work.
I didnt realize you could get the blocks at Hobby Lobby…I’m gonna be making some for Christmas but I think I will try this one out too. [email protected]
This is very very cute. I was just at Hobby Lobby yesterday and I guess I will be going back. lol Cute idea about monogramming too.
I heart this idea! Sadly we do not have a HL in our city. Do you know if the blocks are available at Michael’s? I definitely want to re-create this!
This block is awesome!! Love the colors, I guess I am going to have to find one of these blocks although I do not have a hobby lobby near me. Thank you for sharing.
[email protected]
I Love this block! very pretty!
Minta
http://mintascreations.blogspot.com/
[email protected]
I think this is one of my favorites! My parents gave me a Christmas themed block years ago, so a few from other seasons would be perfect! I didn’t know they were relatively easy to create.
OMG!!! I never could justify buying the Glass Block at Hobby Lobby everytime I would see them….Now I can, extra lights from Christmas, so this would be a perfect project…..to justify my purchase to the Hubby….
Thanks Joy!!!!
What a way to make lemonade out of you lemon of a situation!