Cricut Christmas Tree Box & Sizzix Bow 12 Days of Christmas DAY ELEVEN GIVE AWAY
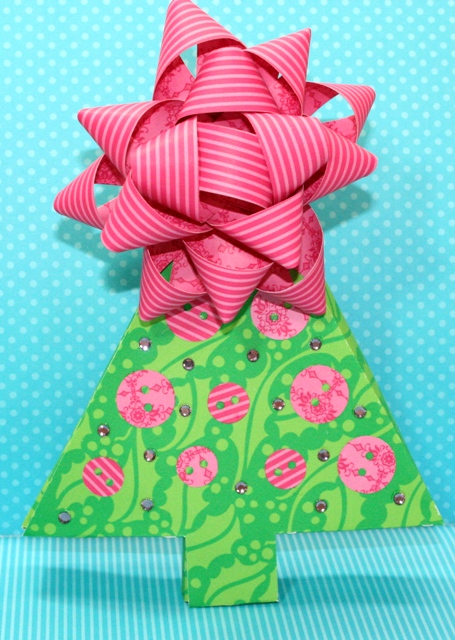
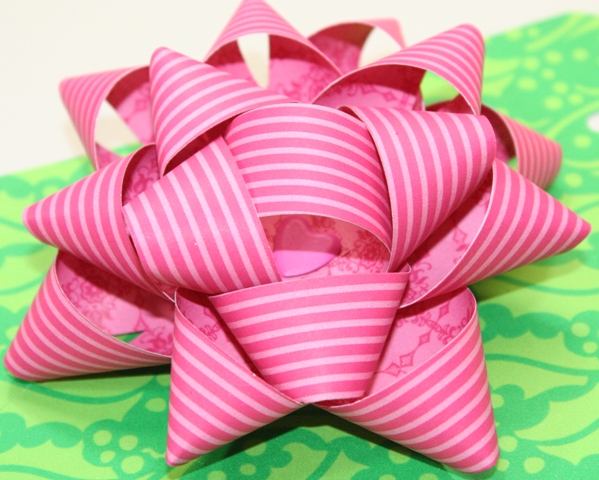
Oh Christmas Tree Box, Oh Christmas Tree Box … how giant is your homemade Sizzix bow?
This little tree box is so cute…even with it’s ginormous bow. 😀
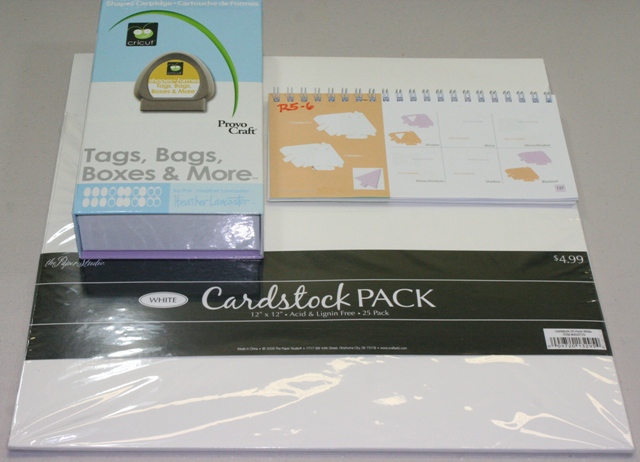
You’ll find this tree box in the Tags, Bags, Boxes & More Cricut cartridge. I’m going to use it in my Cricut Imagine, so that’s what the 12×12 white cardstock is for. I bought that cardstock at Hobby Lobby. It works well with the Imagine. You don’t need the Imagine to make this box, just use any cardstock that you like. 🙂

Here’s the Tags, Bags & Boxes overlay on the Cricut Imagine.
I chose the Christmas tree box using the Shift button so I could get the tree box with holes in the sides instead of slits. I was going to put a handle in it, but decided not to later.
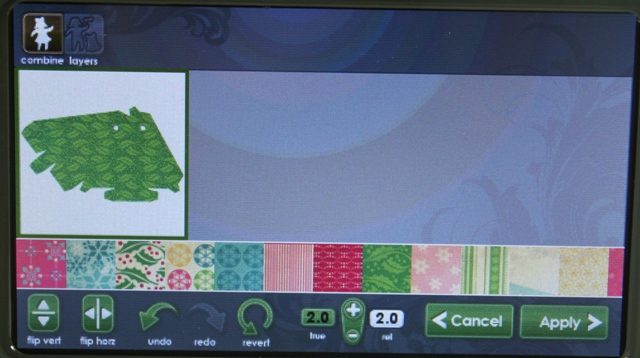
I’m using the Mr. Frosty Imagine cartridge for the patterns you see. I finally settled on the green holly”ish” pattern. Next I’ll click “apply” and we’ll be on our way!
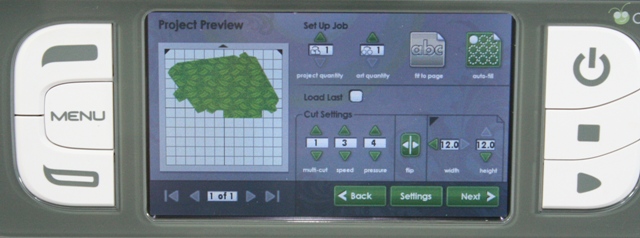
Now we’re almost done. I clicked “fit to page” so the box would be as big as possible while still retaining its shape. “Fit to Page” is the button where it says “ABC”. I’ll click “next” and we’ll get to cuttin’. Yee Haw!
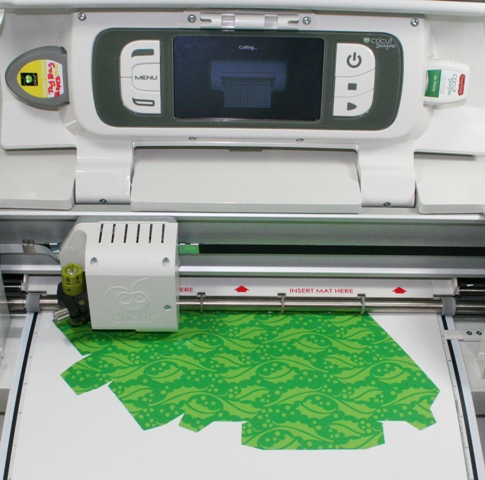
Yep. It’s finished printing so it’s now cutting. If you’re planning on getting an Imagine for Christmas, it’s best to give it a permanent space. It’s heavy. It also needs room in back and in front of it for the mat to extend almost completely. That’s just something to keep in mind. 😉
And now for a brief intermission while We Make a Bow…
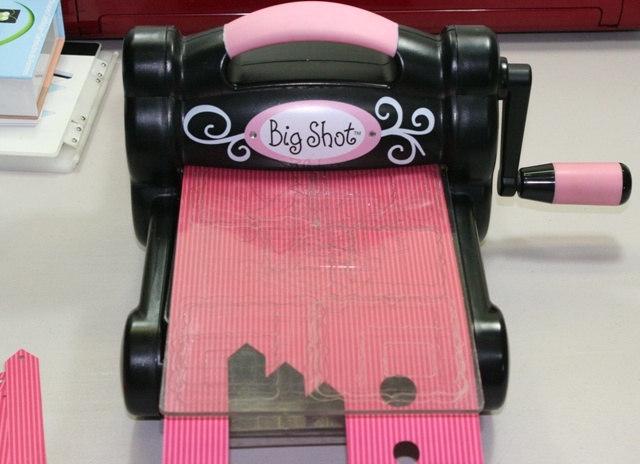
I bought this bow maker Sizzix die months ago and couldn’t wait for it to arrive. It got here and I was like, “Say what? That looks time consuming.” You know what? It is. However, it’s also cool to make your own bows out of any color and pattern that YOU like. You’re not subject to what you can find at your local store. It does take longer than buying a bag of bows, so don’t fool yourself like I did and think this is a time or money saver. It’s just cool. 😀
Yes, these do turn into a bow…eventually.
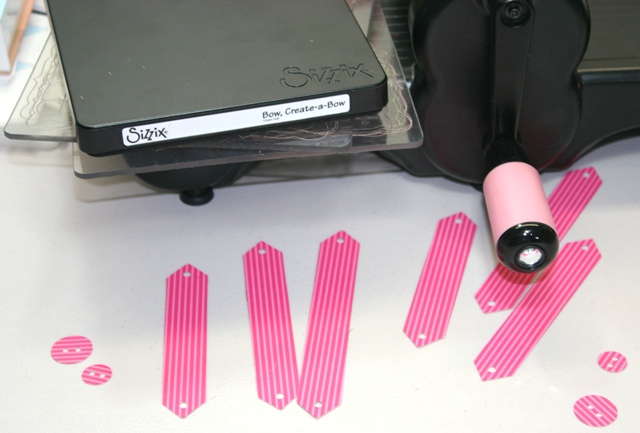
This is after 2 cuts with the die. I didn’t read the directions and figured I now had enough for the bow and put my Big Shot away. Um…wait a sec…the directions say FIVE cuts from the die. Oh for Heaven’s sakes! FIVE CUTS? I got the Big Shot back out and cut 3 more. Geeze. Now I know why I heart the Cricut. I have no patience. LOL!
How embarrassing…It just occurred to me that I could have cut more than one sheet of paper at a time. Well, no use in hiding that I overlooked that idea. Now we can just have a good laugh! 😀
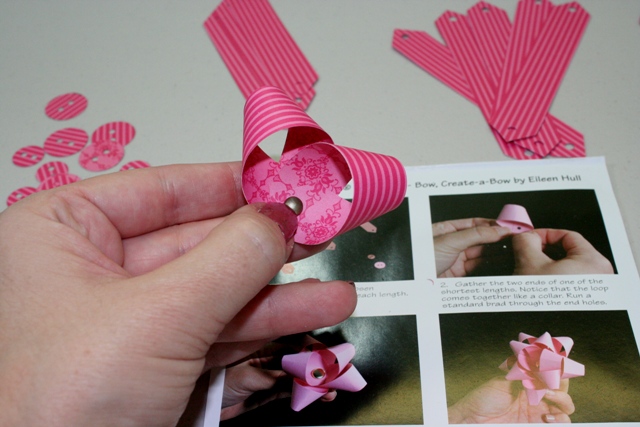
Oh, OK! If you follow the simple instructions you TOO can make a bow. Got it. 😉
I later decided to switch out that dull brad for a heart shaped one I had in my crafty stash.
Drum roll…where’s the drum roll?
I did it!! I made a bow! Woo hoo! Crazy dance. You can see the little heart brad in there too. SWEET!
You might be interested in this video: Cuttlebug & Big Shot Compared
And Now…back to our Previously Scheduled Craft…
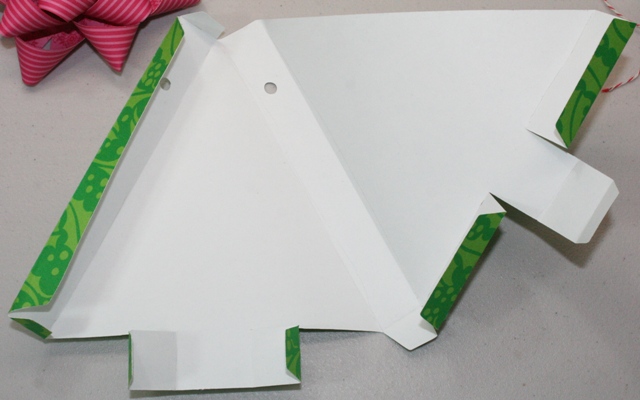
I scored the box by following the tiny cuts the Imagine put there for me. If you’re using a Cricut, the Cricut does the same thing. 😉 Next, I glued it in many of the folds leaving a few of them open for adding and retrieving a gift.
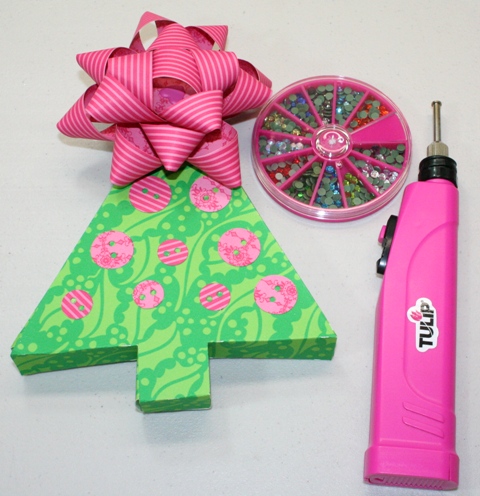
Cute as this is, I think we can better it with some BLING! I’m using the Glam-It-Up crystal and stud cordless heat setting tool and crystals by Tulip.
On the 11th Day of Christmas Tulip – ILovetoCreate.com Gave To One Winner….

It’s an awesome heat setting tool and crystals!! These are just like the ones I used in my post. 😀
Go visit ILovetoCreate.com and see all the cool things they have!
To be eligible to win please leave a comment on this post. The winner will be chosen by Random.org on December 13. Join me on Facebook and Twitter! Look on the left for those links. 😀
SEE YOU TOMORROW FOR THE 12th Day of Christmas and a BLOG HOP with many awesome crafty friends!


Ohhhhh!!! Love the bow… the box ….. and bling to top it off…. NICE!!
What a beautiful tree and bow. Very creative.
Rebecca Minor
buzzybeedesigns(AT)yahoo(DOT)com
Great bow! TFS
Cute box! LOVE the bow!! Thanks for sharing!
Oh please pick me! I really want that eyelet setter.
On a side note…hopefully people read this..did you know if you use the Cricut markers first it makes scoring REALLY easy. Use them on the “wrong” side of the paper and you can’t even see them!! Happy Crafting!!
great bow!!haven’t seen that before.guess I’ll have to look for it.thanks for all your great ideas [email protected]
The bows are beautiful. Thanks for sharing.
Lisa
http://honeybearzdesigns2011.blogspot.com/
I adore the bow! I must purchase it now!
lololol
anne
I dont care that it takes so long…the bows are adorable and such fun to add patterns instead of just plain colored bows.
Such a cute tree!!! I love using crystals, but never tried a heat setting tool. Will definitely put it in my Christmas wish list.
I got Tags, Bags, Boxes and More from the free Gypsy download, but haven’t even looked at it yet. Thanks for the project idea. Also, I have been debating about getting an i-Rock or a Glam-it-Up because I have seen them on so many blogs, but I don’t know anyone personally who has one and can make a recommendation, so I couldn’t decide if I should get one or which one. Winning one would make my decision so much easier 🙂
Well now that’s a cut I will have to try for Christmas. It is wonderful with bling 🙂
I’m loving the bling! You did an awesome job with the bow!
[email protected]
entertaining as always! Thank you for all your generous giveaways!
I hav always struggled with creating Bows. Yours look fab!
Wow love the bow great job.. ty for sharing.
Lynn
How cute! I just had to check out the box (IO have that cart) and then the bow. Love the bow!
Love that box, it is adorable. You do the most wonderful tutorials!
Debbie
Adorable!
This is adorable! Thanks so much for sharing!
Love it, so cute! Thanks for sharing.
I love the bow. It is great. Thank you for sharing. And such a cute box. I never saw this on the cartridge
Wonderful box….love the bling!
[email protected]
thanks for all the hard work you do on your blog and the projects you post – truly an inspiration!
love that Bow!
I love that bow, but I don’t have that die. I saw somewhere a woman who made the same thing just using strips of paper, wish I could remember where I saw it! I never could figure out that Christmas tree box, like where to glue and where not to. Maybe I’ll give it another try! That bling rocks!!
I love this bow, and I saw that someone asked if this would fit in the cuttlebug. I saw on Mycreative time with Emma, that she said it does. I think she said that she had the acrylic top piece cut smaller, and then these work. Please check her site to make sure that I did read that and did not dream LOL it, nut i am pretty sure it was her, or maybe Pink Cricut. Sorry I don’t have a definite answer., Karen
Great box, I’ll have to try one!
Becky F
Thank you Joy for the chance to win!! And for the great idea!!! 🙂
I love the TBB&M cart! I think it’s one of the best ones!
Joy this turned out super awesome. Now I REALLY want sorry need that sizzix die now lol.
Hugs,
Raven
Wow! I love that bow making die! The bow you made is beautiful (and the box is cute, too!)
Super cute ideas. Love the bling and you are right, it does make everything better. Thanks for sharing. Been wanting to get an embossing maching so will check out your review to see what ya say about all of that. ;0)
Cute tree box! I have that cartridge, but never noticed the tree. Love the bow too! 🙂
This is so adorable!!! I need to make one of those!
LOve this box, and that bow is so cute.. thanks for sharing..
The giveaway look great, will love to try it..
[email protected]
I didn’t even know this box was in this cartridge.
Gee weez, thanks for sharing!!!!!!!!
I am so happy now I want go make some!
created2bunique at ymail dot com
I am really getting excited about trying all these new “craft tools” that you are introducing me to!
I never would think of adding some bling to this, cuz I didn’t know there was a tool to make it easier1
Thanks Joy…you’ve reinvigorated my crafting soul!
I just made the tree box with the window tonight! Yours looks fab! Wish I had the imagine 🙂
Tanya
phenis2031 at yahoo dot com
Pretty little box. It’s so cute with the ribbon. Love the ribbon…. Thanks for showing us!
love the craft. God Bless you and your family and keep you safe durin the coming year.
Awesome!!! Just adorable!!!
Thanks for the chance to win.
annadowdy at gmail dot com
Joy great bow and box! TFS Susan
[email protected]
Very cute box. Thank you for sharing
Love that bow!!! So cute!
Somehow I missed this post. Awesome, love the big bow!~
Very cute project. Love the bow!! The bling on the tree is super cute! Thanks for sharing your great ideas.
Your directions and pics are wonderful. Thank you so much for sharing them with us. You are so inspiring and always have such wonderful ideas.
Amy
Love the project- Ive never made a box with my cricut yet…
kacee
[email protected]