Cricut Back to School Projects
Provo Craft sent me these creations and detailed instructions to share with you! At the very bottom I added some links to altered notebooks that I made in case you are interested in making more notebooks. Back to school = notebooks. LOL!

Say Thanks (Teacher) Card Instructions:
1. Using paper cutter, cut kraft cardstock down to an A2 size (4 1/4” x 11”) and score to make card base
2. Using paper cutter, cut yellow patterned paper at 4″ x 5 1/4″ and the schooled themed pattern paper at 3 3/4 x 5″ and adhere together.
3. Tie black ribbon around adhered sheets slightly right of center.
4. Using Recess cartridge and aqua patterned paper cut pinked circle (ribbon-s) at 5″.
5. Using Cricut Essentials cartridge and rainbow patterned paper, cut one circle at 2 1/4”
6. Using Cricut Essentials cartridge and cream cardstock, cut one circle at 2”. Then using your black pen add pen detailing and stamp sentiment.
7. Layer circles and adhere to card.
8. Using the Recess cartridge and cream cardstock, Cut first layer of the apple out at 1 1/2”.Then cut the shift layer out using the green patterned paper at 1 1/2”. Using the layer function, cut the main portion of the apple out in the red patterned paper at 1 1/2”. Then using the prawn patterned paper cut out the stem by using the layer feature and the shift key at 1 1/2”.
9. Assemble apple and adhere to card.
What you will need:
Cricut Expression 2, Cricut Lite Recess cartridge, Cricut Essentials cartridge
Joy’s note: You can make this with any Cricut machine. For basic shapes you can also try George & Basic Shapes or Plantin Schoolbook and other carts you may own.
Other Supplies: Adhesive, Black Ribbon, Paper: kraft cardstock, yellow Patterned paper, aqua patterned paper, green patterned paper, brown patterned paper, red patterned paper, rainbow stripe patterned paper, school themed patterned paper, and cream cardstock, stamps, Black Ink, Red Ink, Black pen, Paper cutter

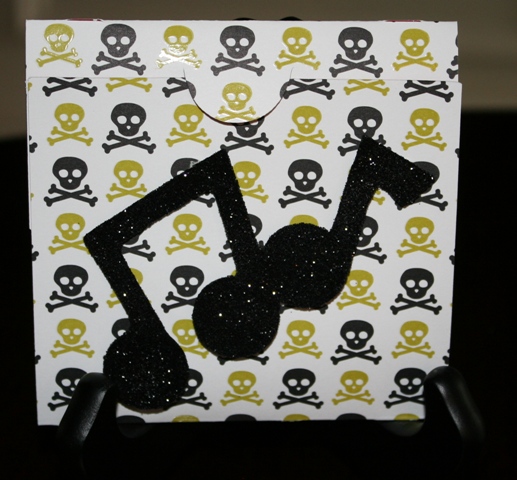
Free-to-Rock Pencil Holder Instructions:
1. Cut FREE TO ROCK. Using Rock Princess cartridge and Raven vinyl, select Phrase feature and cut one 3″ . Using Rose Pink vinyl, select Phrase feature, press Shift, and cut one 3″ .
2. Layer on pencil holder as shown using transfer tape.
3. Adhere ribbons around top of pencil holder as shown.
4. Adhere button to ribbons as shown.
Other Supplies: Glass pencil holder, Ribbon: hot pink, orange, Button: black and white, Glue gun

Personalized Notebook Instructions:
1. Cover notebook front with diagonal striped paper.
2. Cover rest of notebook with awning striped paper.
3. Cut label. Using Accent Essentials cartridge and pink cardstock, cut one 3″ . Repeat cut using dark red cardstock. Adhere to notebook as shown.
4. Using letter rub-ons, spell notes and place on label.
5. Apply rub-on flowers as desired.
6. Add ribbon of your choice to side of notebook as shown.
Thanks to Provo Craft for sharing the projects above!
Check Out My Altered Notebooks below:
Here are some more Altered notebooks!
Neat ideas. Thanks for sharing
Great projects! I still have some composition books to decorate. What adhesive do you like to use to adhere the paper to the notebook?
Hey Amy,
I’ve had good success using my ATG gun as the adhesive. I just make sure to get it around the edges of the paper so they don’t come up. A little Zip Dry never hurts for tough spots too! 😉
~Joy~
Cute gifts for teachers! Hard to believe your kids are back to school already!
Ejoy the “quiet” time!
TeresaK,
They go back too early! The quiet is pretty sweet though. LOL! 😉
~Joy~